Marco Satti
Who am i?
I am Marco Satti, an eighteen guy that live in Camporgiano, a small village in Tuscany, Italy.
I study in an technical and technological institute specialized in elecronics electrotechnics and automation; so i should be specialized in these subject too!
My school: ---> https://www.isigarfagnana.edu.it/index.php/i-plessi/itt-f-vecchiacchi
My contribution in Fablab
05/09/23: My entrance in Fablab
For now my contribution is not really big (it concerns only the creation of this page) but i hope to improve it as soon as possible!
Capybara phone holder
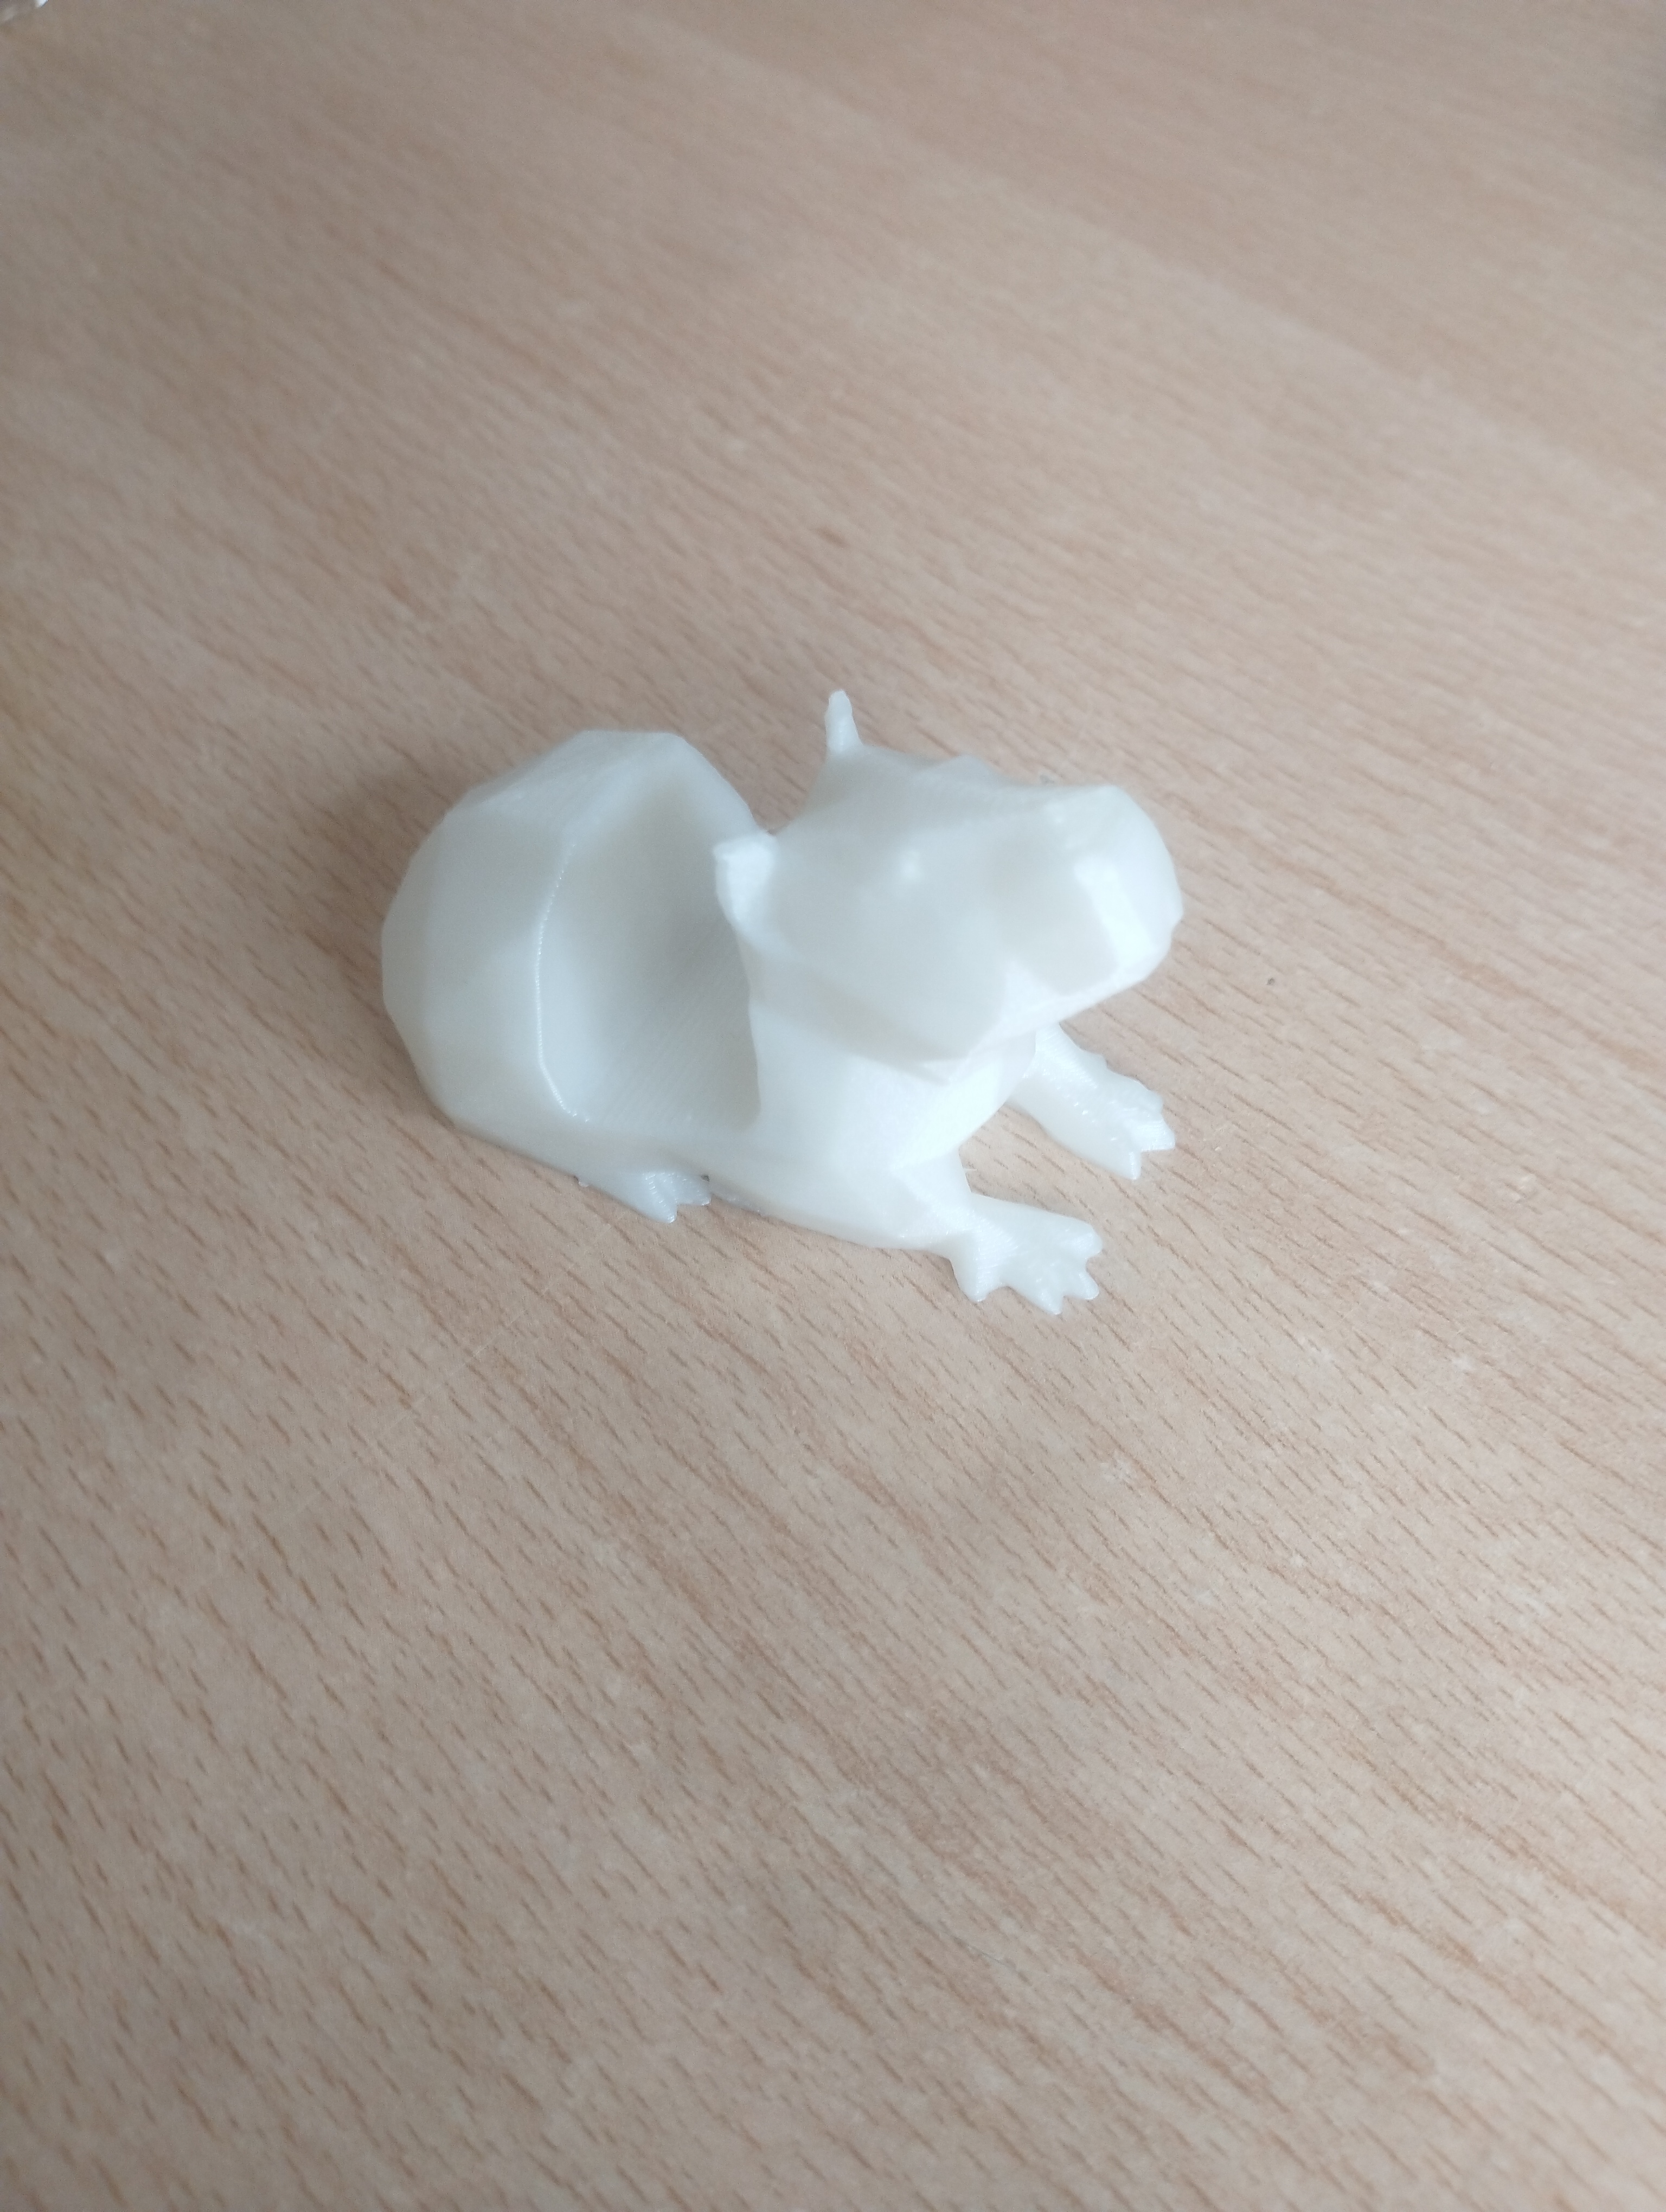
Can a capybara (a big and fat mouse) hold a phone? Of course: everything is possible with a 3D painter.
On the site Ultimaker thingiverse you can find a lot of project alredy ready to be printed on a 3D painter. I chosed one of this projects: https://www.thingiverse.com/thing:6166476/files, which is a phone holder in the shape of a capybara.
Afetr have dowloaded the program, i loaded in Cura and selected the standard parameters for the printing. The material used is white PLA and i used 2.71m of that, for a total of 8g of weight.
After about one hour of work, Archimede (the name of the 3D painter) had done its job, and this is the result.
The lizard
I have tried yo use another type of 3D printer that allow me to do object very very longer. The aim was to create a lizard, but the things have gone bad because this machine have a problem: the first part of PLA is not precise as the rest because it doesn't make a great contact with the bed, in big objects is not a big problem: a small error in a big object is not important, but in a small object like a lizard also a small error it's a big problem. Infact when the machine had to make the legs of the lizard, which are very small, it made a big confusion. This is a problem that i have still to solve.
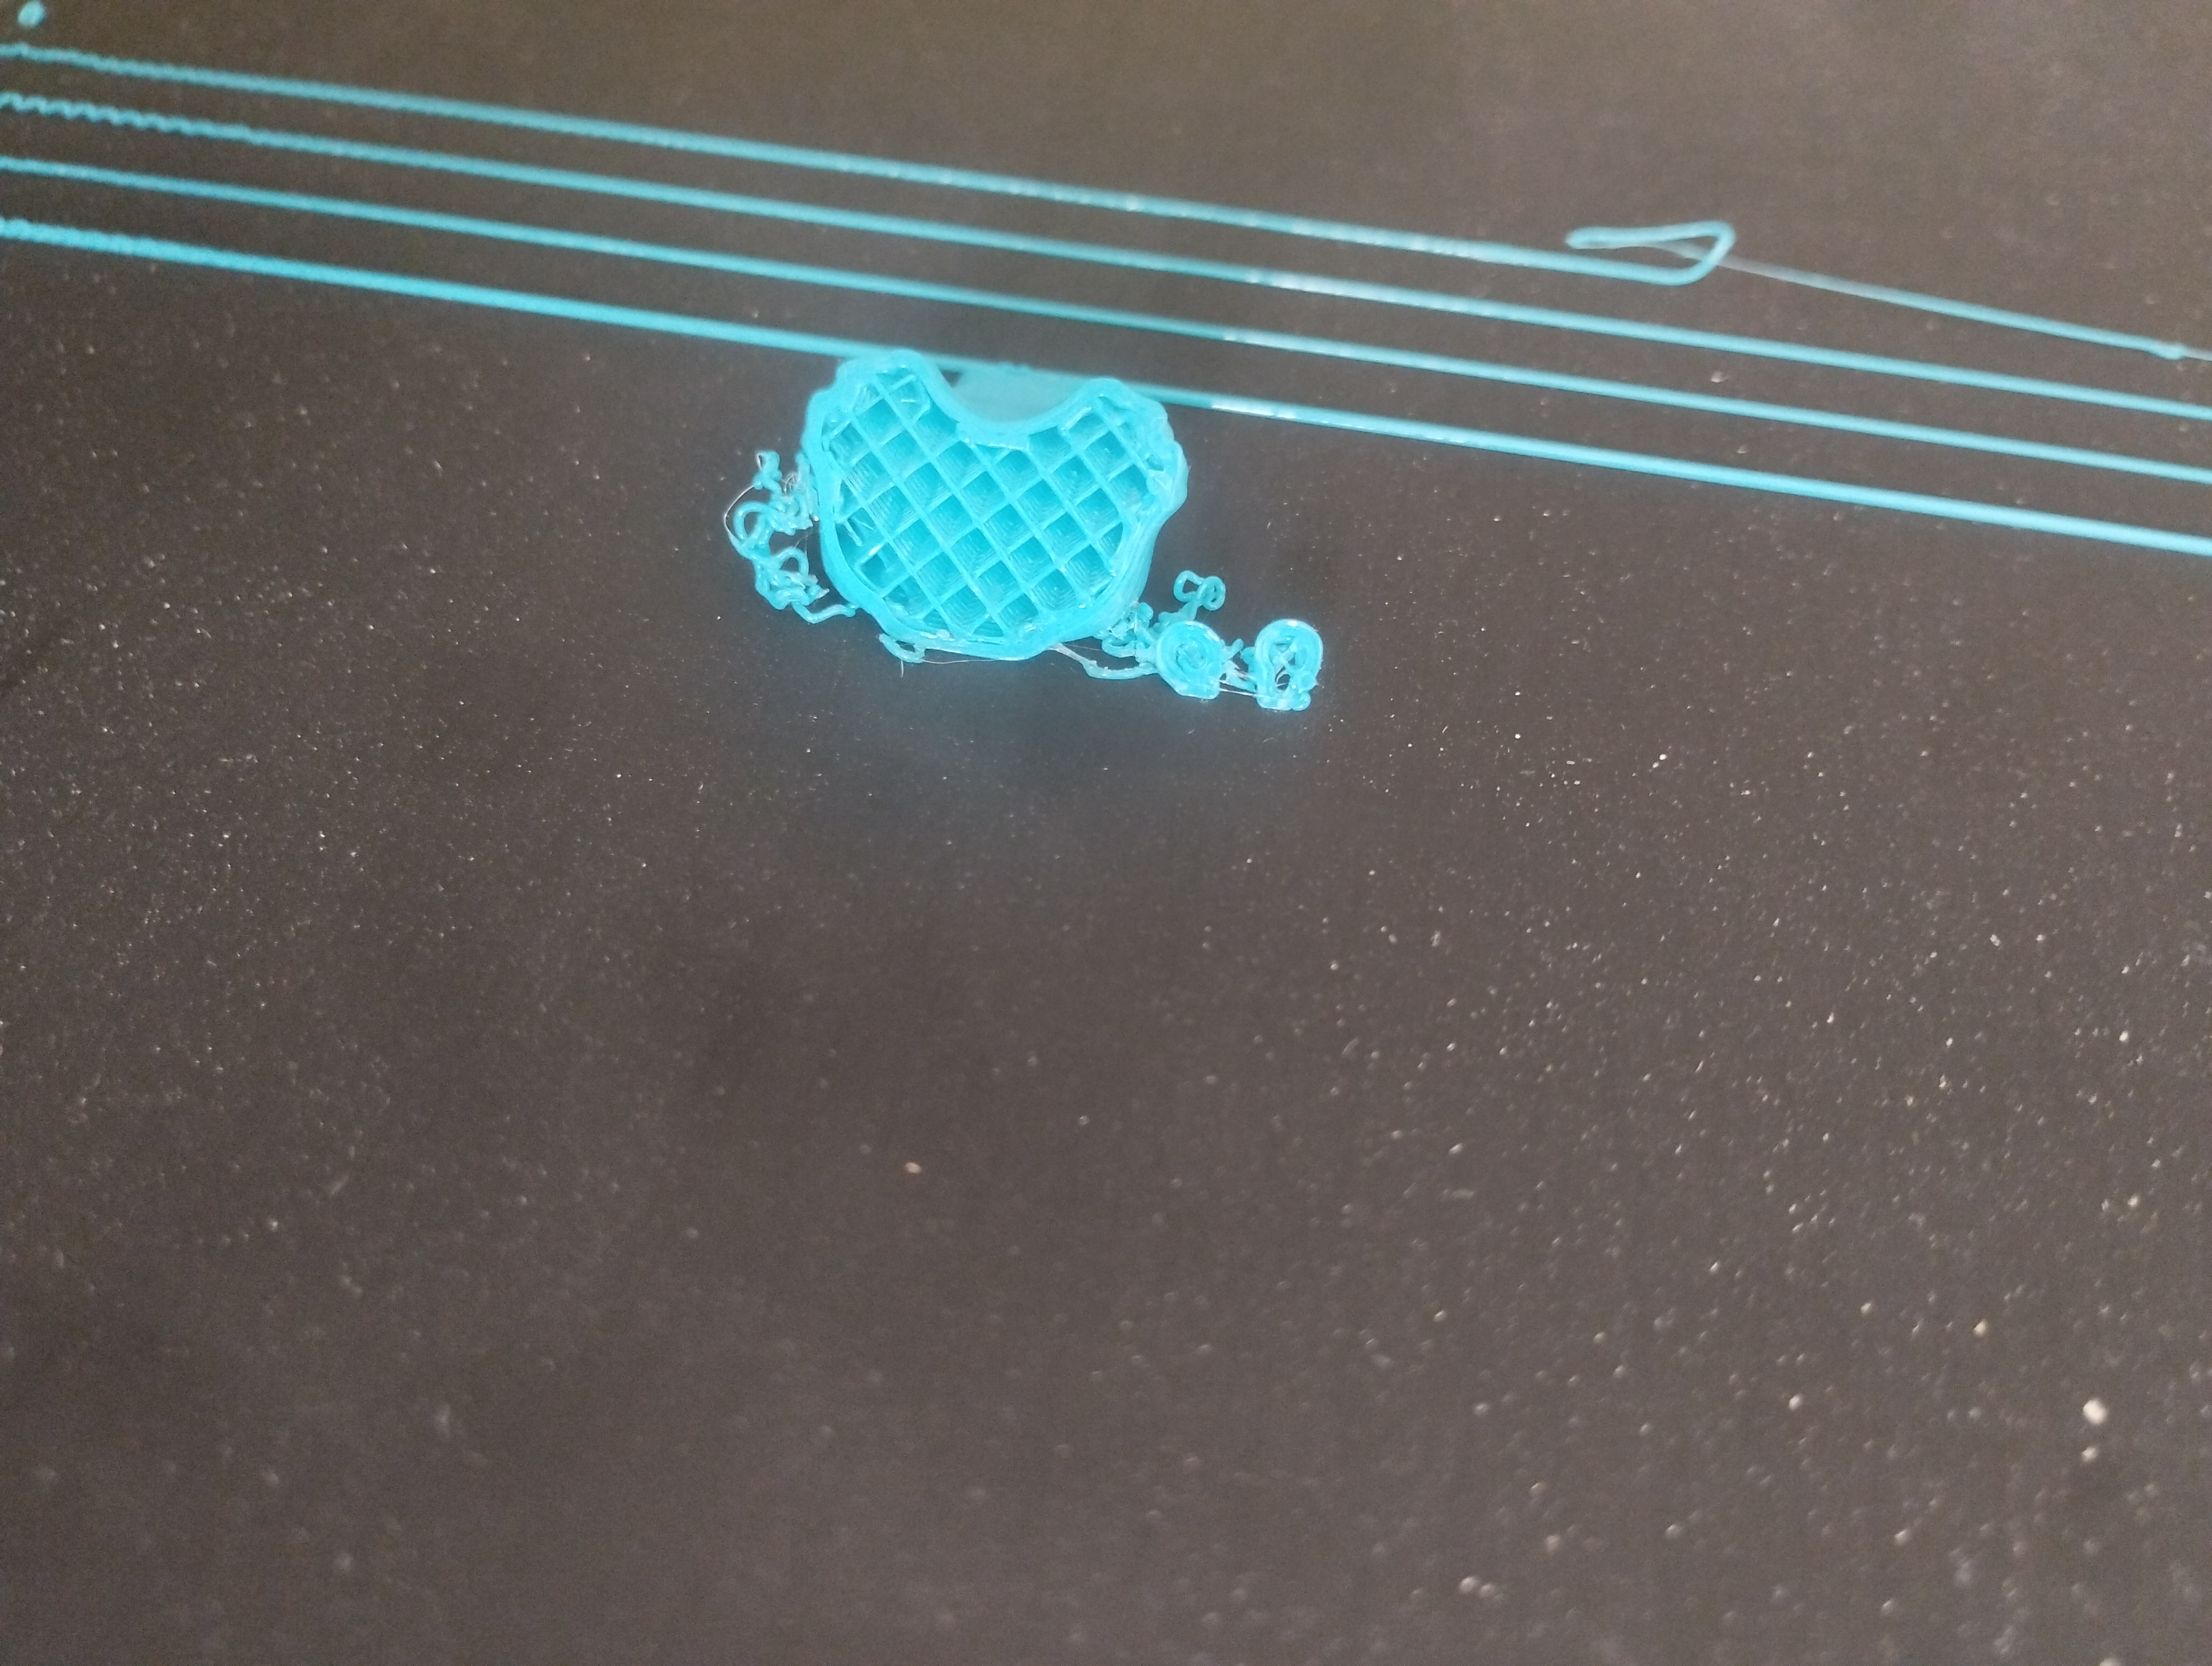
here we can see the legs that are very ruined.
The serpent
The serpent was born towards the end of the 16th century, probably in France, as an instrument derived from the bass of the cornetto family, with the aim of supporting the sound of the choir in church, particularly in Gregorian chant. At that time they were made not of plastic, but, plastic is the only material that can be used on a 3D printer.
The project is to realize a serpent using a 3D printer; i am going to use Bambu Lab P1S, a kind of 3D printer which is vary faster than the others types. We chose this because we have to do like more than 40 pieces, so with a faster machine it will be easier.
Today (07/09/23) we started the production. To make the first piece we took an entire day because the machine wasn't working and we couldn't find the problem; so after so many tries and reaserches it turned out that the machine was clogged up. At this point we had to unclog it: we dismatled the machine and with a small allen key warmed up we removed all the PLA stucked inside it.
At this point we could start the printing. We print only one piece becuase there were not so many time and we had still to see if the machine was unclogged. After about one hour of work and using 11,12 meters of PLA this is the result: piece 23!!
Serpent day number two (08/09/23)
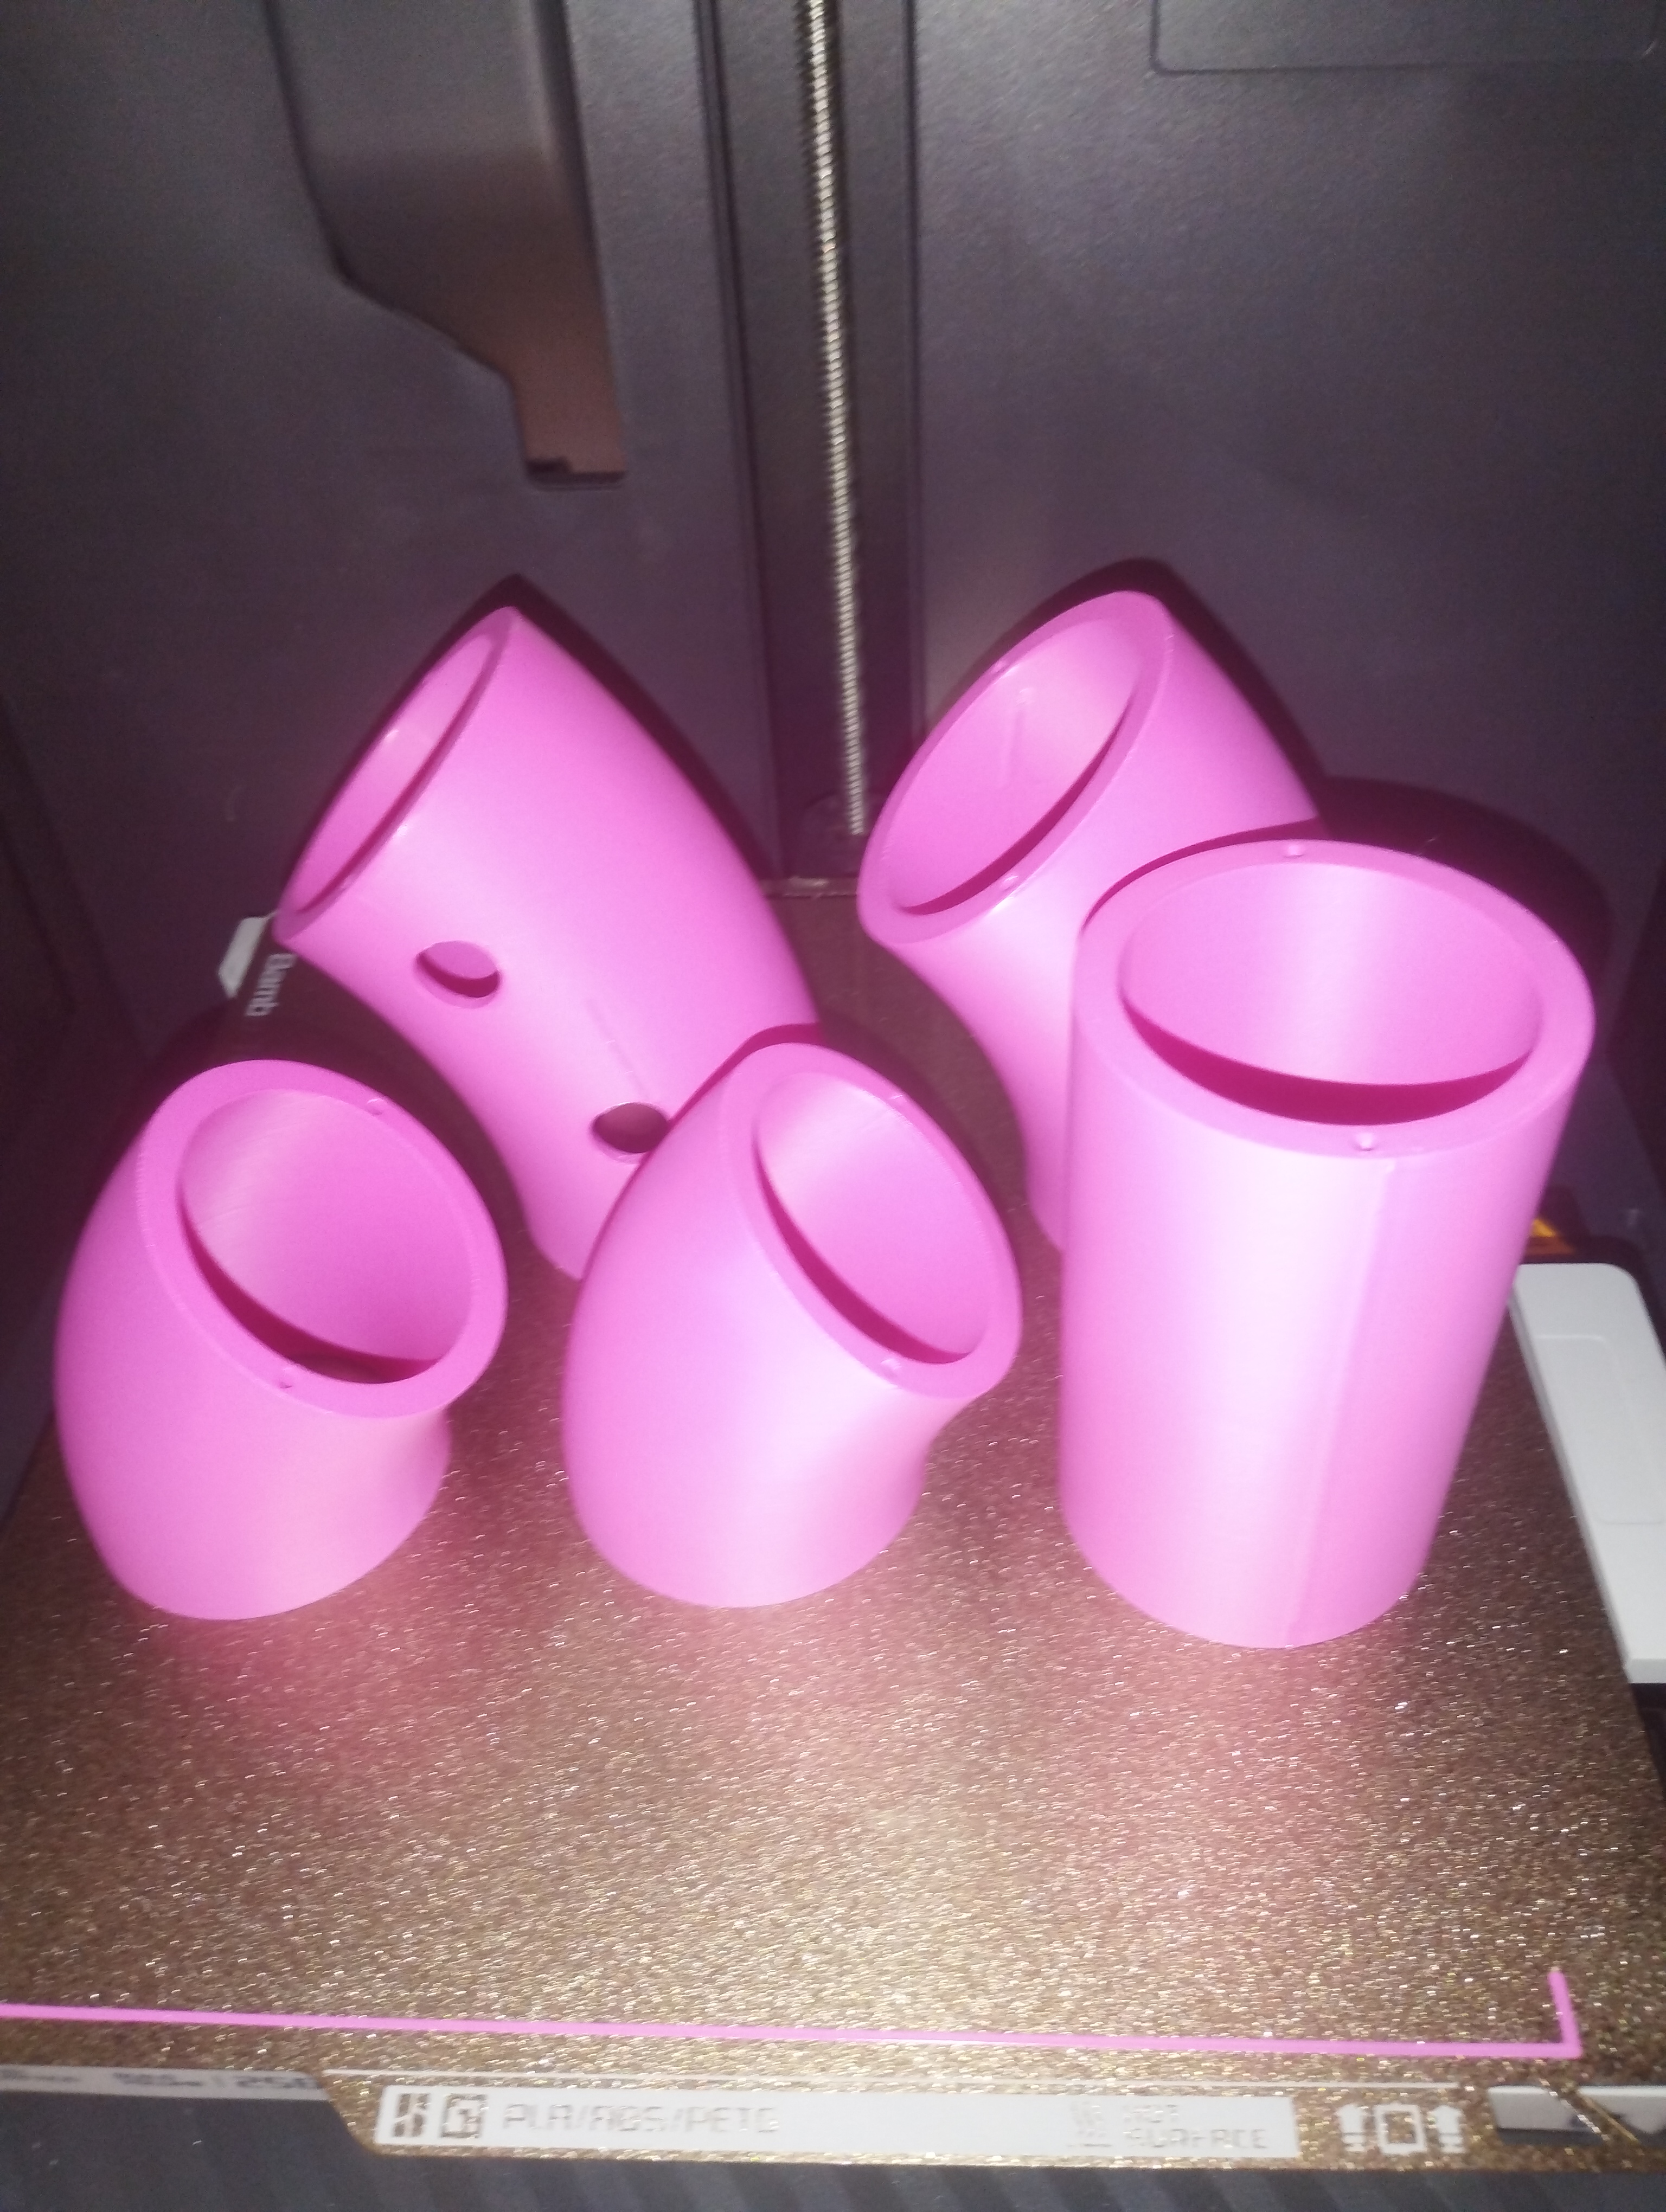
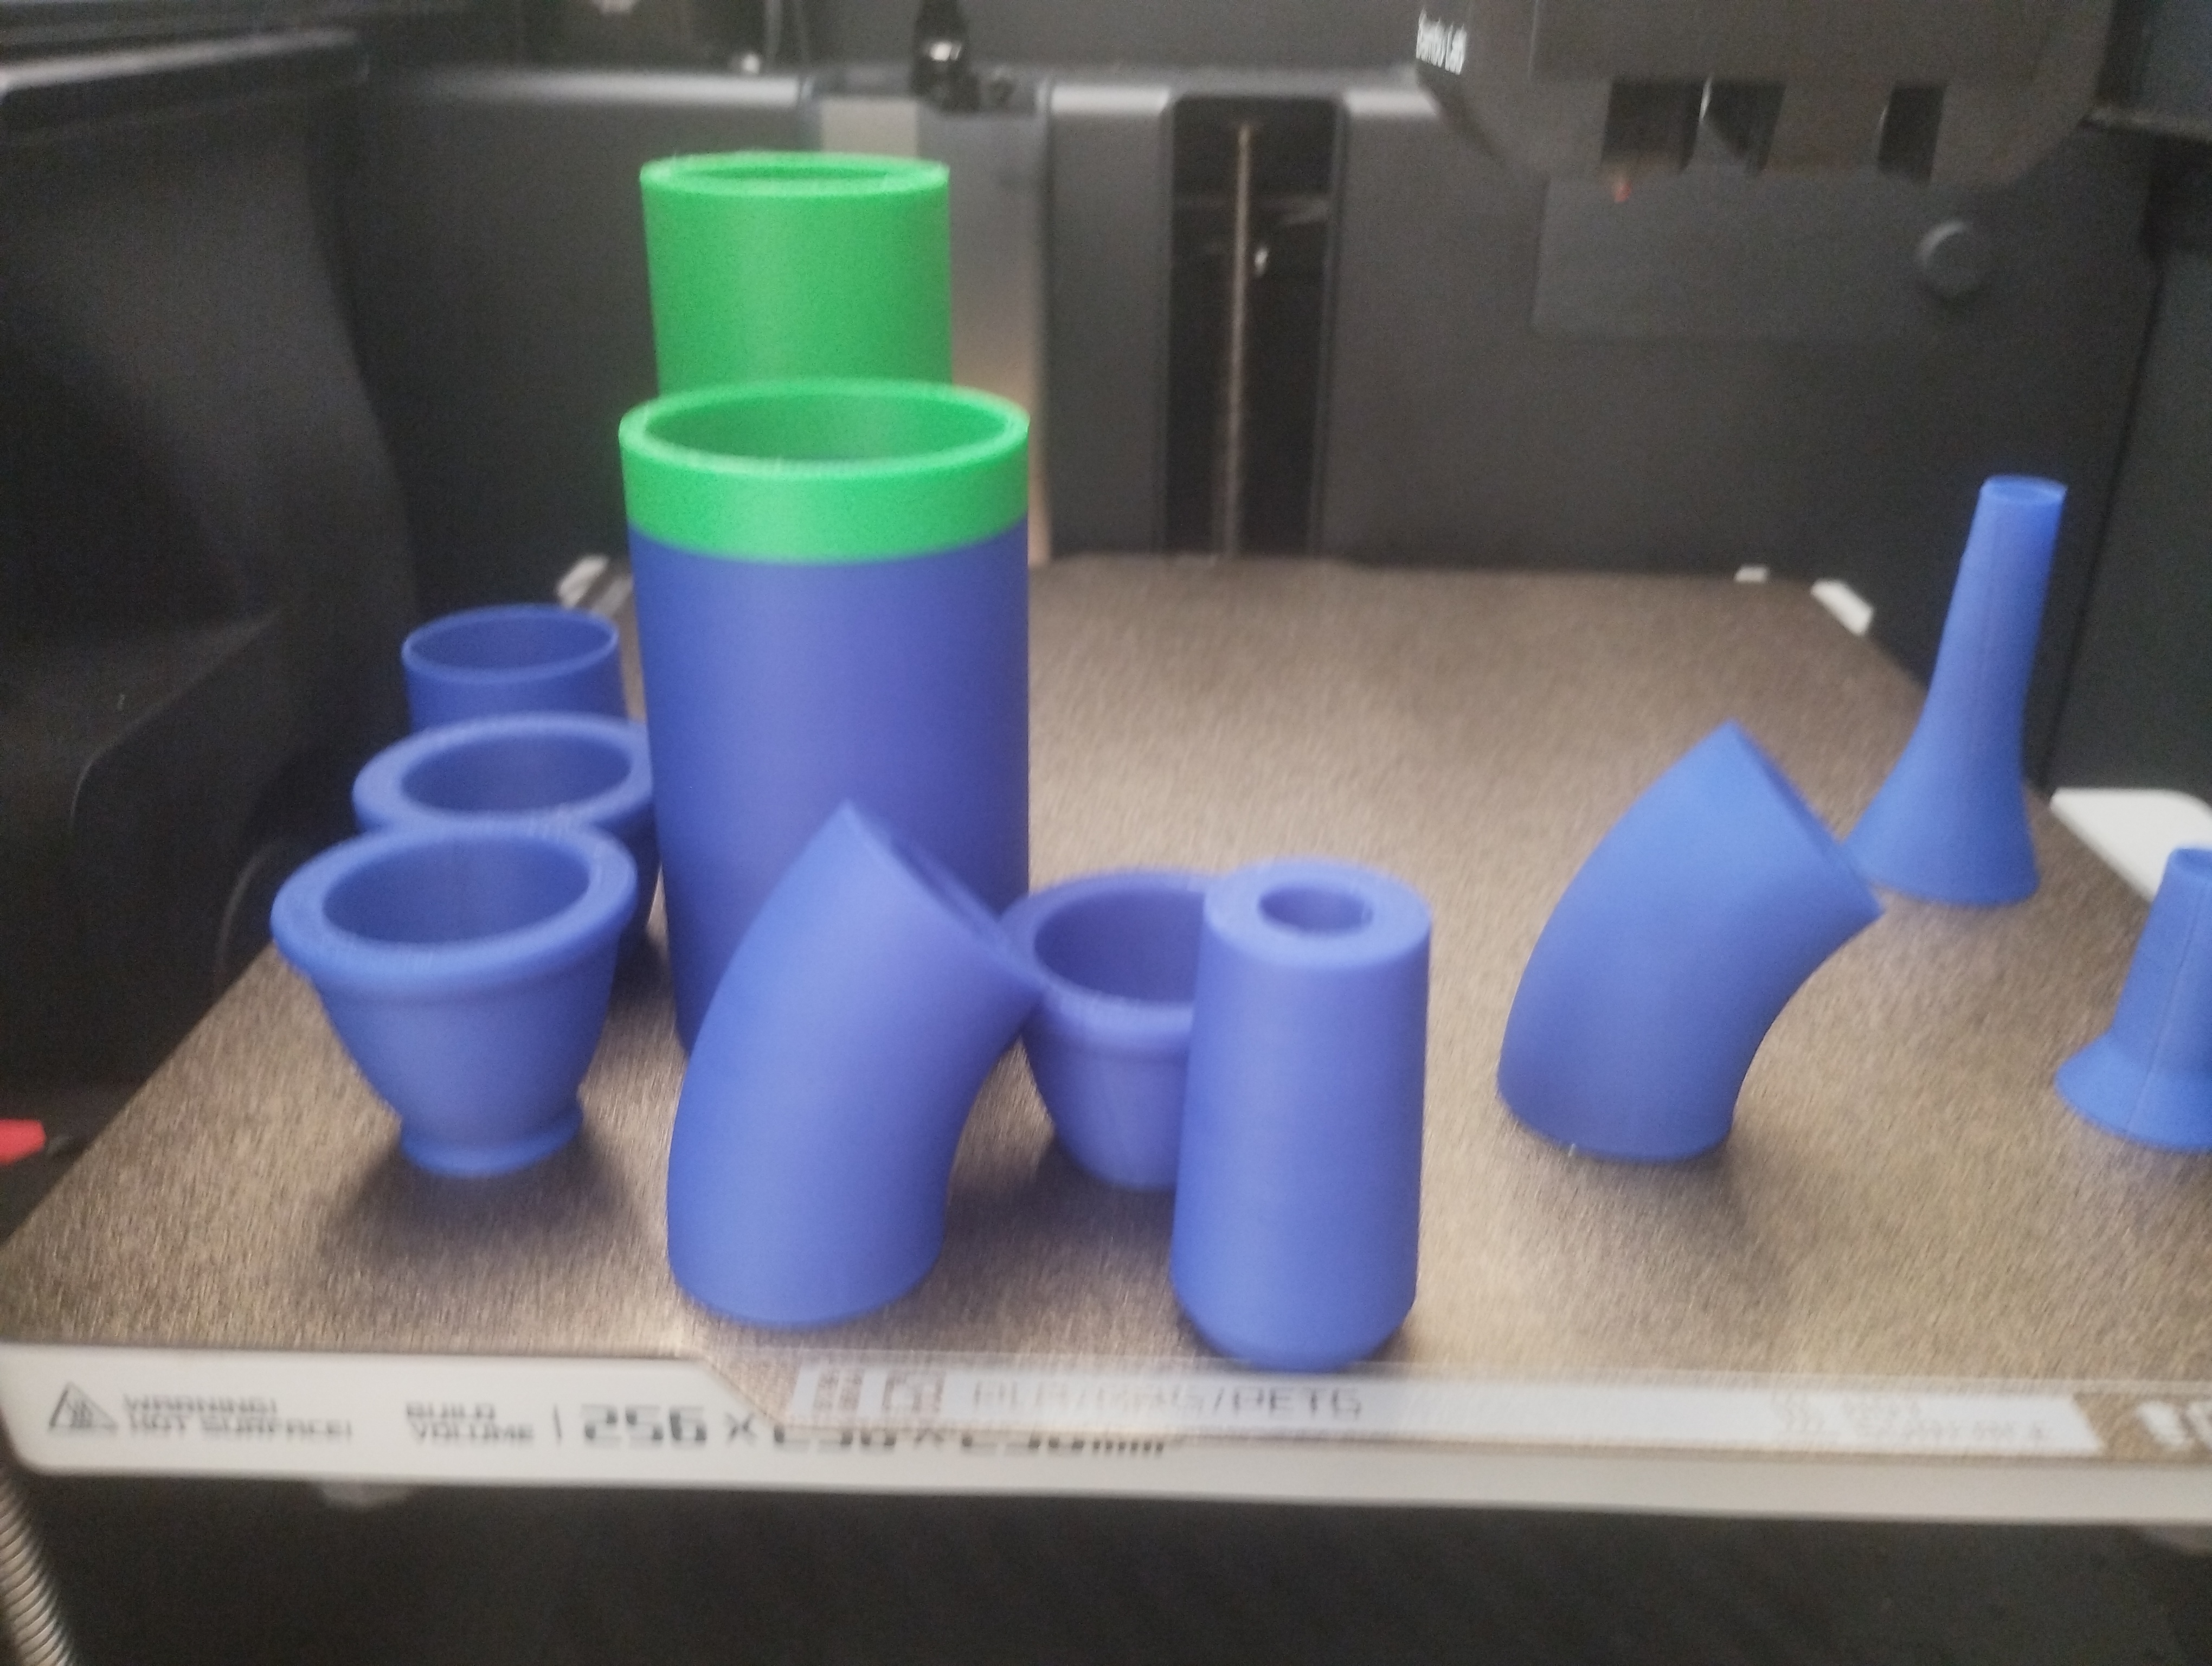
Today shouldn't be problems with the printer, so i can use it in the right way, infact i started the printing of 5 pieces at once!!
The machine took 7 hours to make this prints and used about 28 meters of filament, for a total weight of 244g.
This is the project and the result: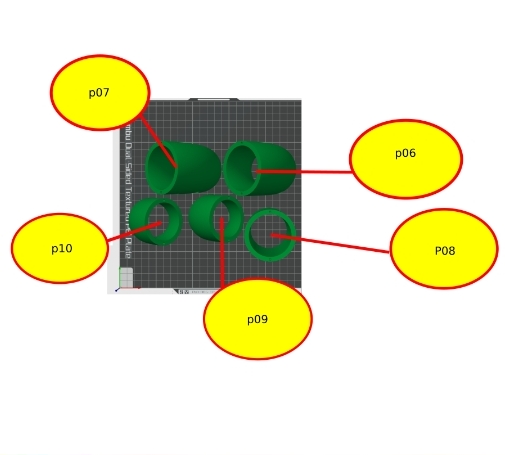
As soon as the printing it will be finished i'll start another printing with more pieces than this one, because it's friday and i can use the weekend to print a lot of pieces that will be ready on monday. The machine will use 155 meters of filament and the total weight will be 463g. The machine is going to work for almost 14 hours!!! They are a lot of hours, infact there is a little risk to have some problems, due to this fatc, i can say that this printing is also a test for the P1S.
This is the project: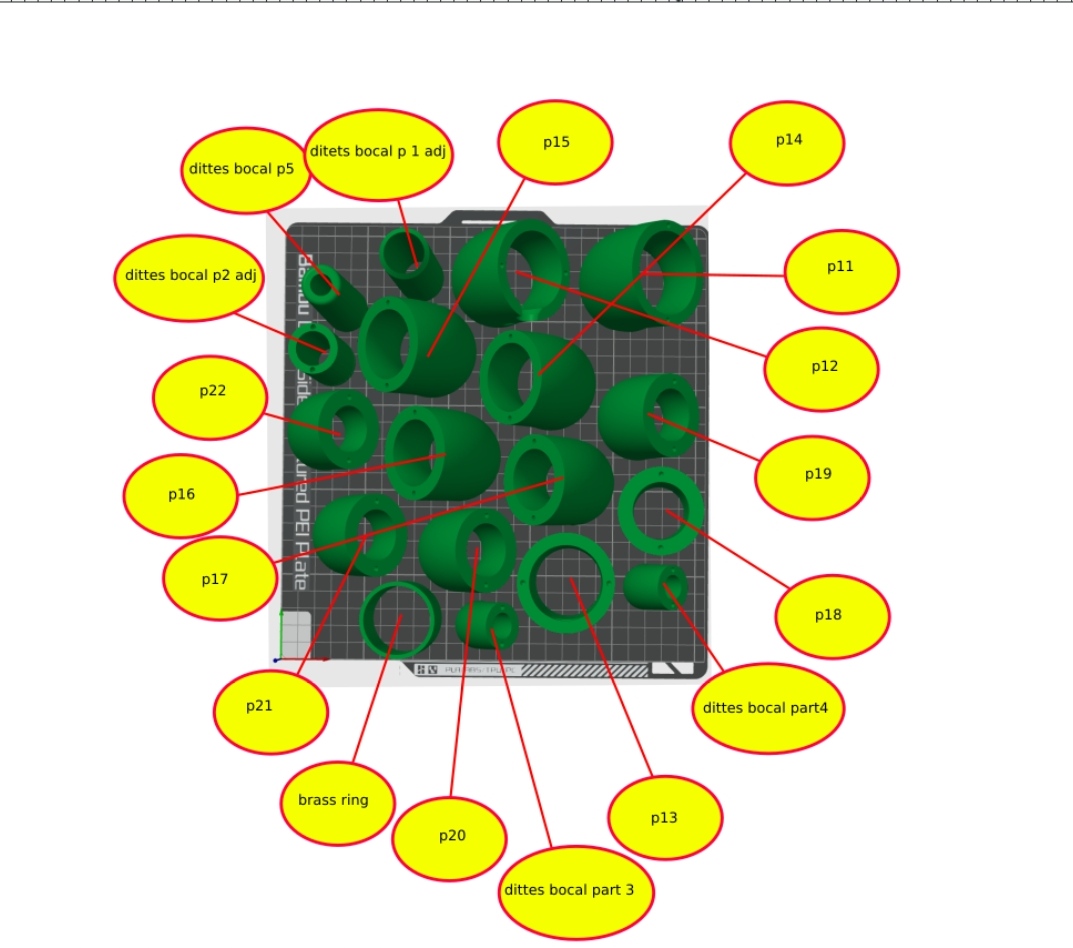
Serpent day number three (11/09/23)
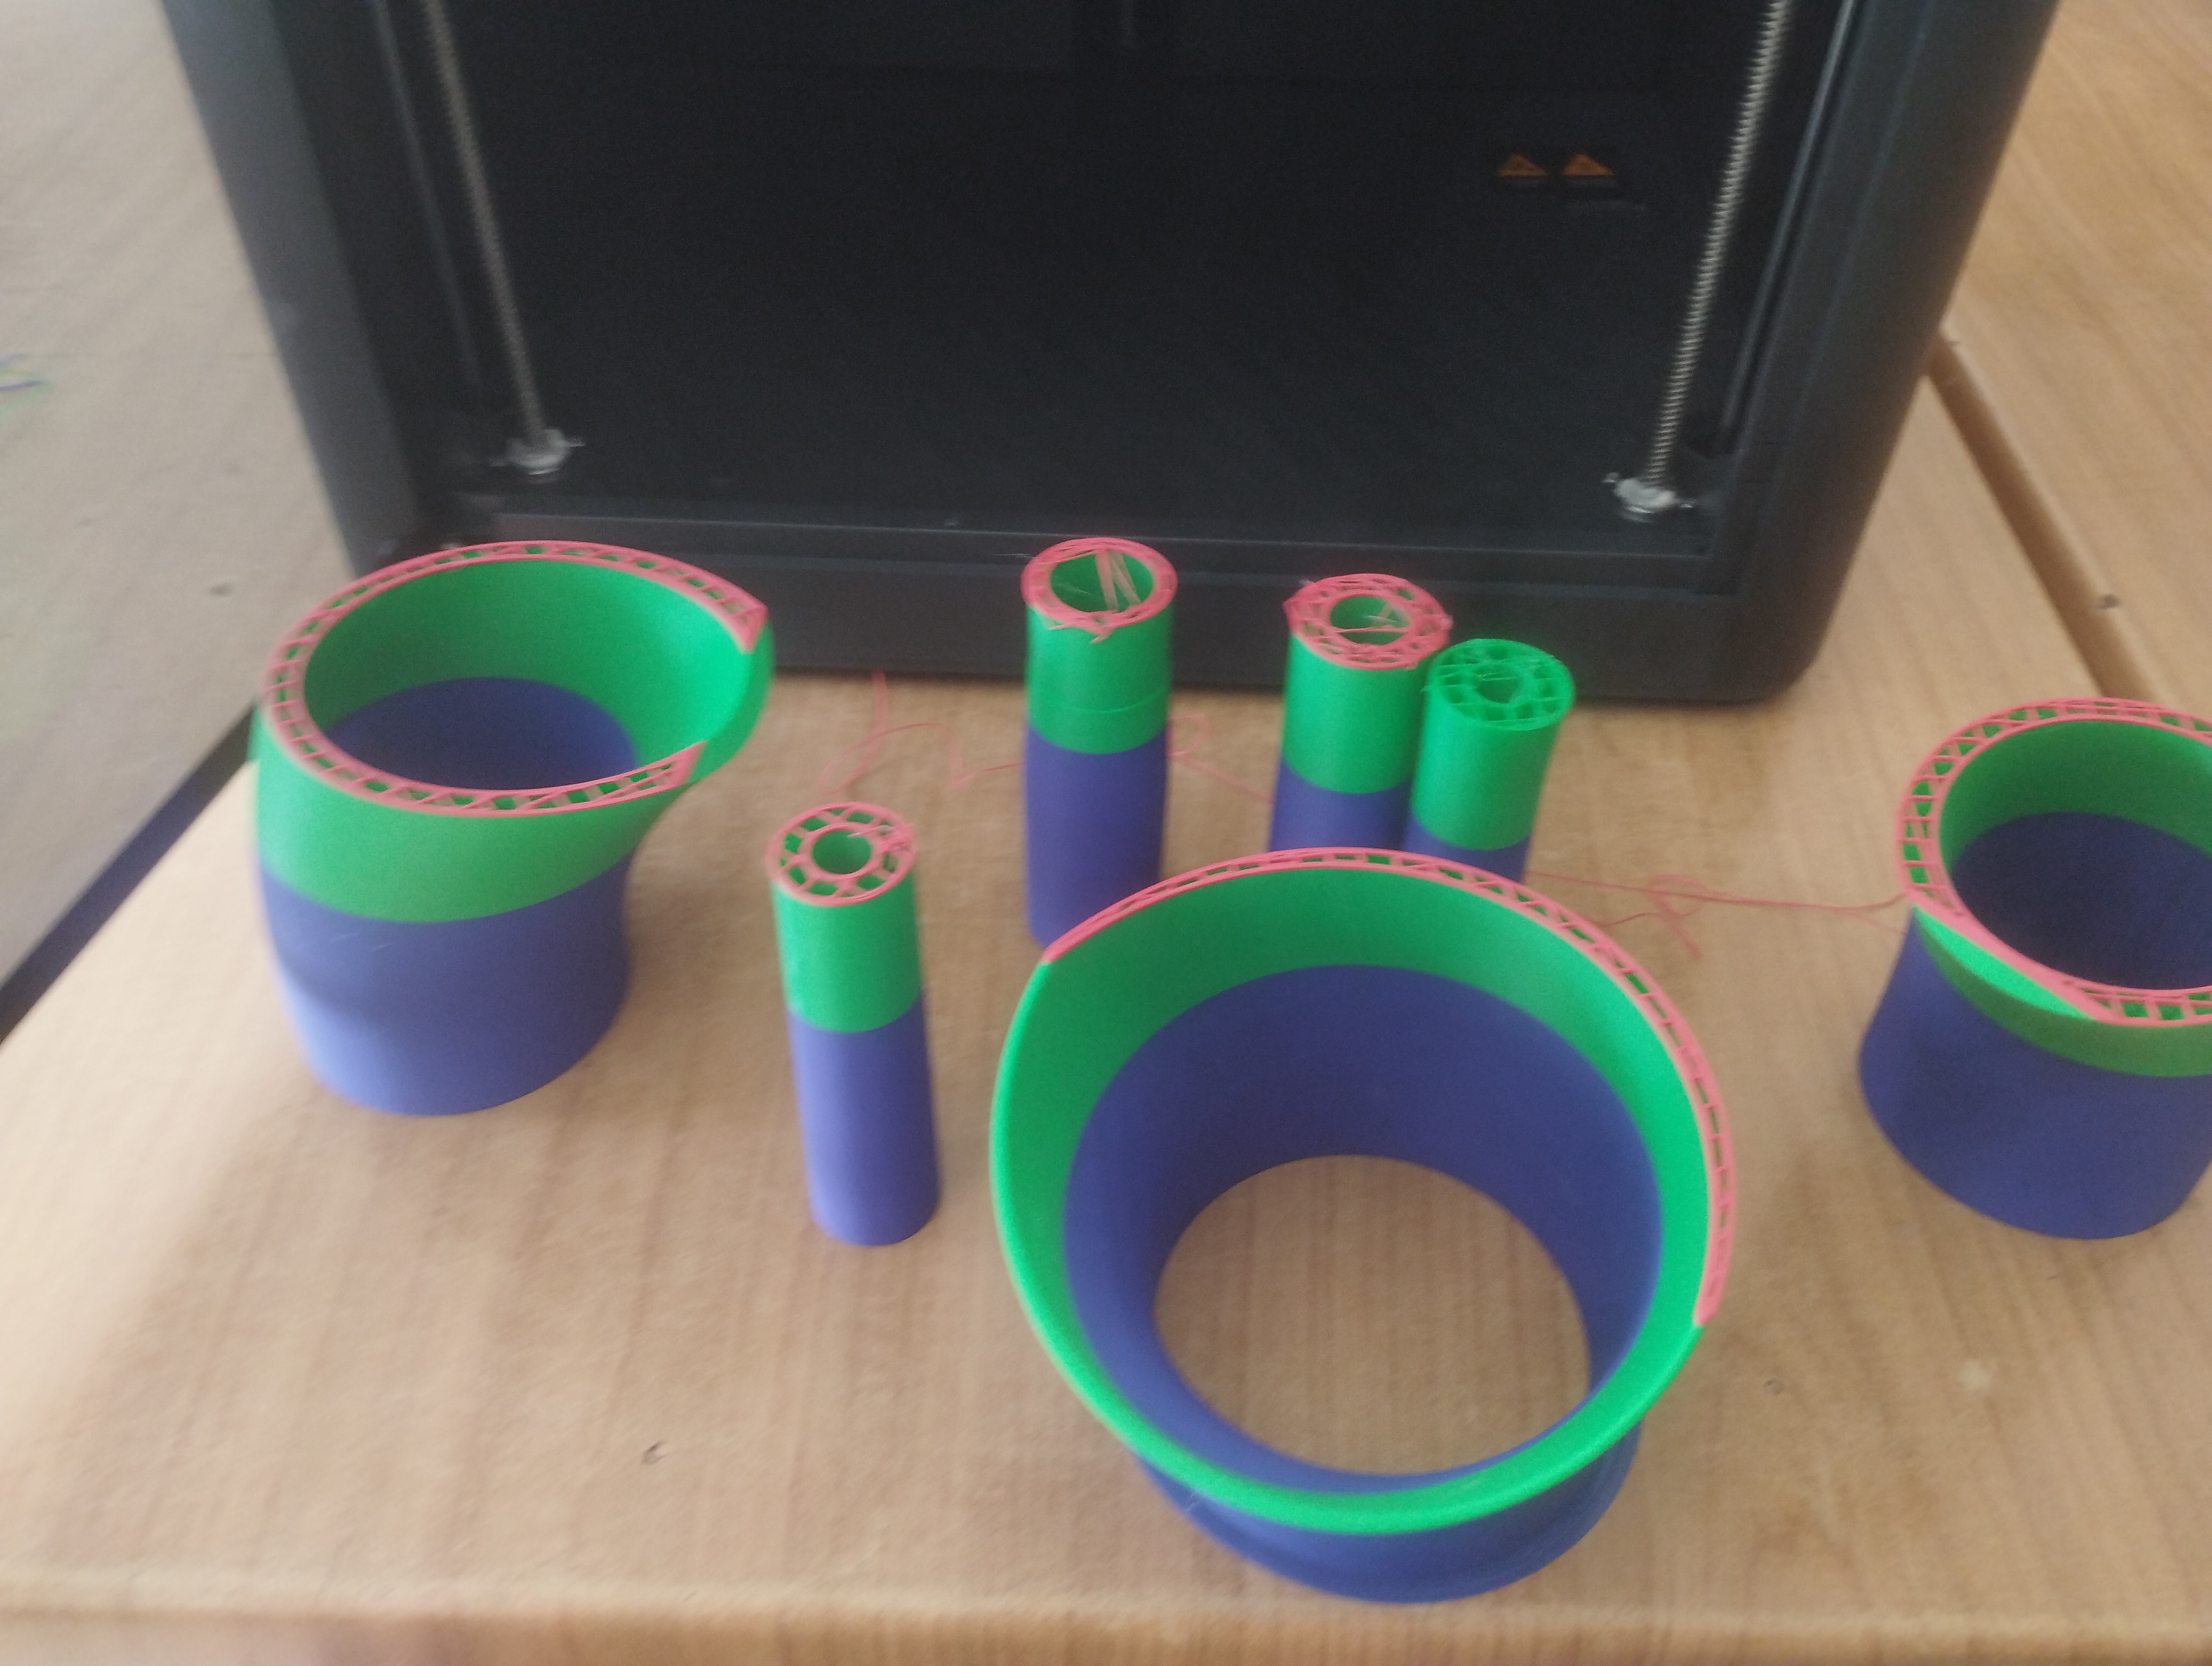
Today is monday, so the first thing i did when i am arrived it was to check if the machine had worked in the weekend. Everything was good: so this is the result: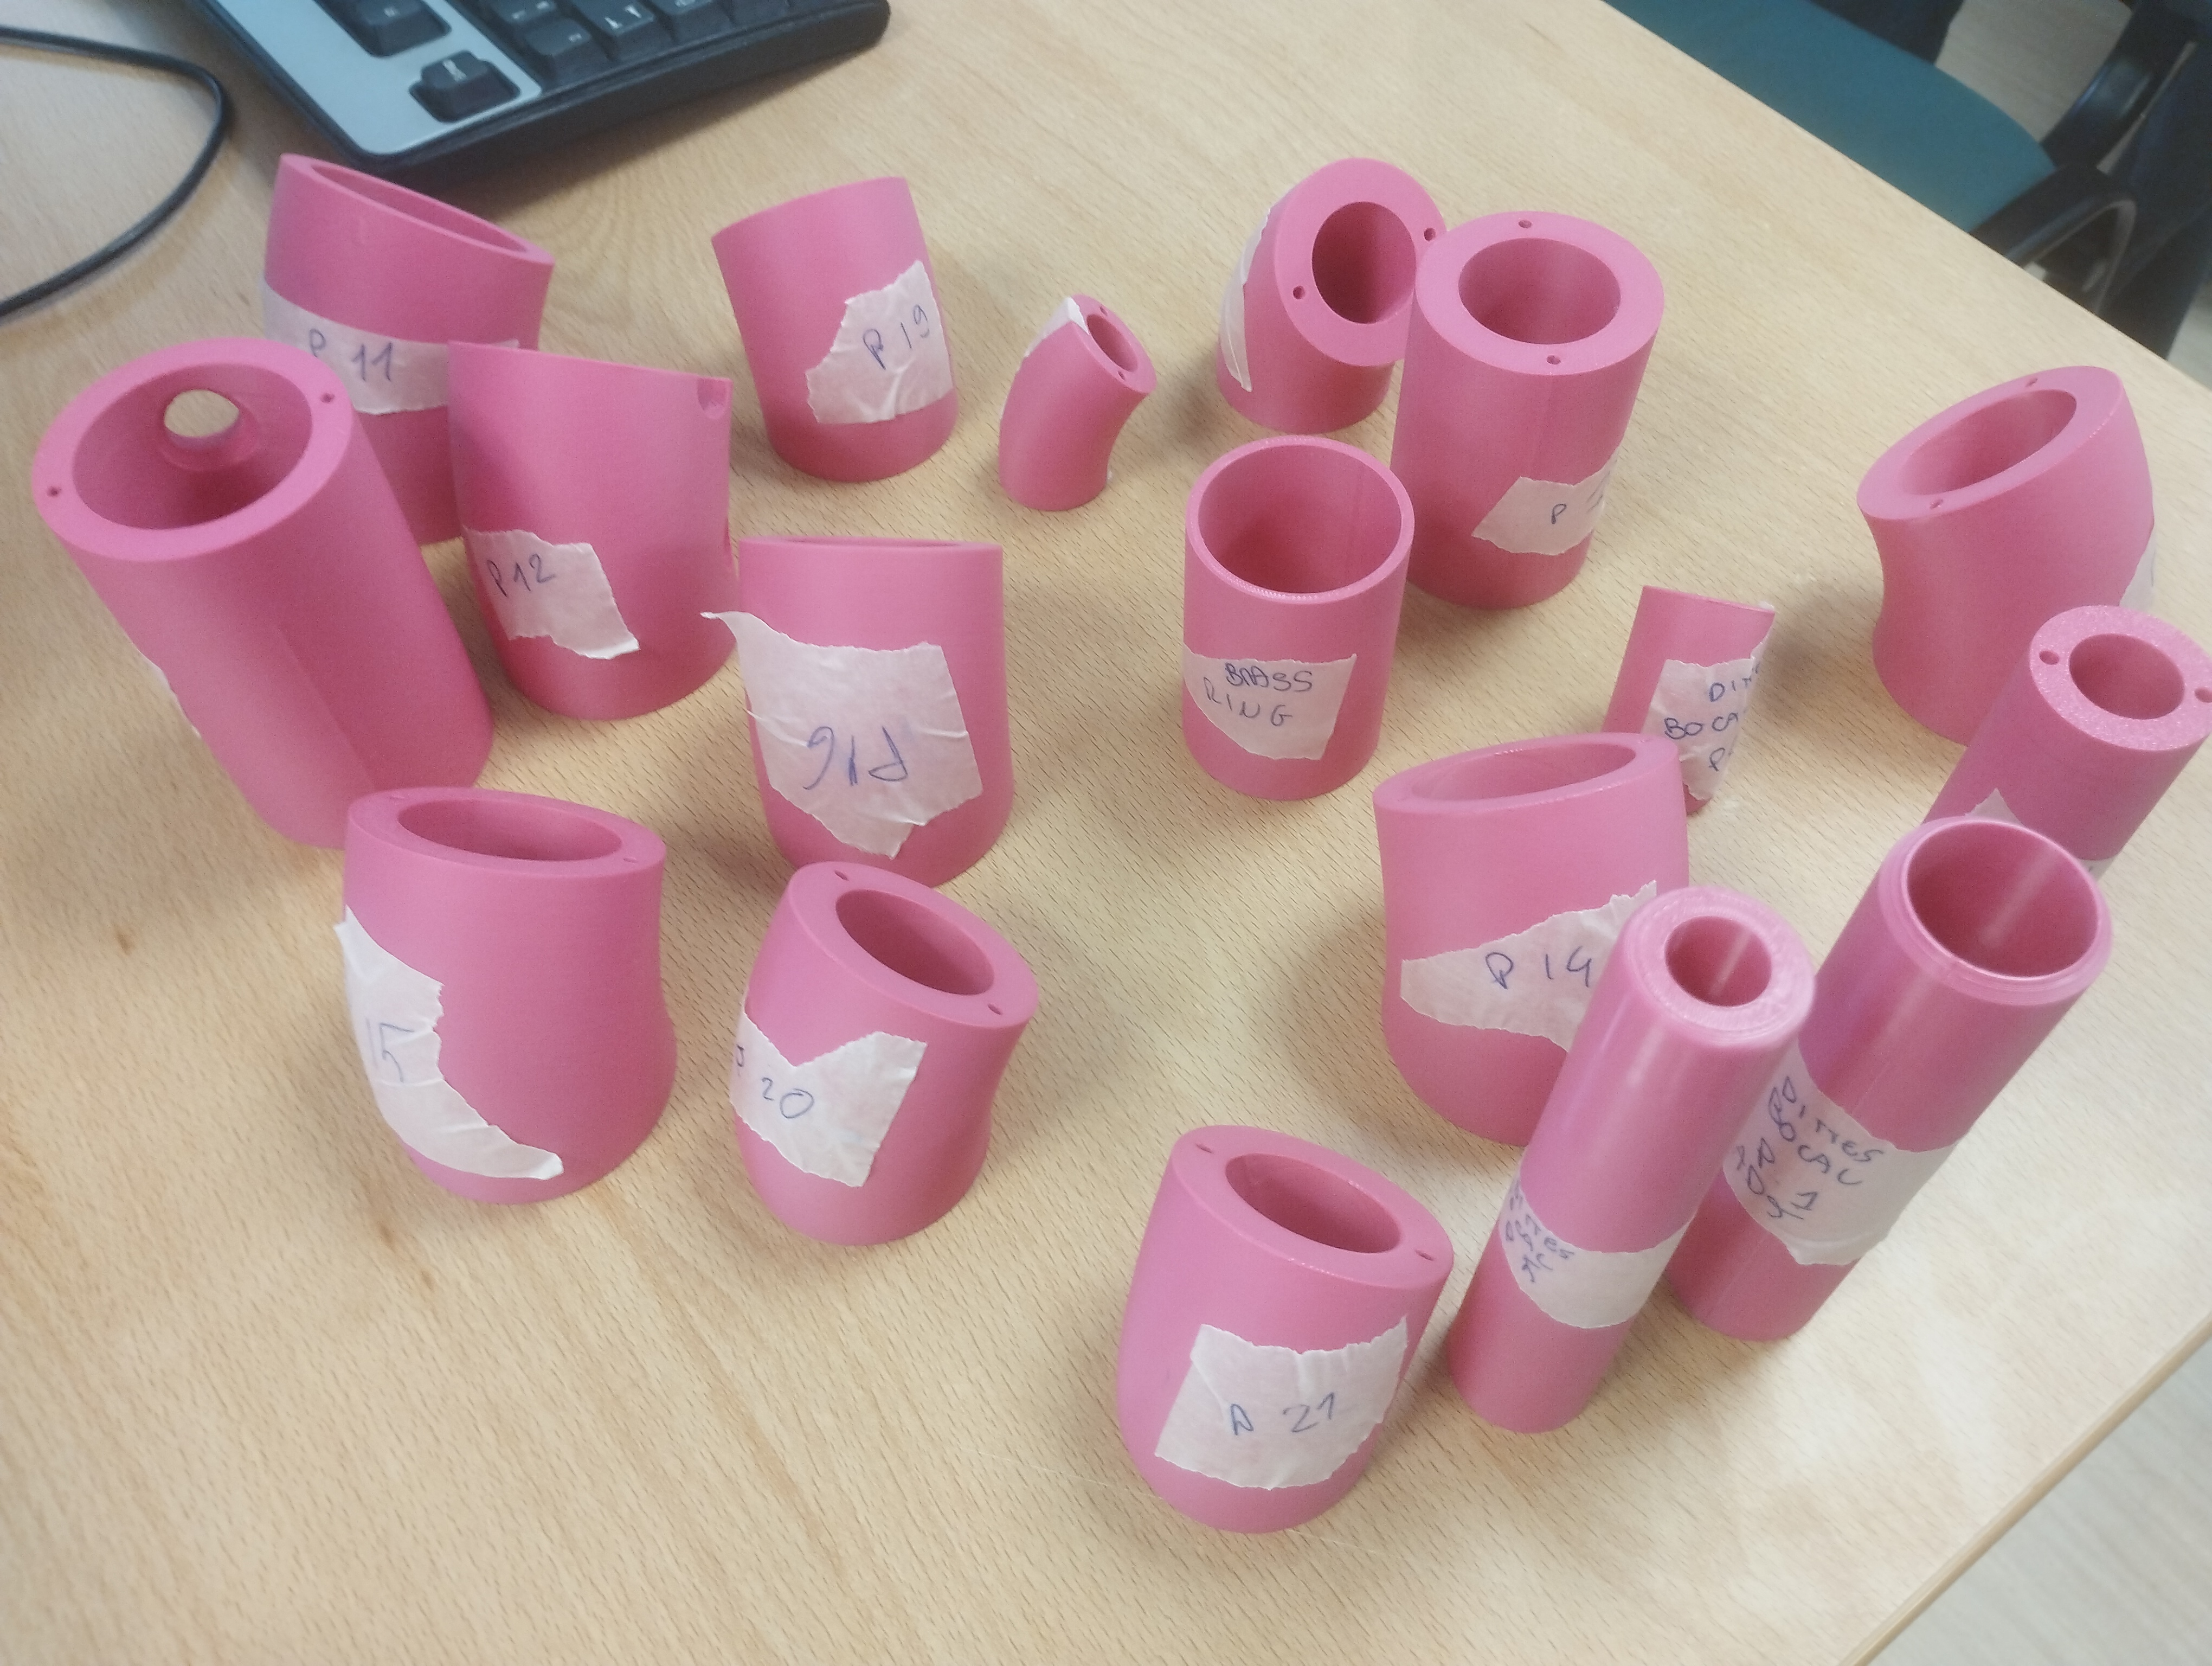
As i did on friday, today i have started a shorter print in the morning and i will start another one bigger as soon as the first finish take advantage of the night.
This is the project of the first.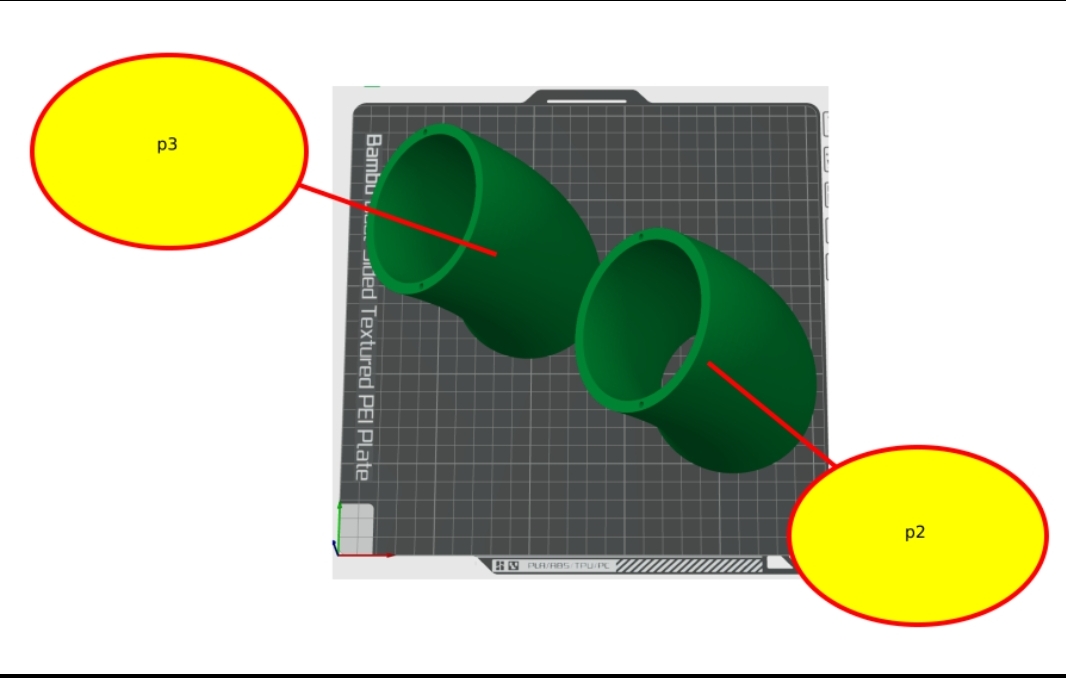
The work is almost finished, but the coil of filament won't be enough, it is the first time that we are in this situation, because the machine is new,so we will see what the machine are gonna do in a situation like this, if this will be a problem or if the machine can manage this situation.
So, the printer stopped automaticaly when the filament ended, the problem was that, after have insert manualy the new filament, the printer didn't restart again: it was freeze. We didn't know what to do, so we switched off the printer and reswitched on, hoping that the machine could keep the work, otherwise we would have to restart all the work. I don't konw if we have been lucky, or this is the right method, but, the printer continued the work without any problems.
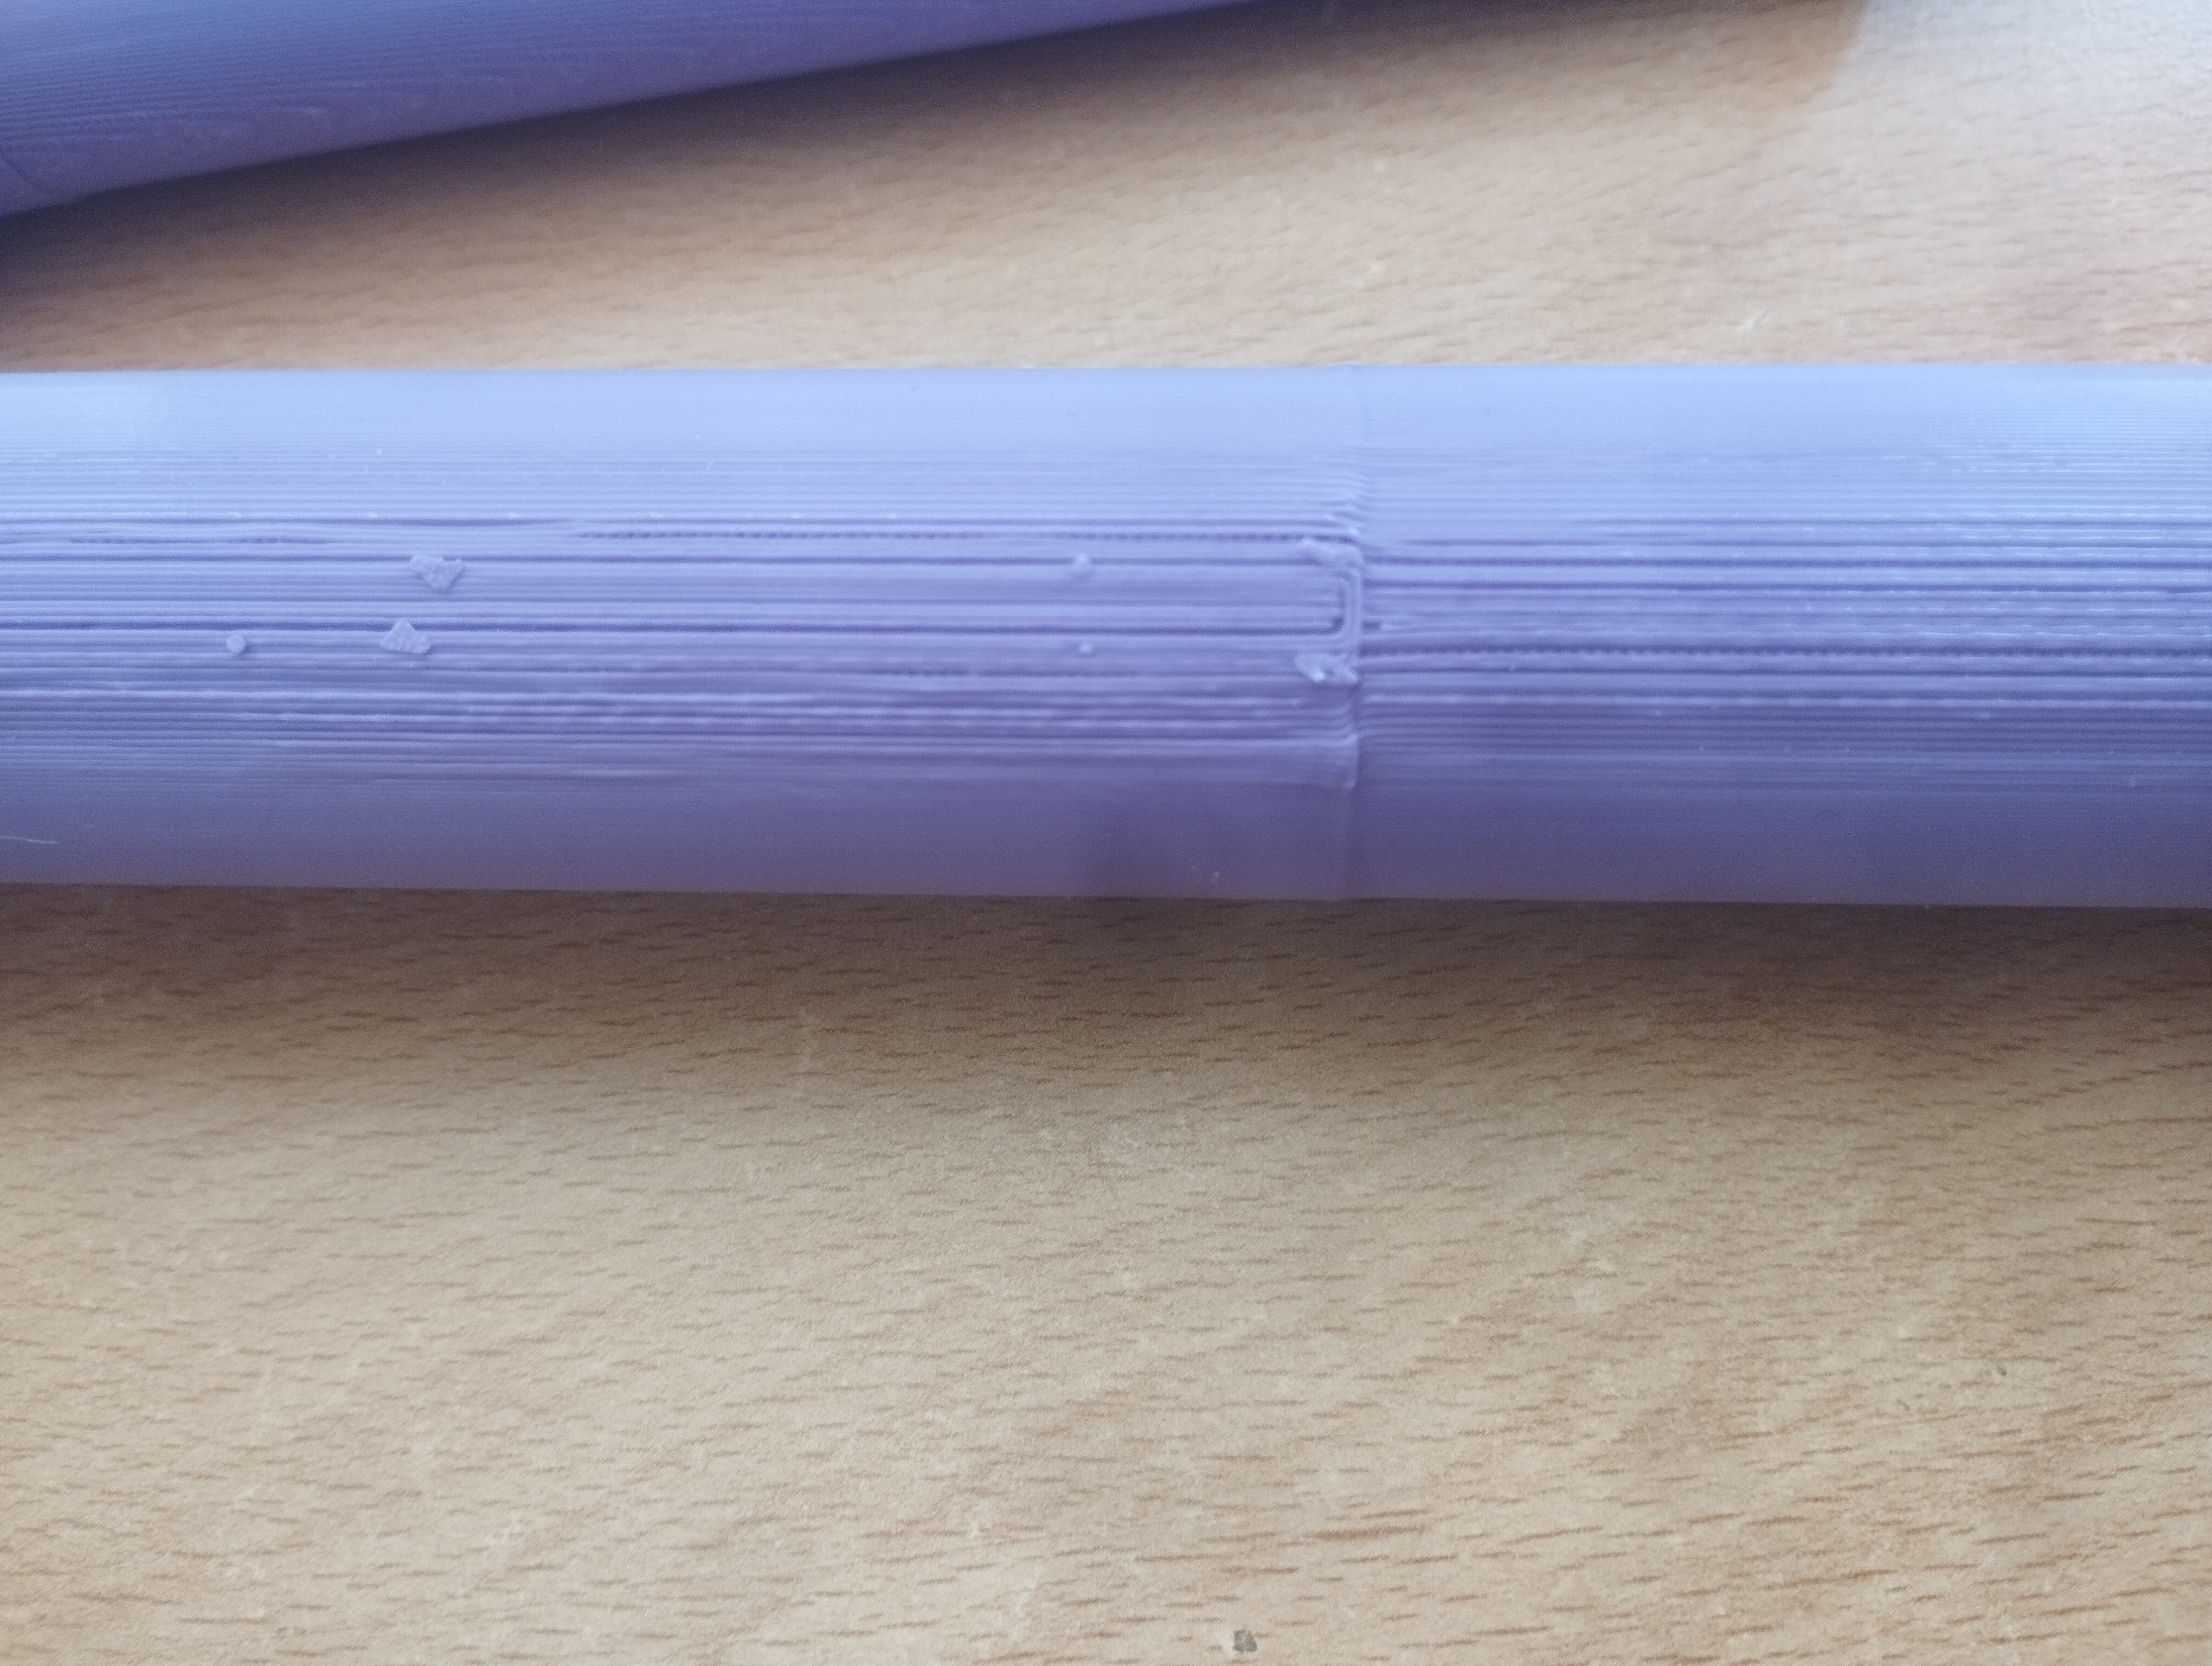
We had a problem also with the new filament. After put the new coil it was created a node and the filament broke. So i reinsert the filament in is hole but there was still some space from the two parts of the filament, due to this there are some layer missing. It shouldn't be a big problem, i can also cover this pieces with some tape.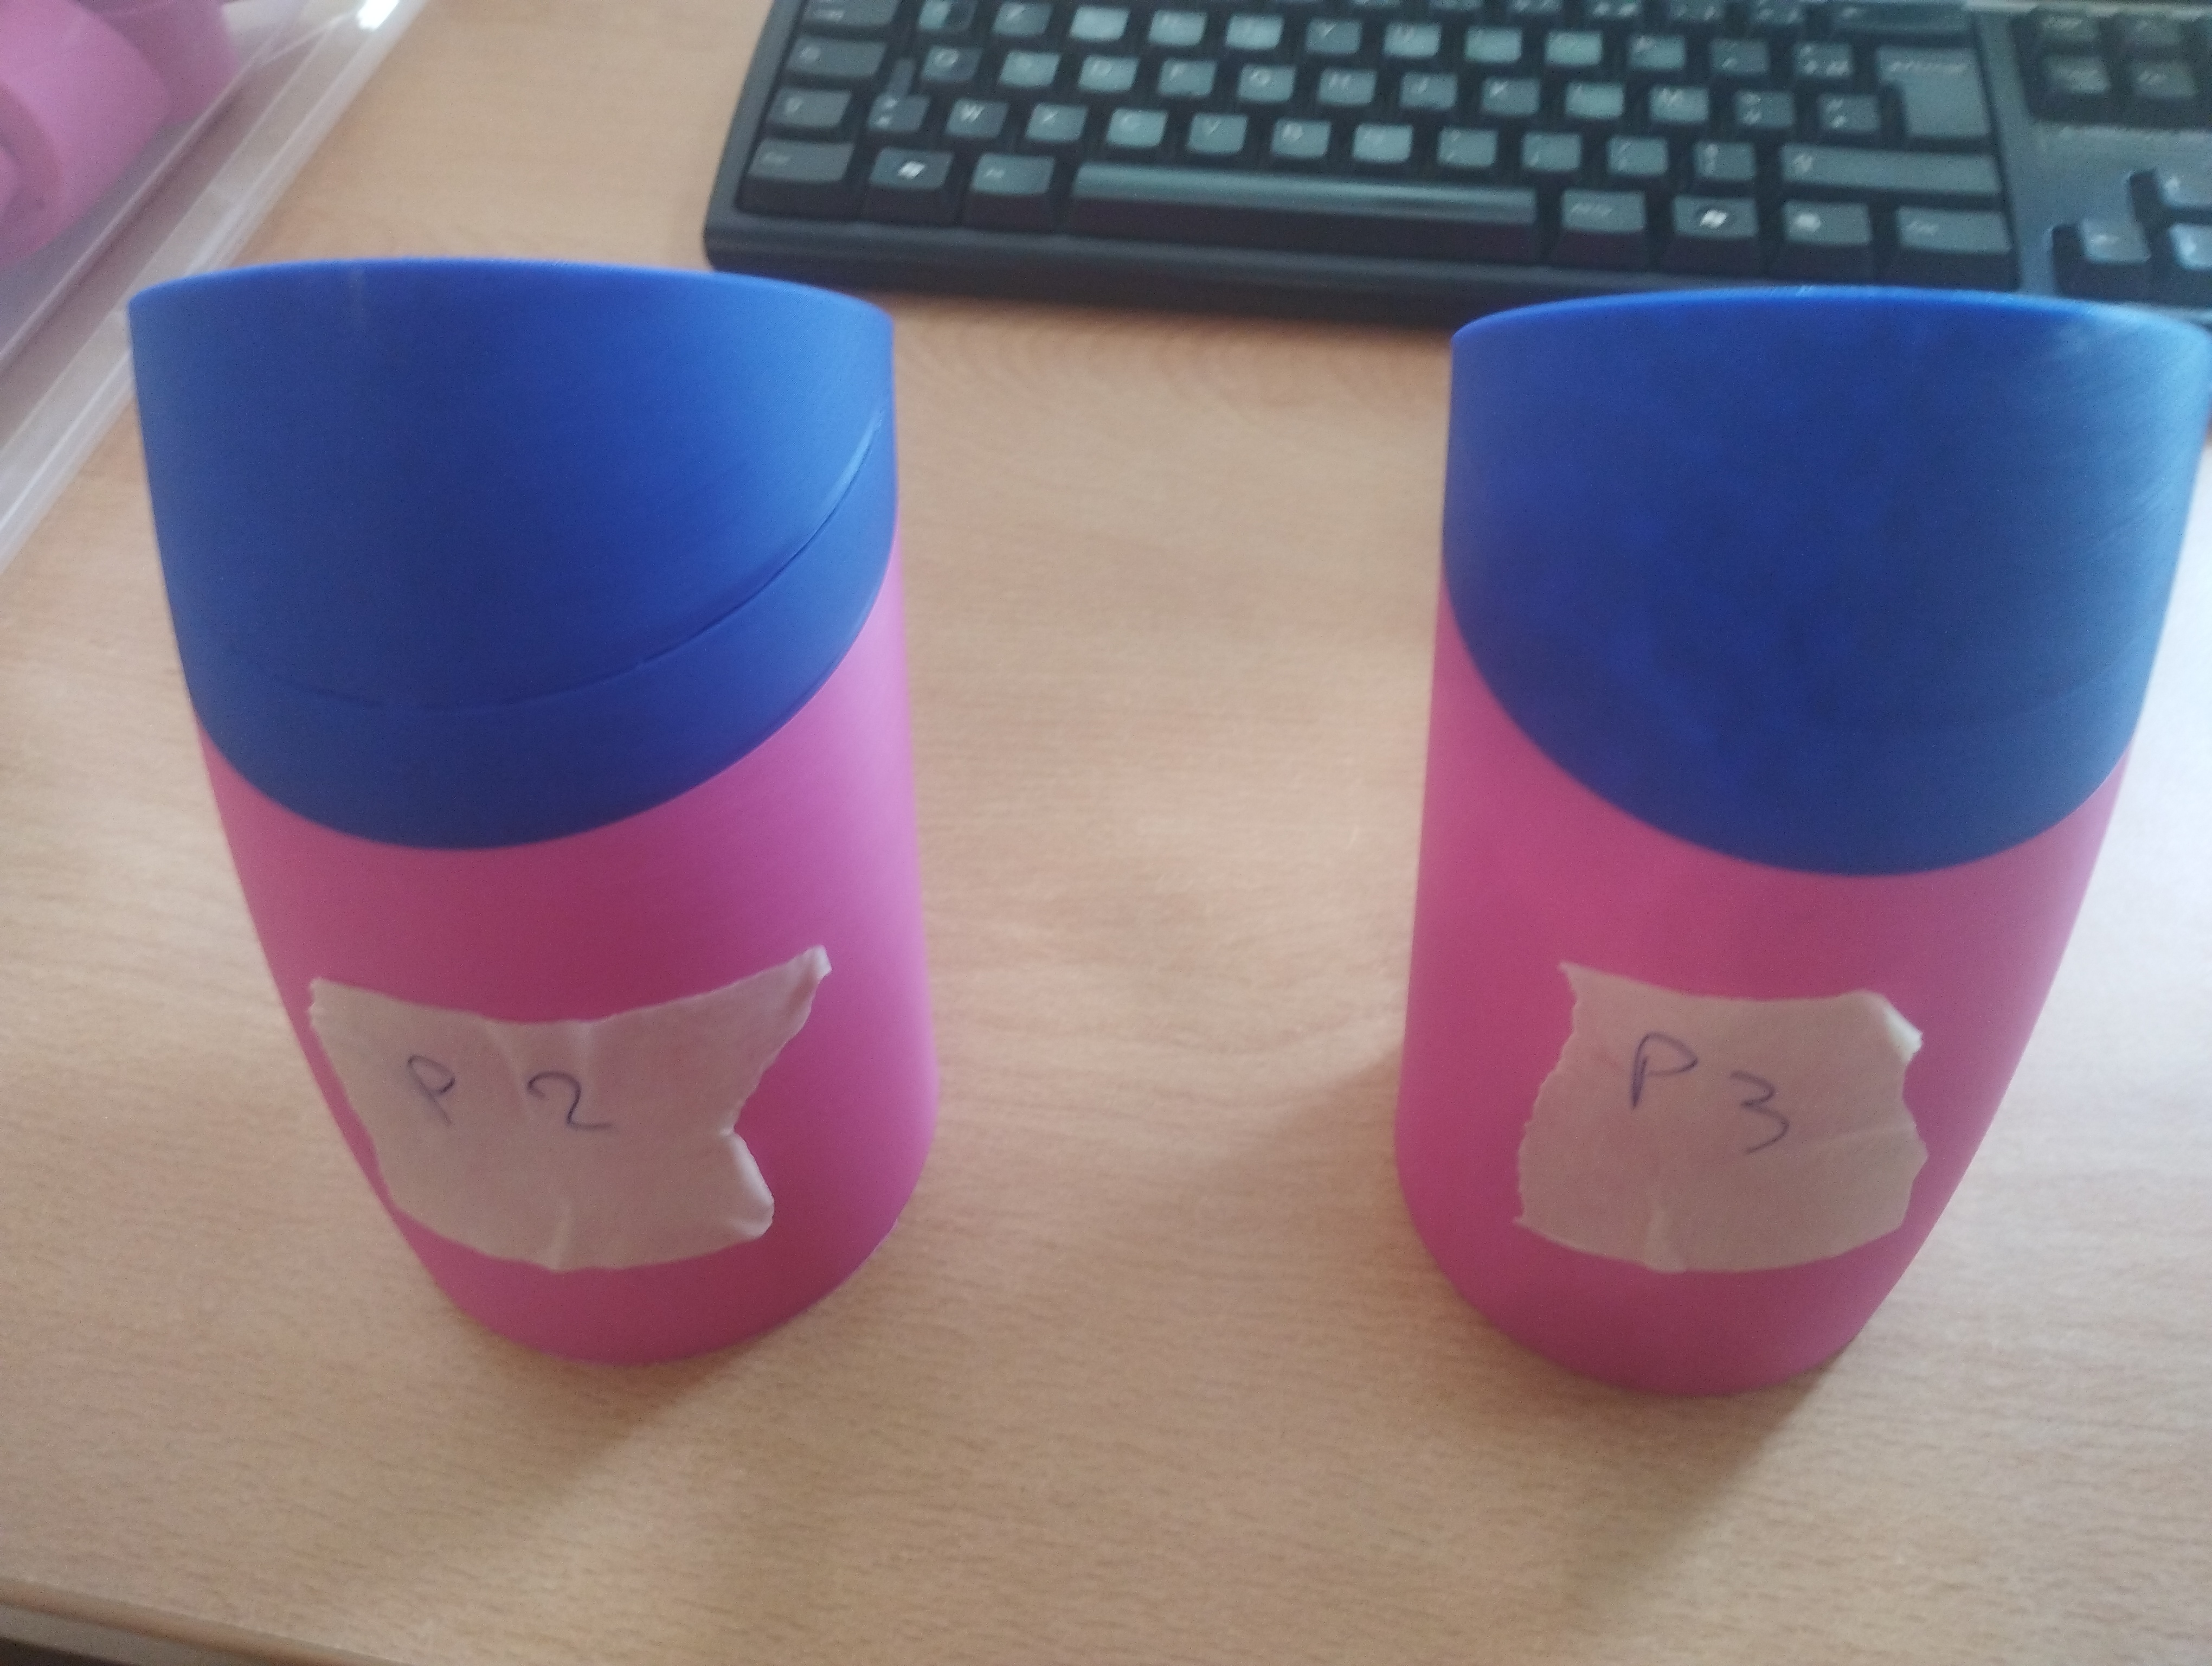
This is the result, we can see the change of the colour and also on the p2 the missing layers.
I have alredy put the rest of the piece on the printer, let's wait wednesday to check the result.
Serpent day number four (13/09/23)
Today is wednesday, this morning i went to check the machine and i find out that during the printing the filament is ended, so the pieces wasn't ready yet; so i inserted another coil which was almost finished, i knew that not so many time later i would have to changed it. Infact after about one hour also this coil was finished and i had to insert another one again. I put an old coil of filament thinking that it would have been the same as a new one; i was wrong. Infact the printing went wrong, my supposion it's that the old coil became humid over time and for this reason it had zero grip. I had to trow away the pieces that the machine hadn't finished and reprint them again.
in those photos we can see the pieces done and the wrong ones
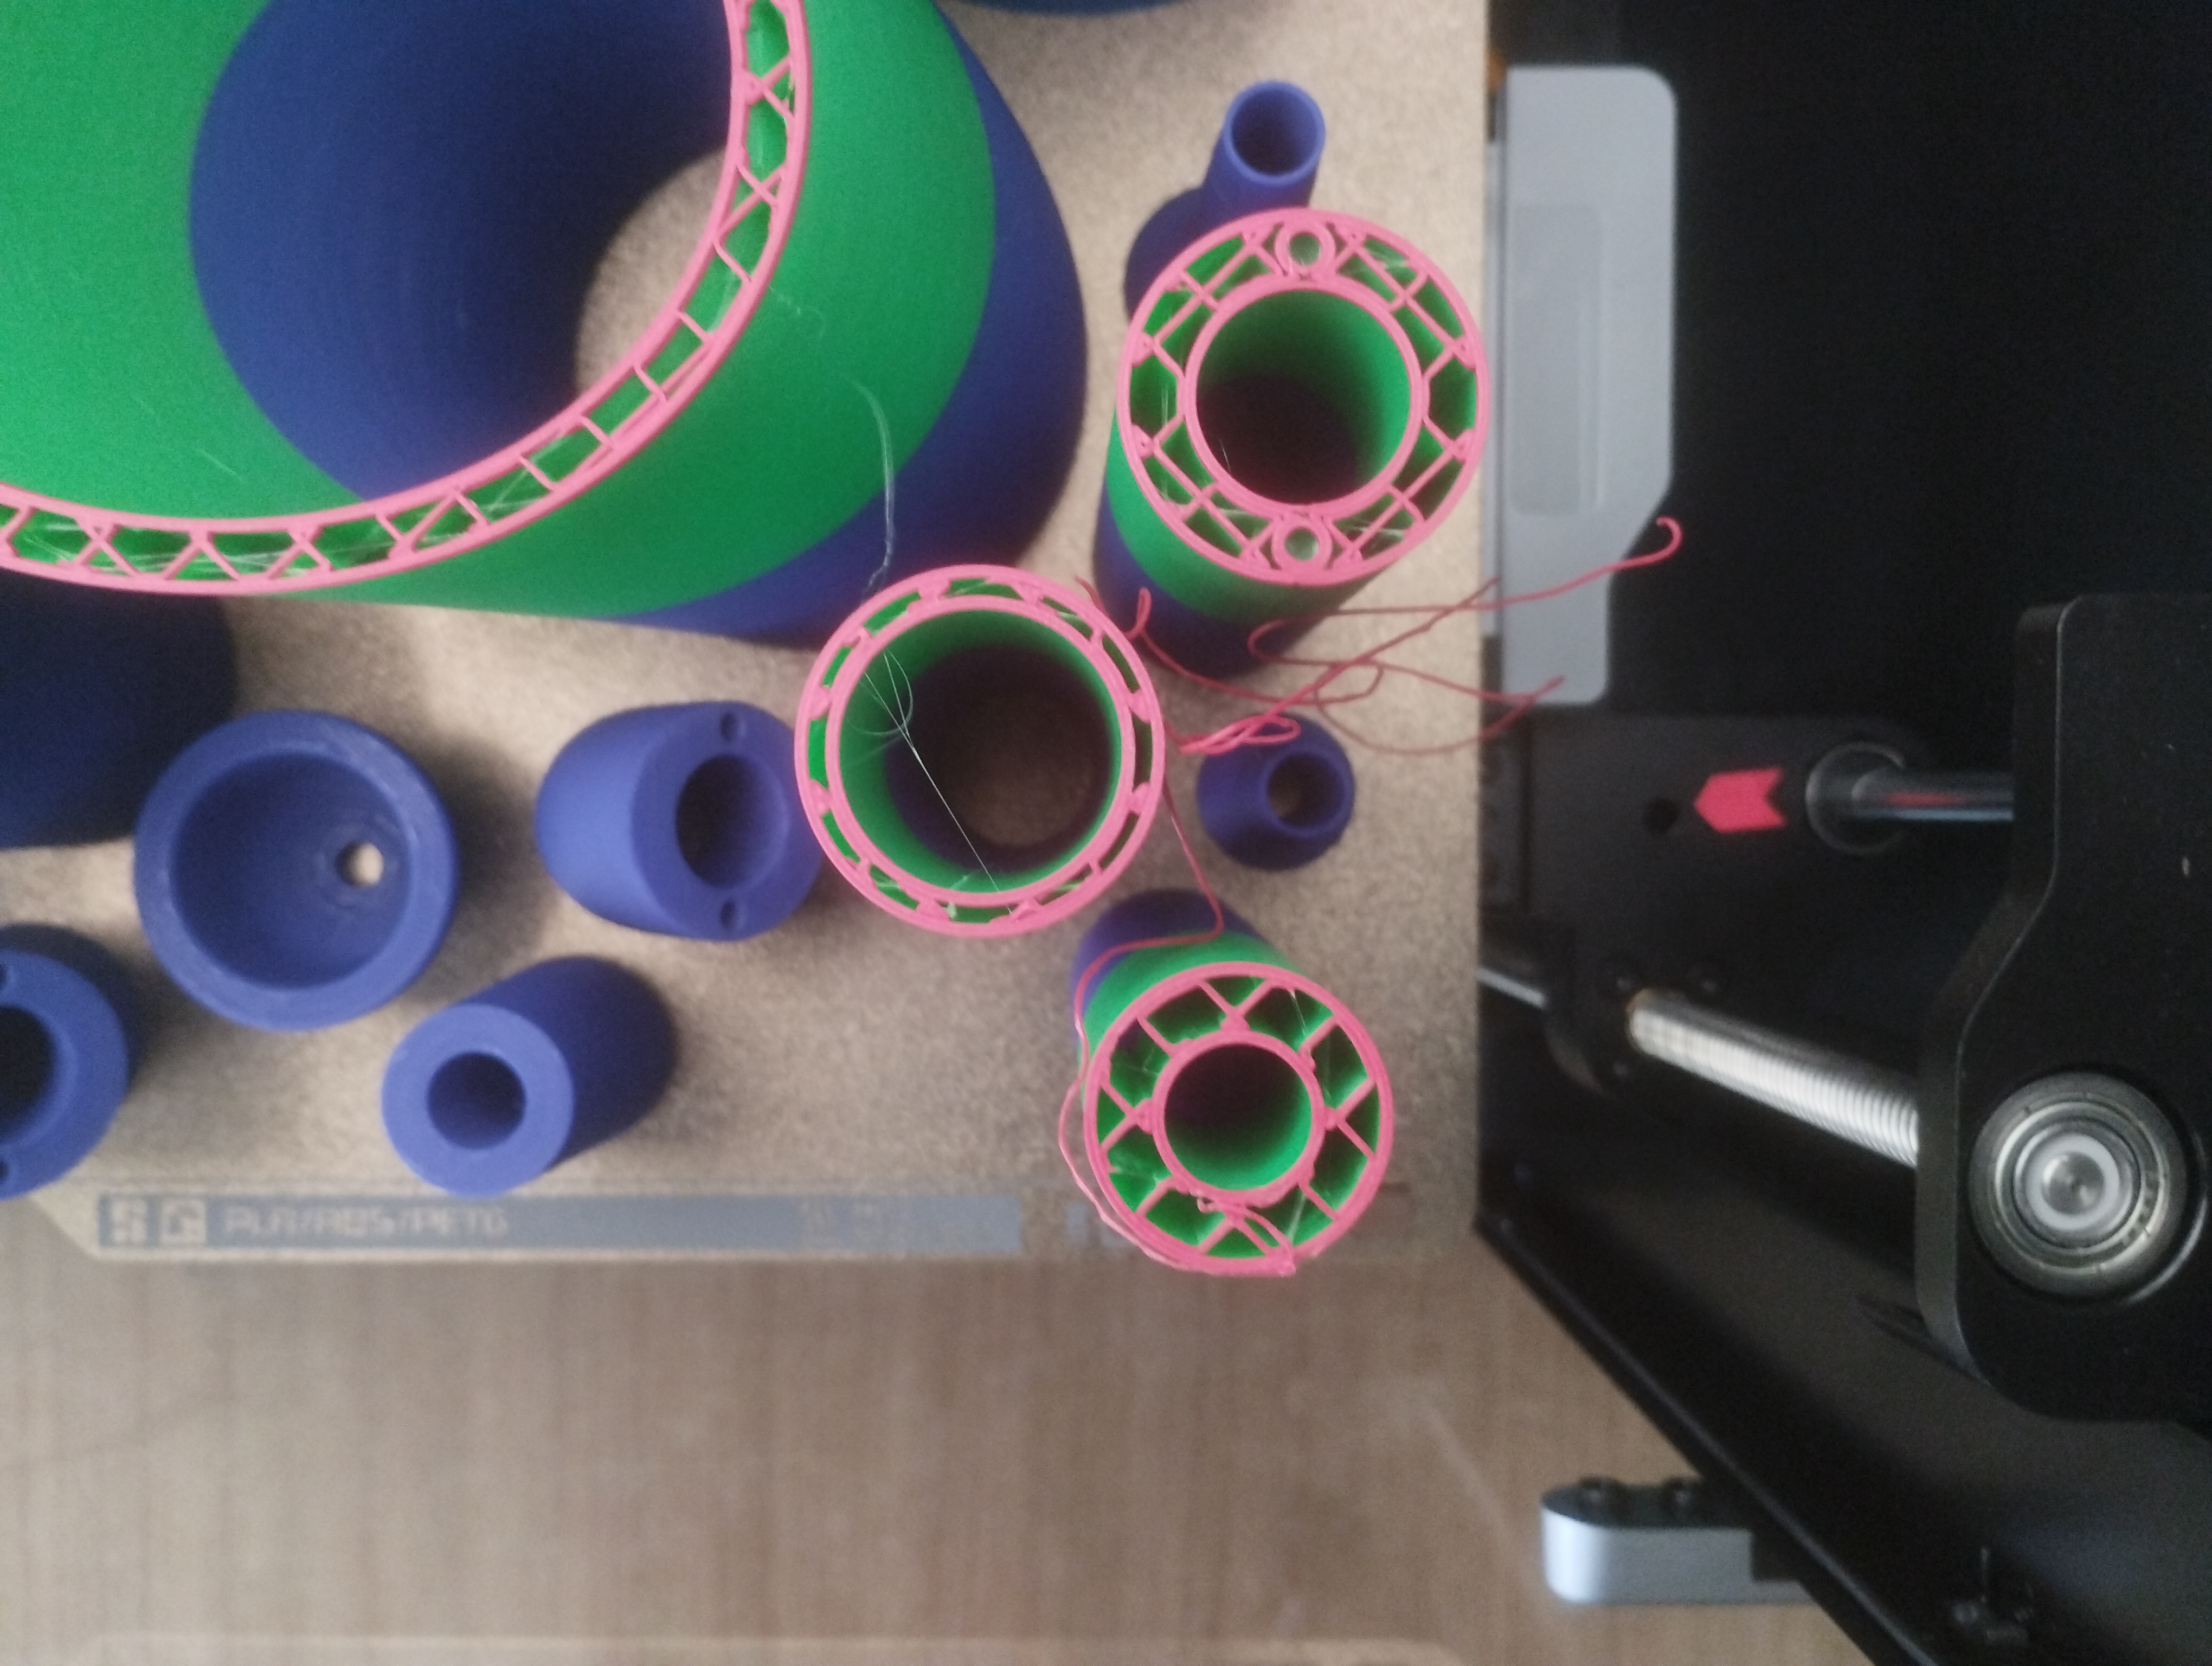
After have insert the red filament a piece moved, so i have to remove it from the plate, but the machine continued to do its work accumulating the filament that should be placed on the missing pieces. This fact have obstaculated the rest of the work because it was no more accurate. Maybe in an slower machine this would be not a problem, or maybe a smaller one, but in a machine fast as this, it became impossible to work.
So, while i'm waiting the rest of the pieces, i'm looking for something that can fit in the holes beetween the pieces and so allow me to glue them perfectly.
For now, the best solution i found, it's to put little pieces of filament and add some glue. I try two options: for the first one i covered the filament with some tape. and in the second i used only the filament,without tape, i used Pattex glue for both of the experiment. I have to wait friday to check the results because the glue takes some hours to dry and i don't have so many time right now.
Serpent day number five (15/09/23)
So, today it's friday and it's an important day for the progress. I've alredy checked if the remaining pieces were done, they are, so all the pieces are ready. 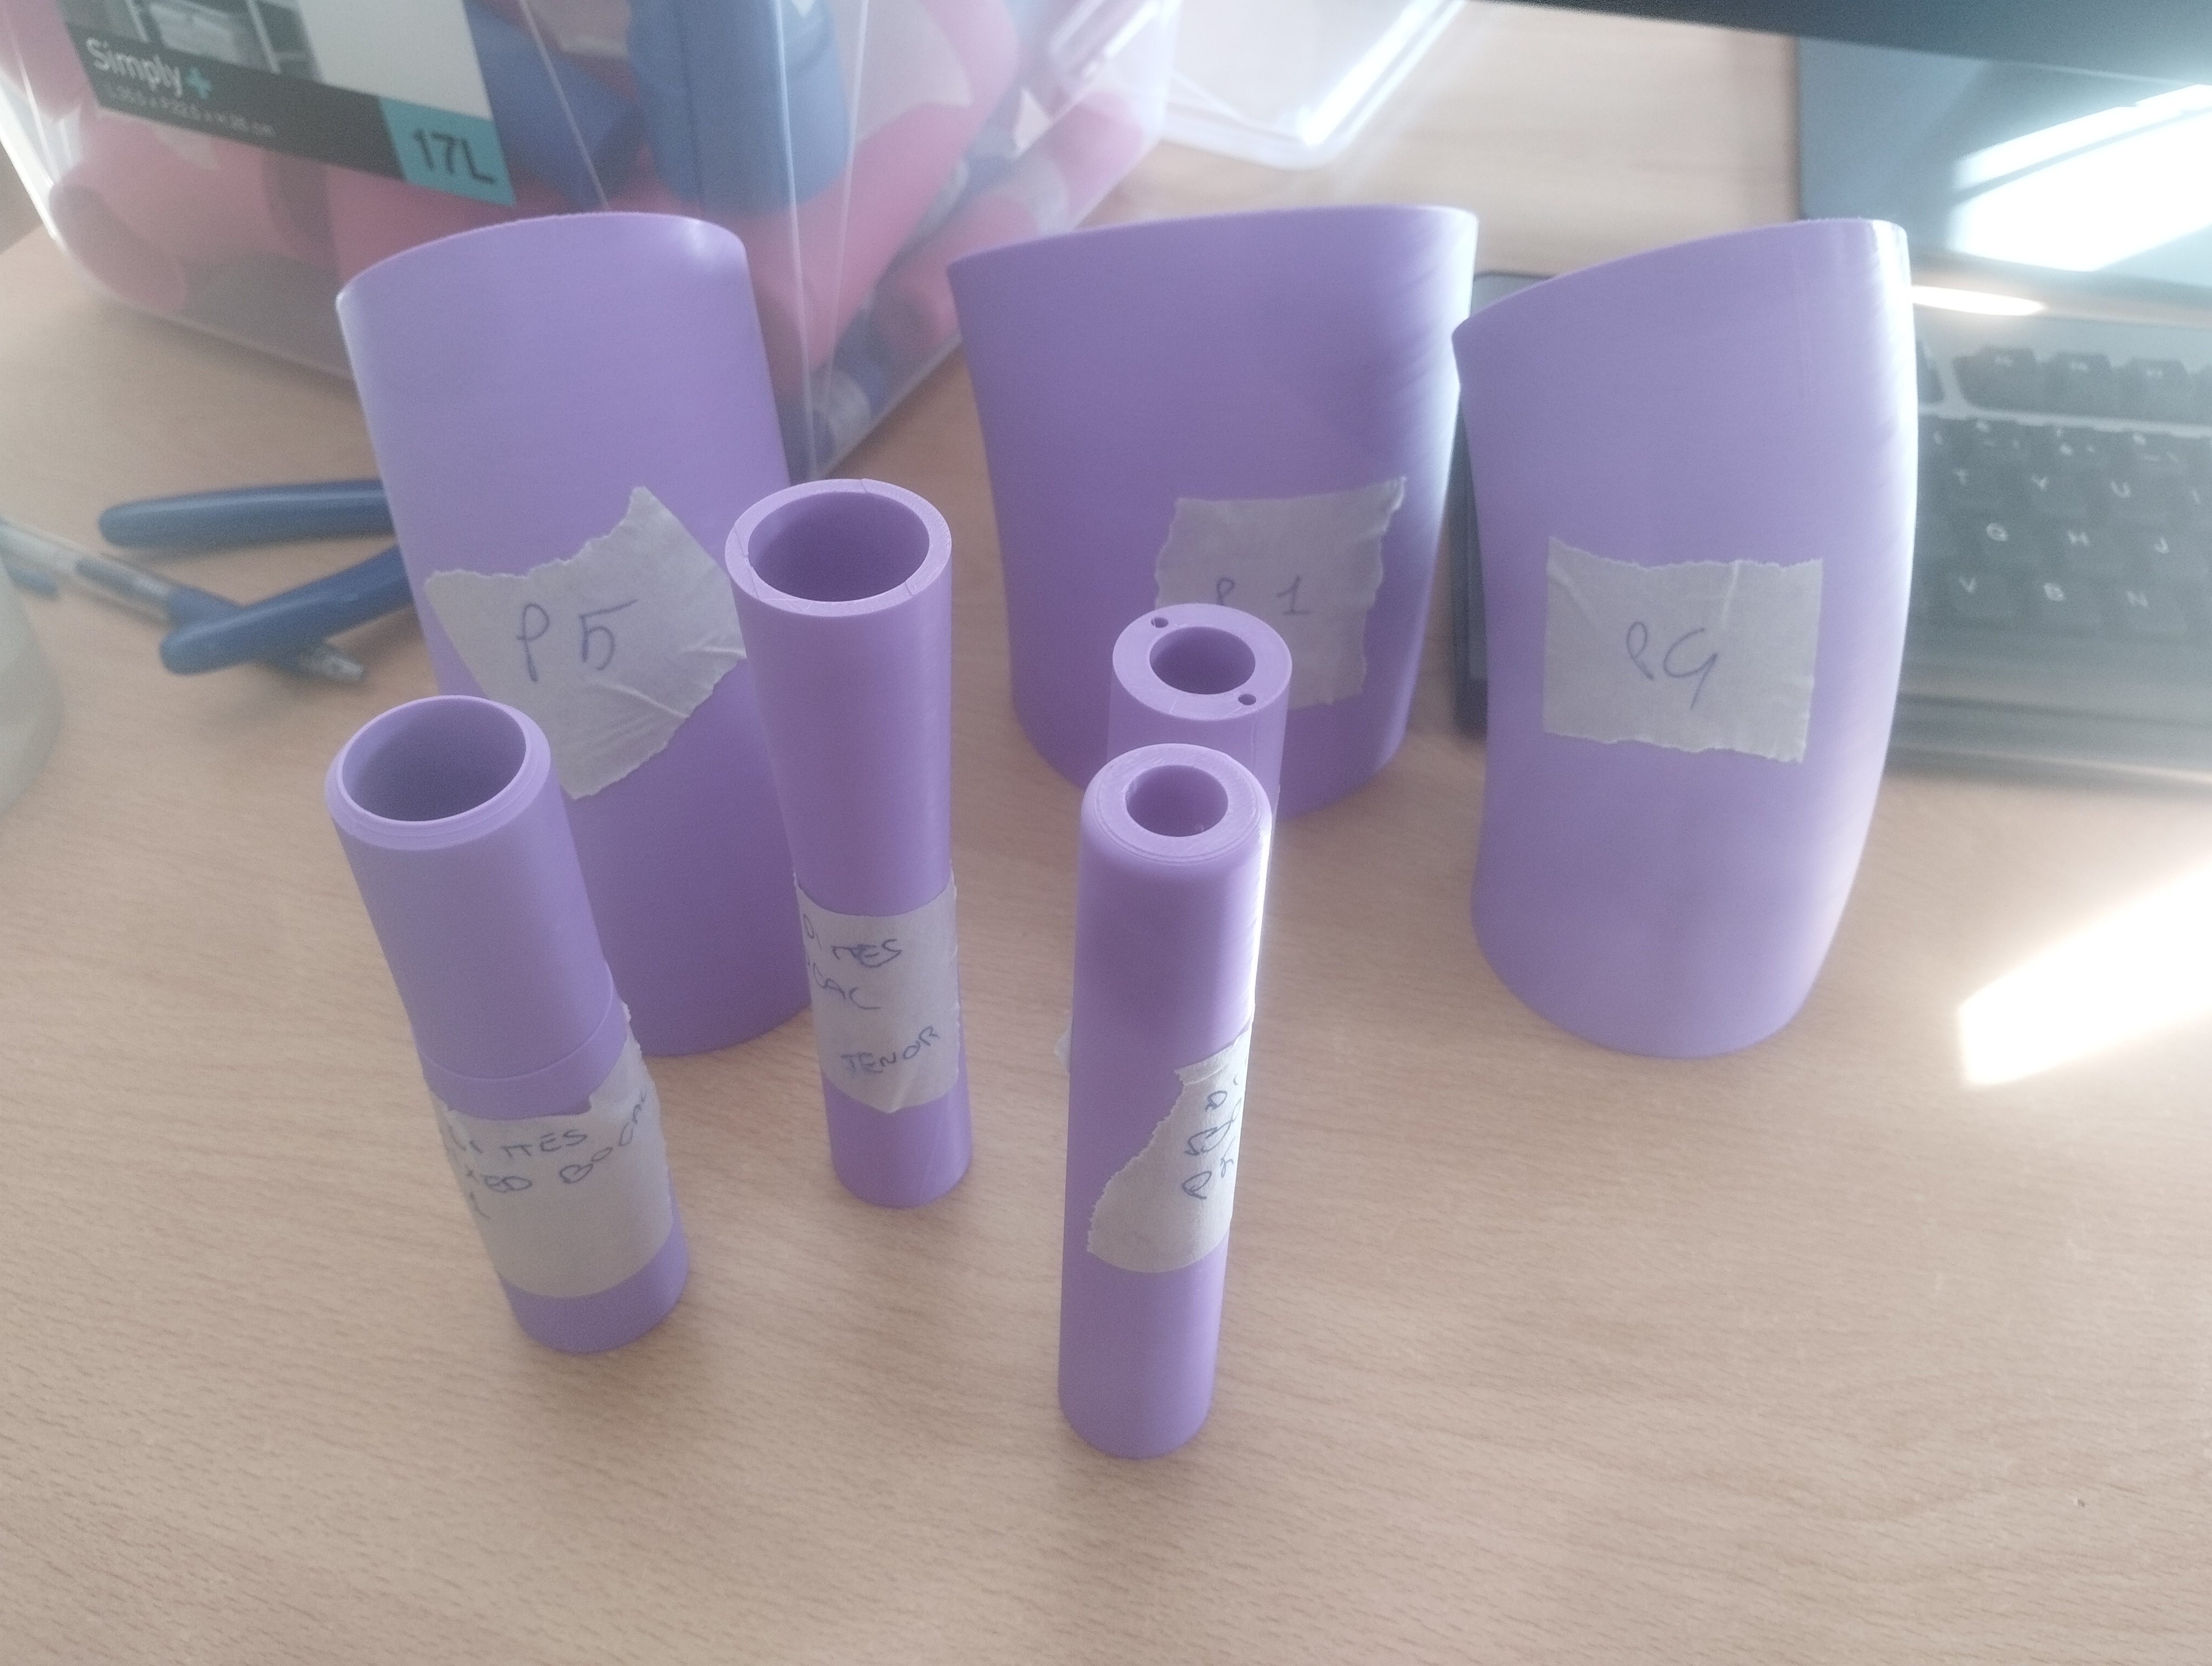
During this project we noticed that for long printings like those, is important to use new filament because the old ones can absorb the humidity and this is not a good thing because the filament can lose the grip and in the big printing you risk to lose hours of work.
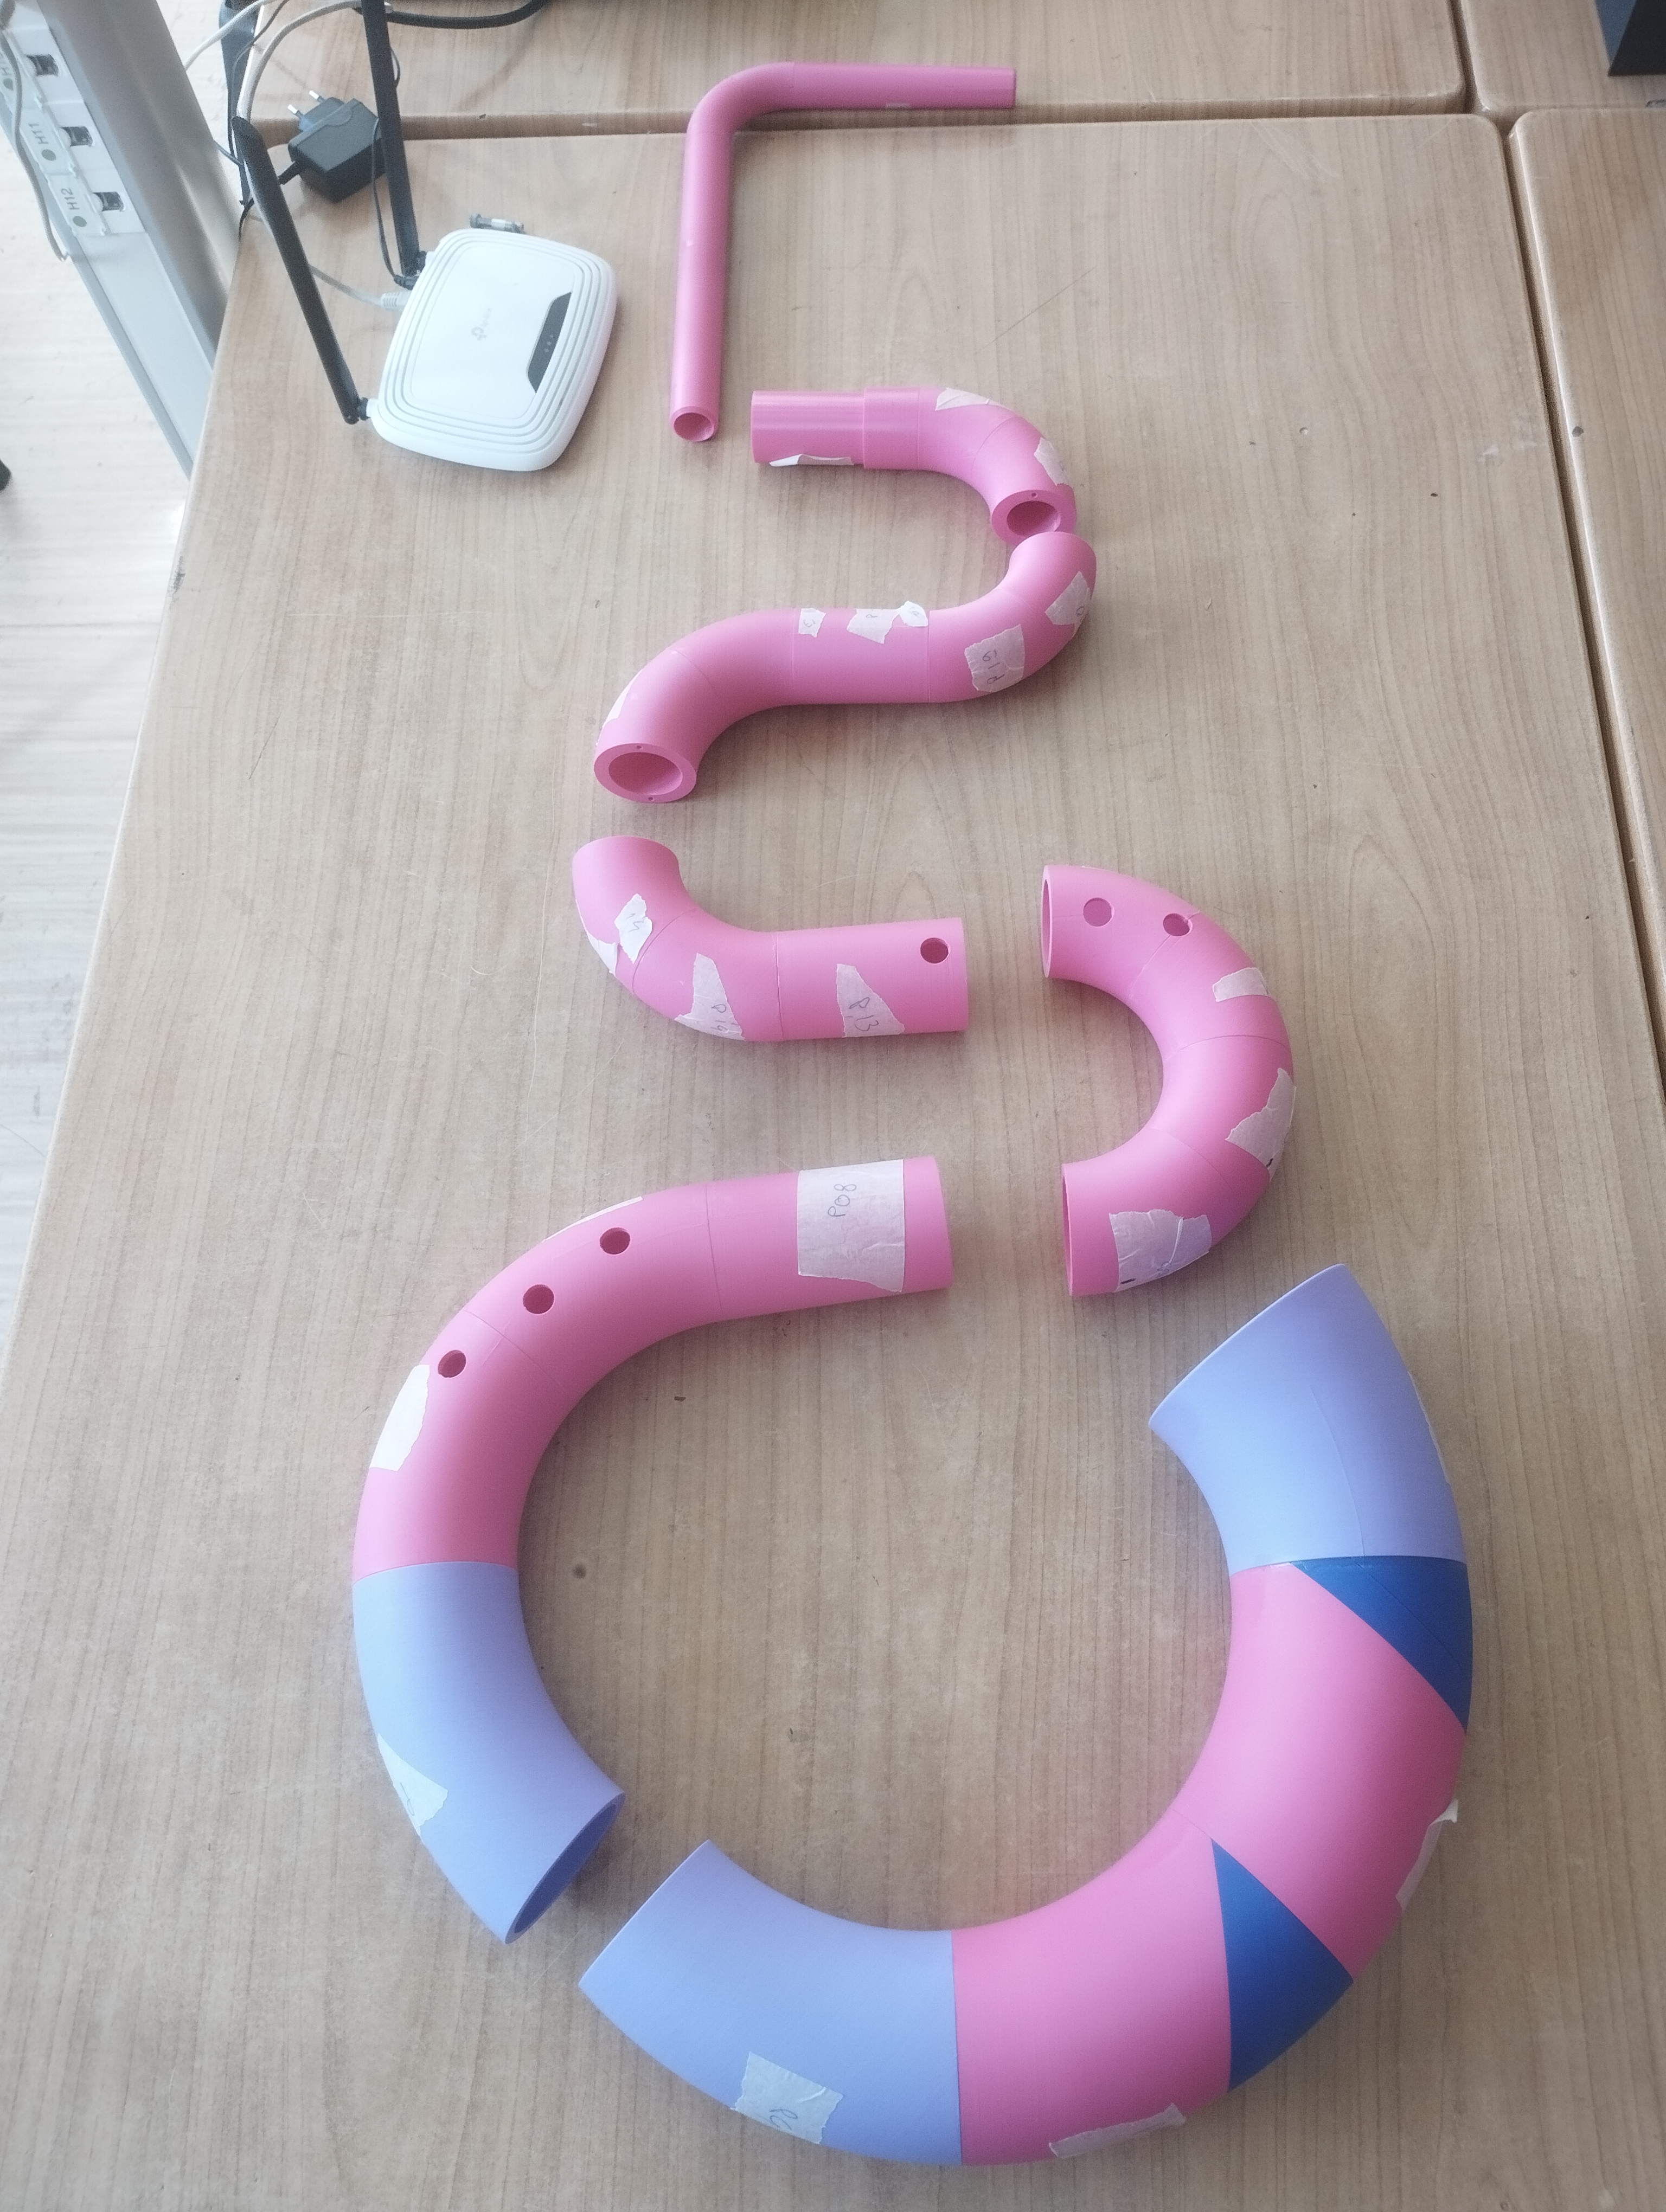
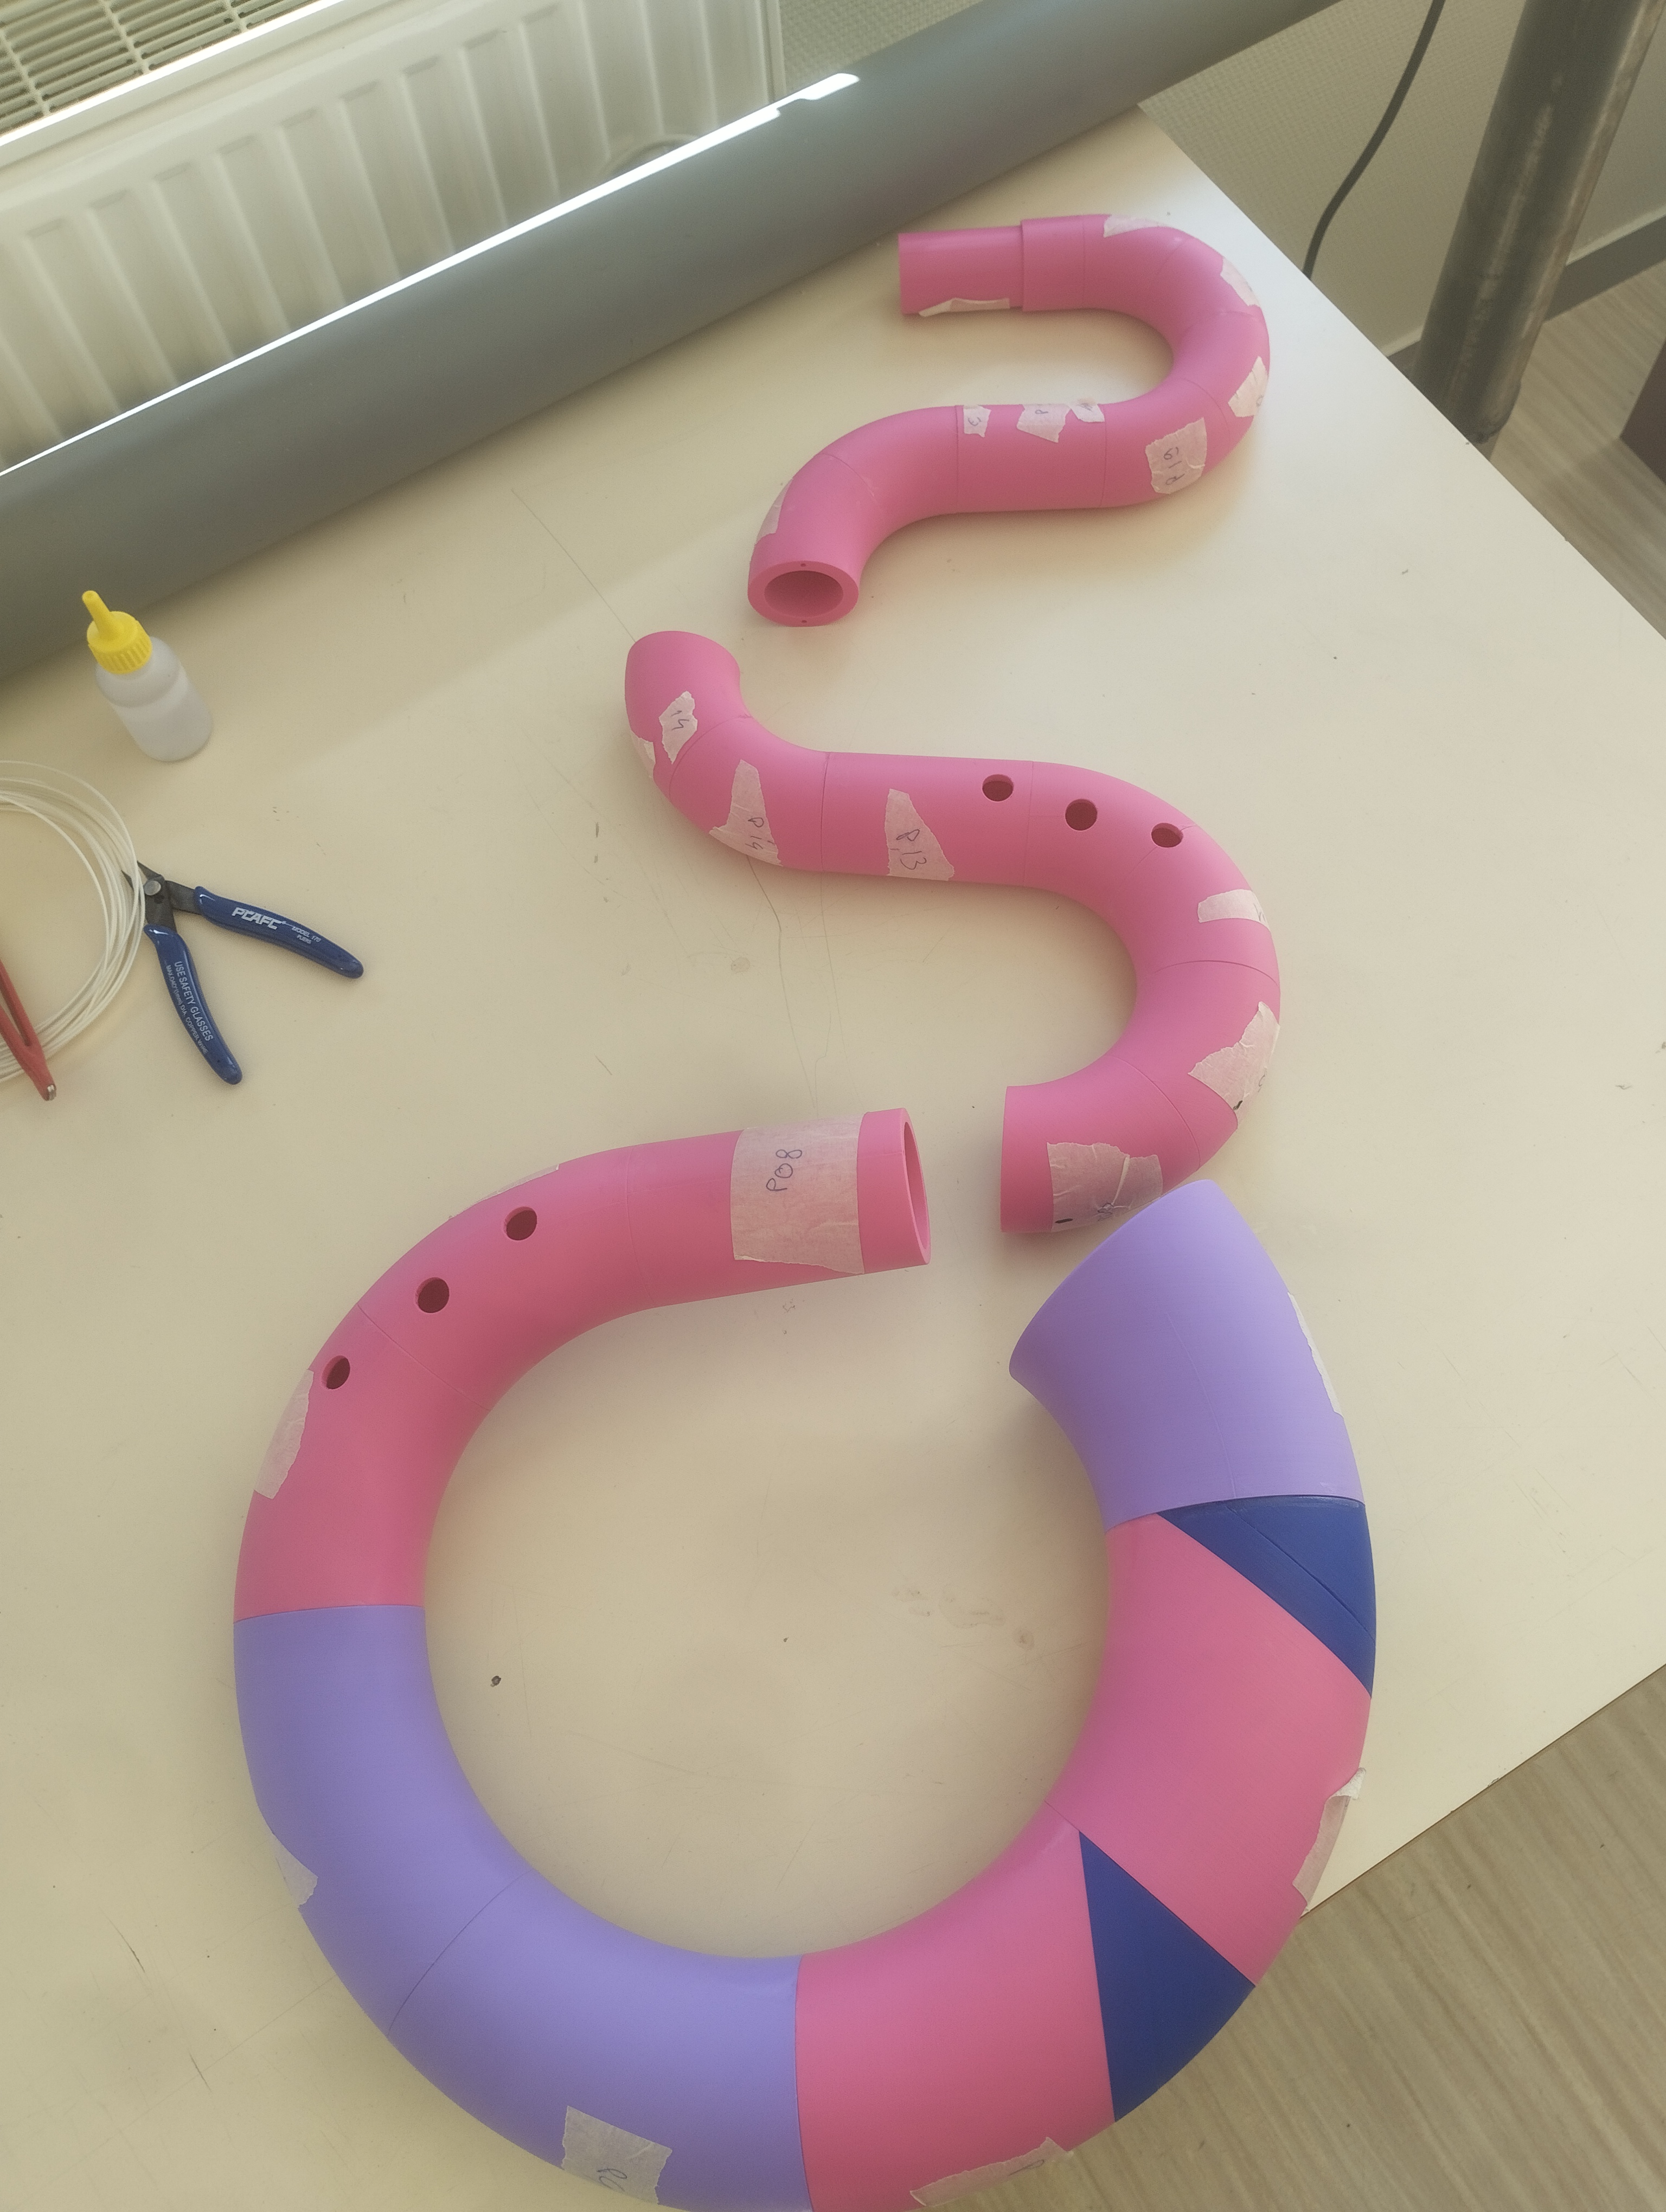
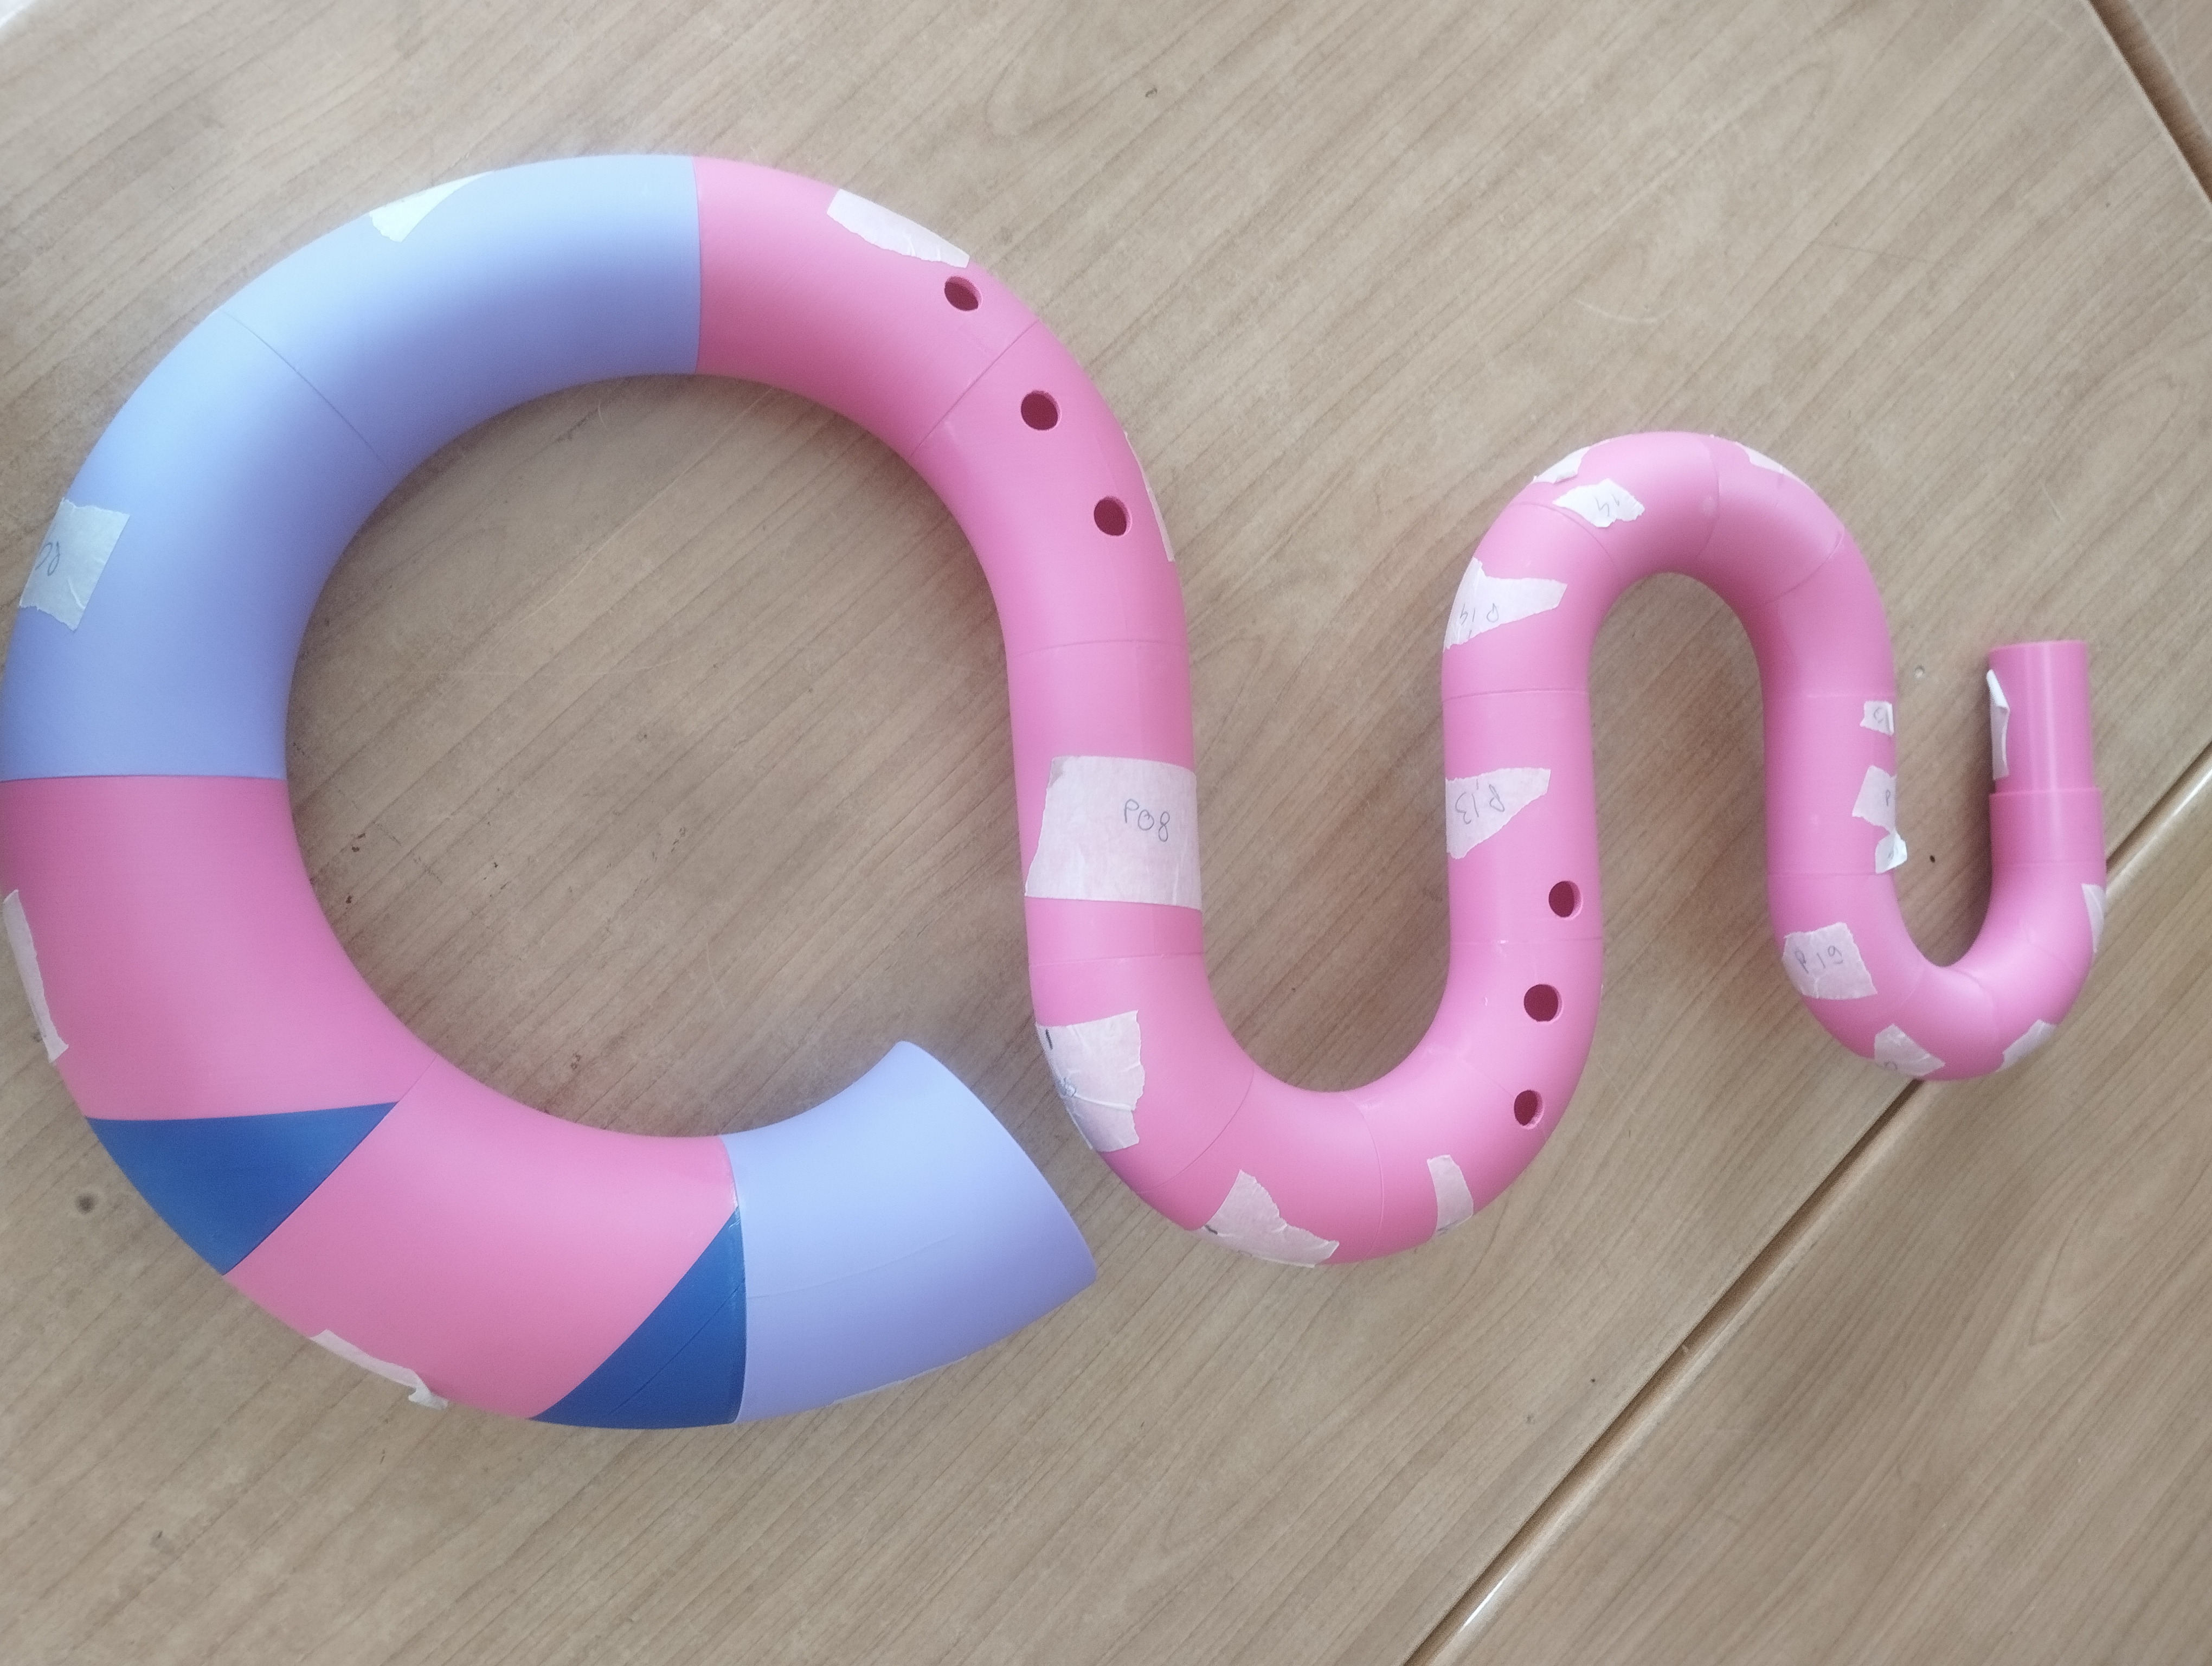
These are all the pieces of the serpent's body in their final position, after have glued them and afetr have prepared the bocal and mouthpiece parts the serpent will be done.
Now the only thing to do it's to find a way to unite them.
I made two tries another time: from the work of wednesday i understood that there is no differences between the filament alone and the one with tape in the gapes; so today i sanded the surfaces of the pieces and tried also another kind of glue. Due to the this sanding should be more grip between the pieces and they should be more glued. Now i have to wait monday to see the result and choose the best glue.
Serpent day number six (18/09/23)
Today i have sanded almost all the piece. I used 3 level of sandpaper: 40, 80, 120.
After that i've started gluing the pieces. My tecnique is based on gluing all the pieces in group of 2-3, to avoid weight overload. wait that the glue dry. I will repezt this method until i will have the final instrument.
(Should be) Last day of serpent (19/09/23)
Today there is no much left to do. I've only to join the remaining parts; i've alredy glued some of them and i'm gonna wait at least one hour beetween each gluing session, to make sure that the super glue can dry.
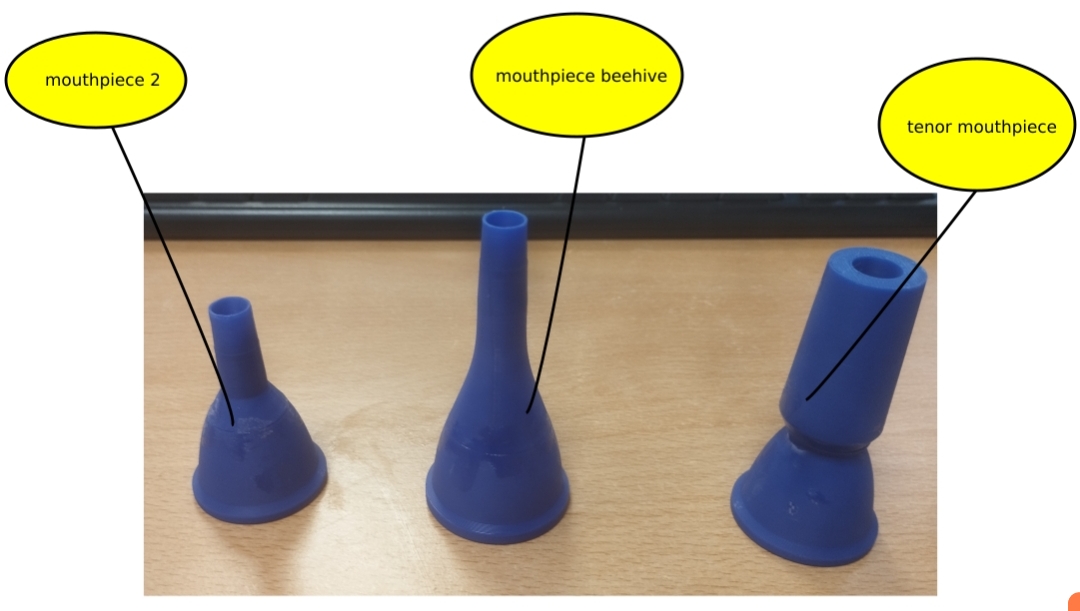
While i'm waiting the glue i'll prepare the bocal parts. The serpent is made by three section: the body, the mouthpiece and the bocal part(the part between the body and the mouthpiece).
It's easy and fast to craft the mouthpiece because there are only 3 kind of them and they are very small (compounds by 2 little pieces).
So, right now the thing to do is to prepare the bocal parts
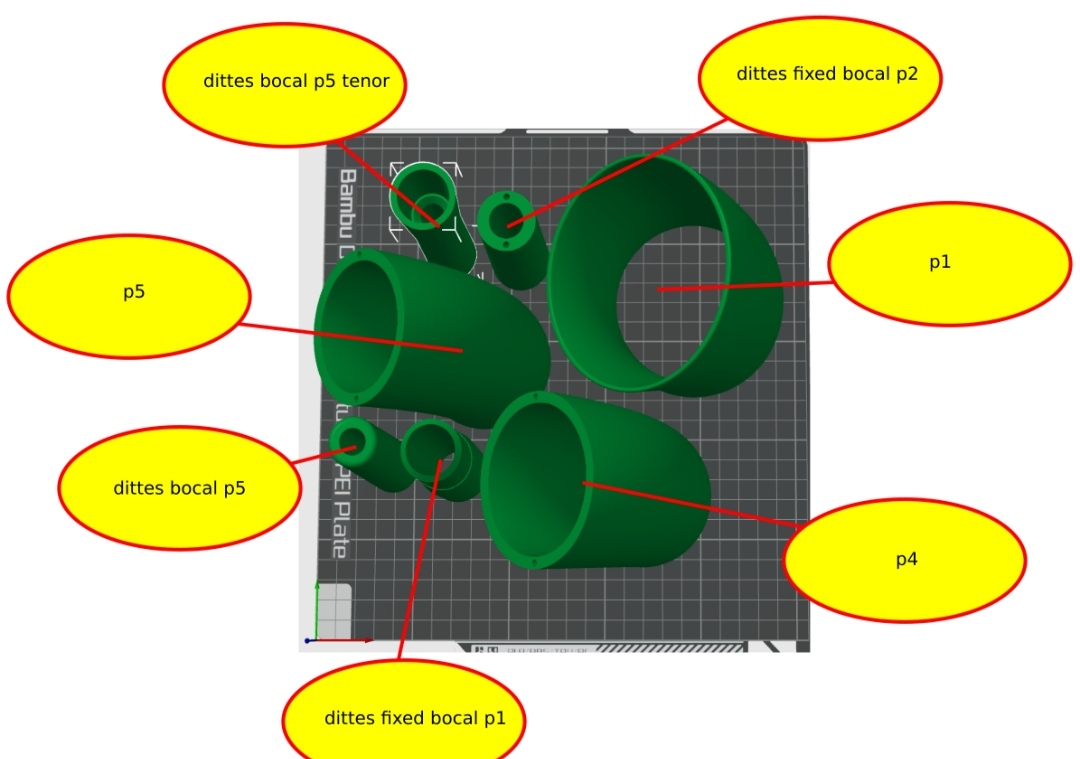
I have two different kind of bocal part to craft: adjustable and fixed. They are very similar: they are both made by 5 pieces, 4 of them are exactly the same. There's only one different piece and that's the one that fits into the snake's neck. The fixed version is a little bit larger than the adjustable, i don't konw the differences in terms of sound.
The fixed version has also the tenor variant; to realize it i have to change the part where the mouthpiece is insert, whith another one a little bit bigger, it looks like a funnel. But here i have a problem, because the bocal parts are all glued togheter, so i can't swap it. To use the tenor variant i have to reprint the last 4 parts and joining them togheter. In this way i will have three differnt bocal part.
I 've started with the adjustable bocal part and i glued all the pieces togheter in only one time because they are small. After that i did the same for the fixed.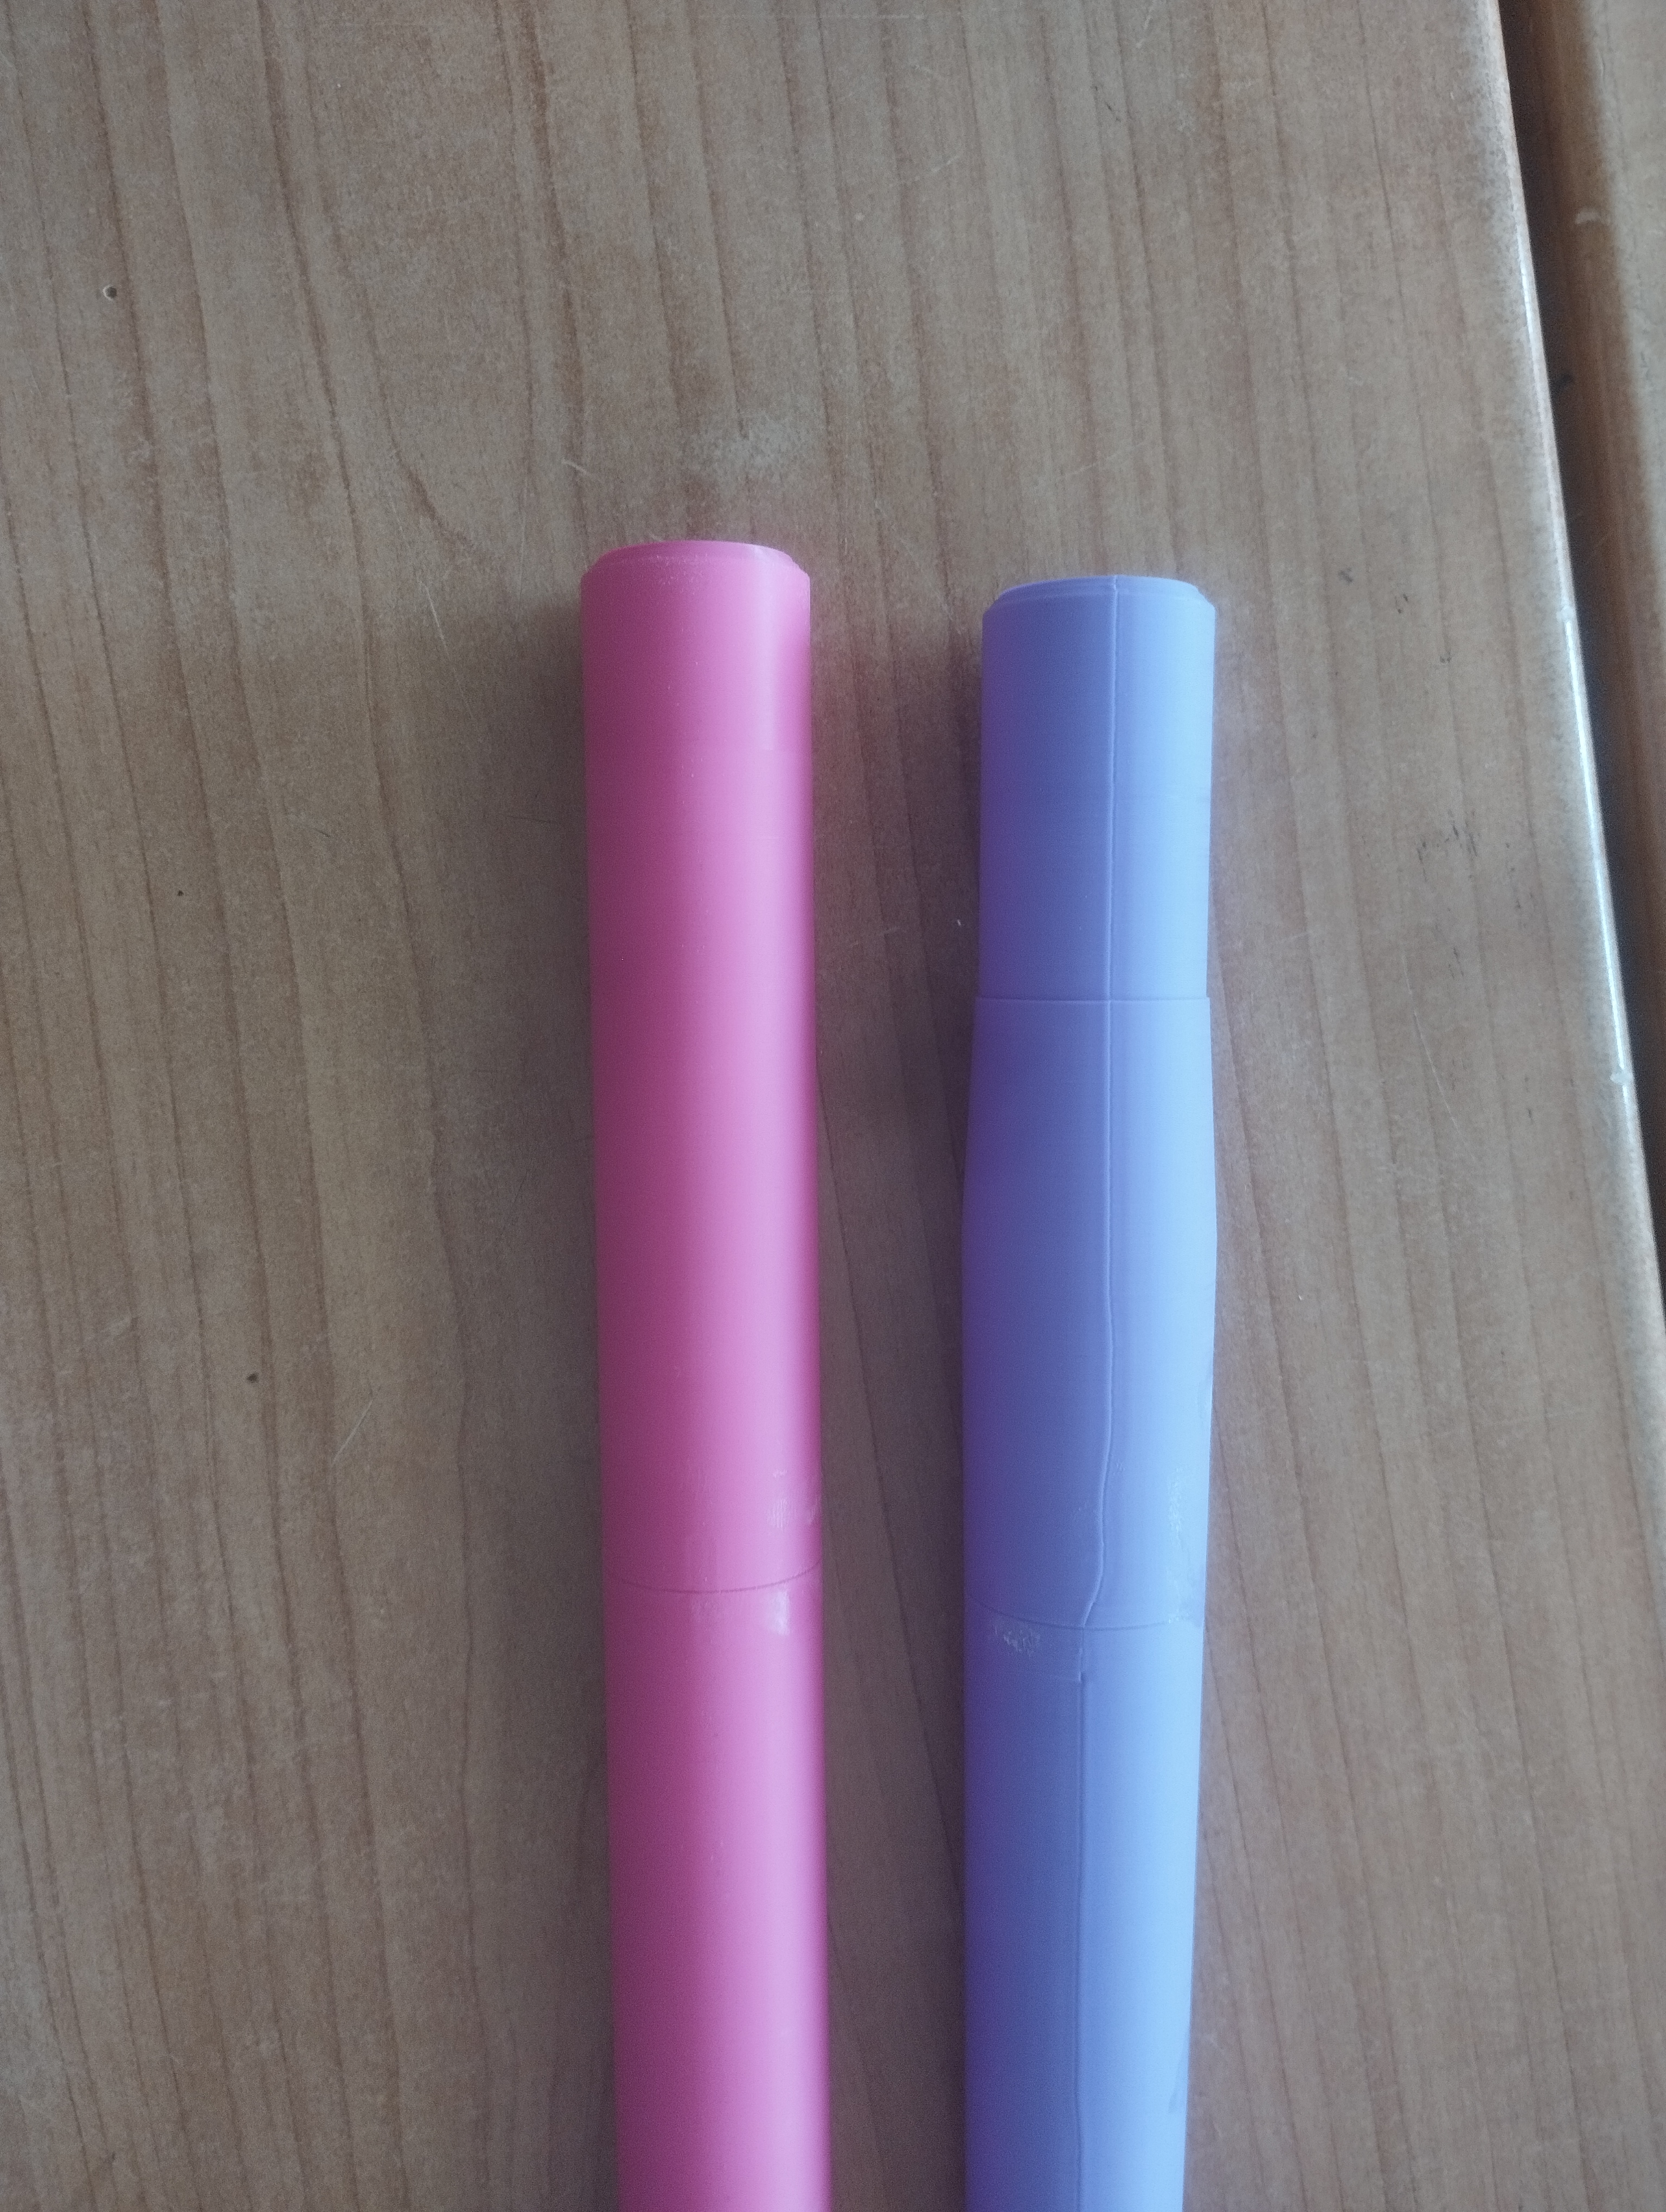
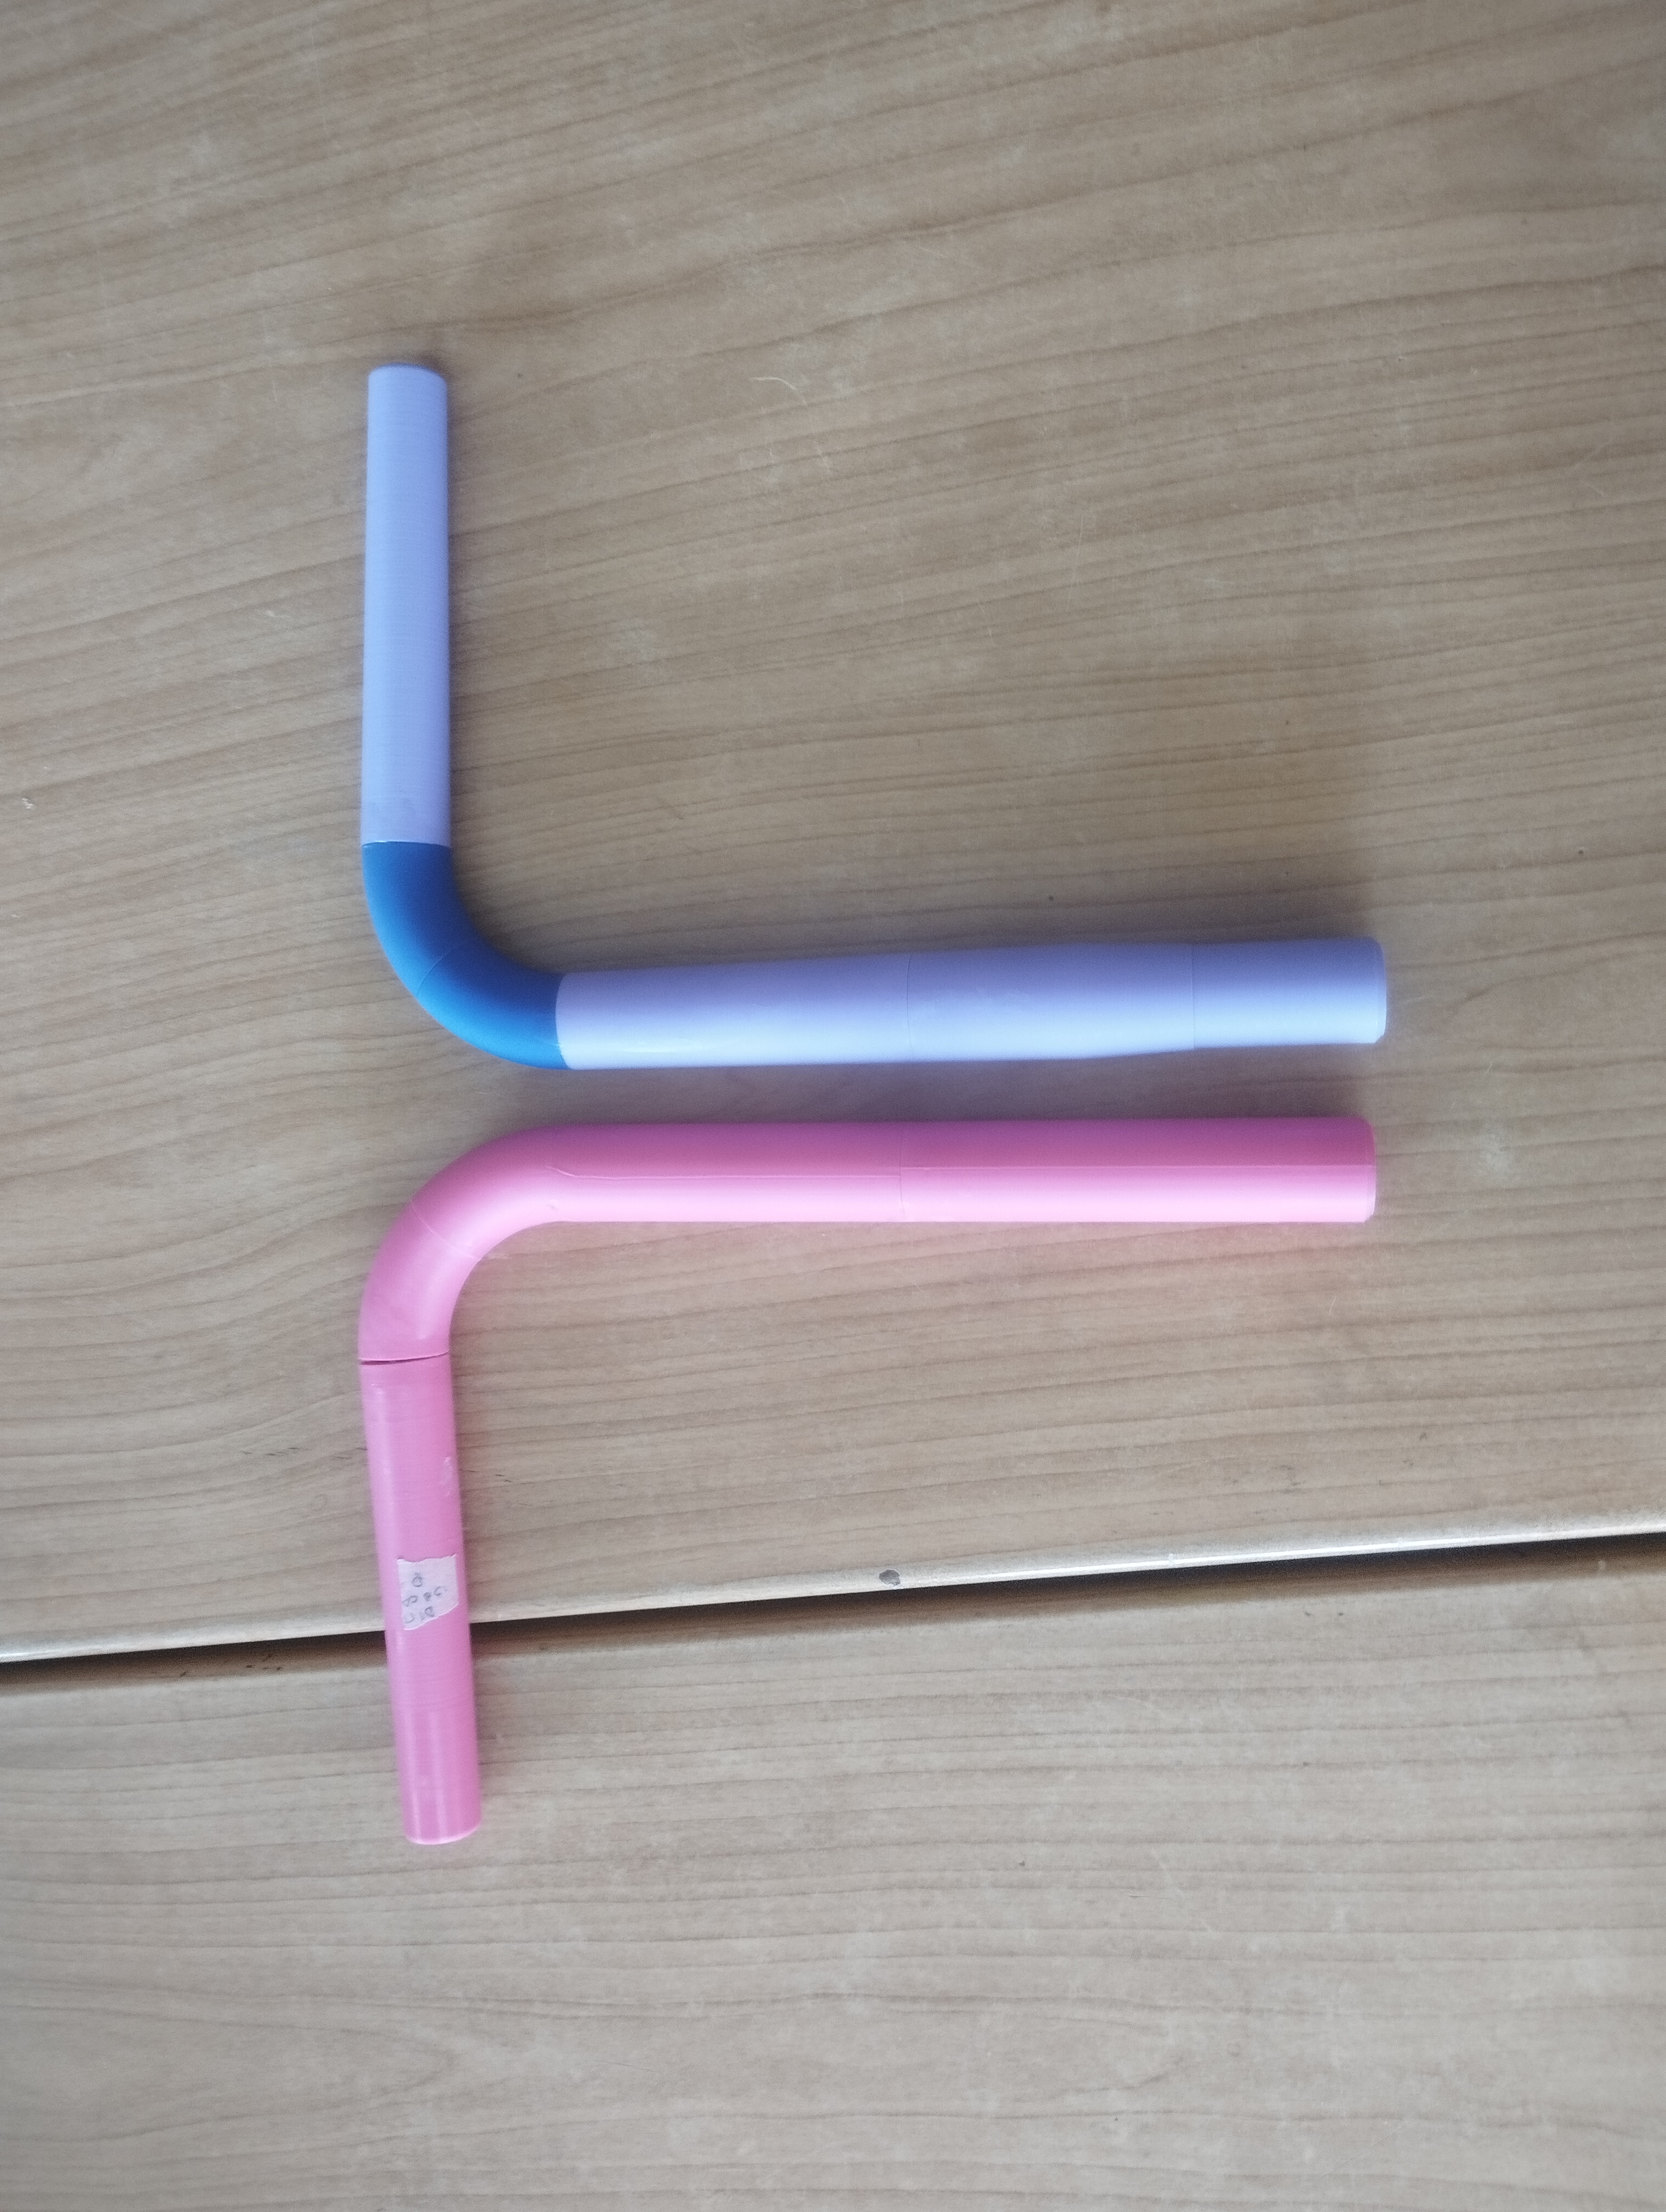
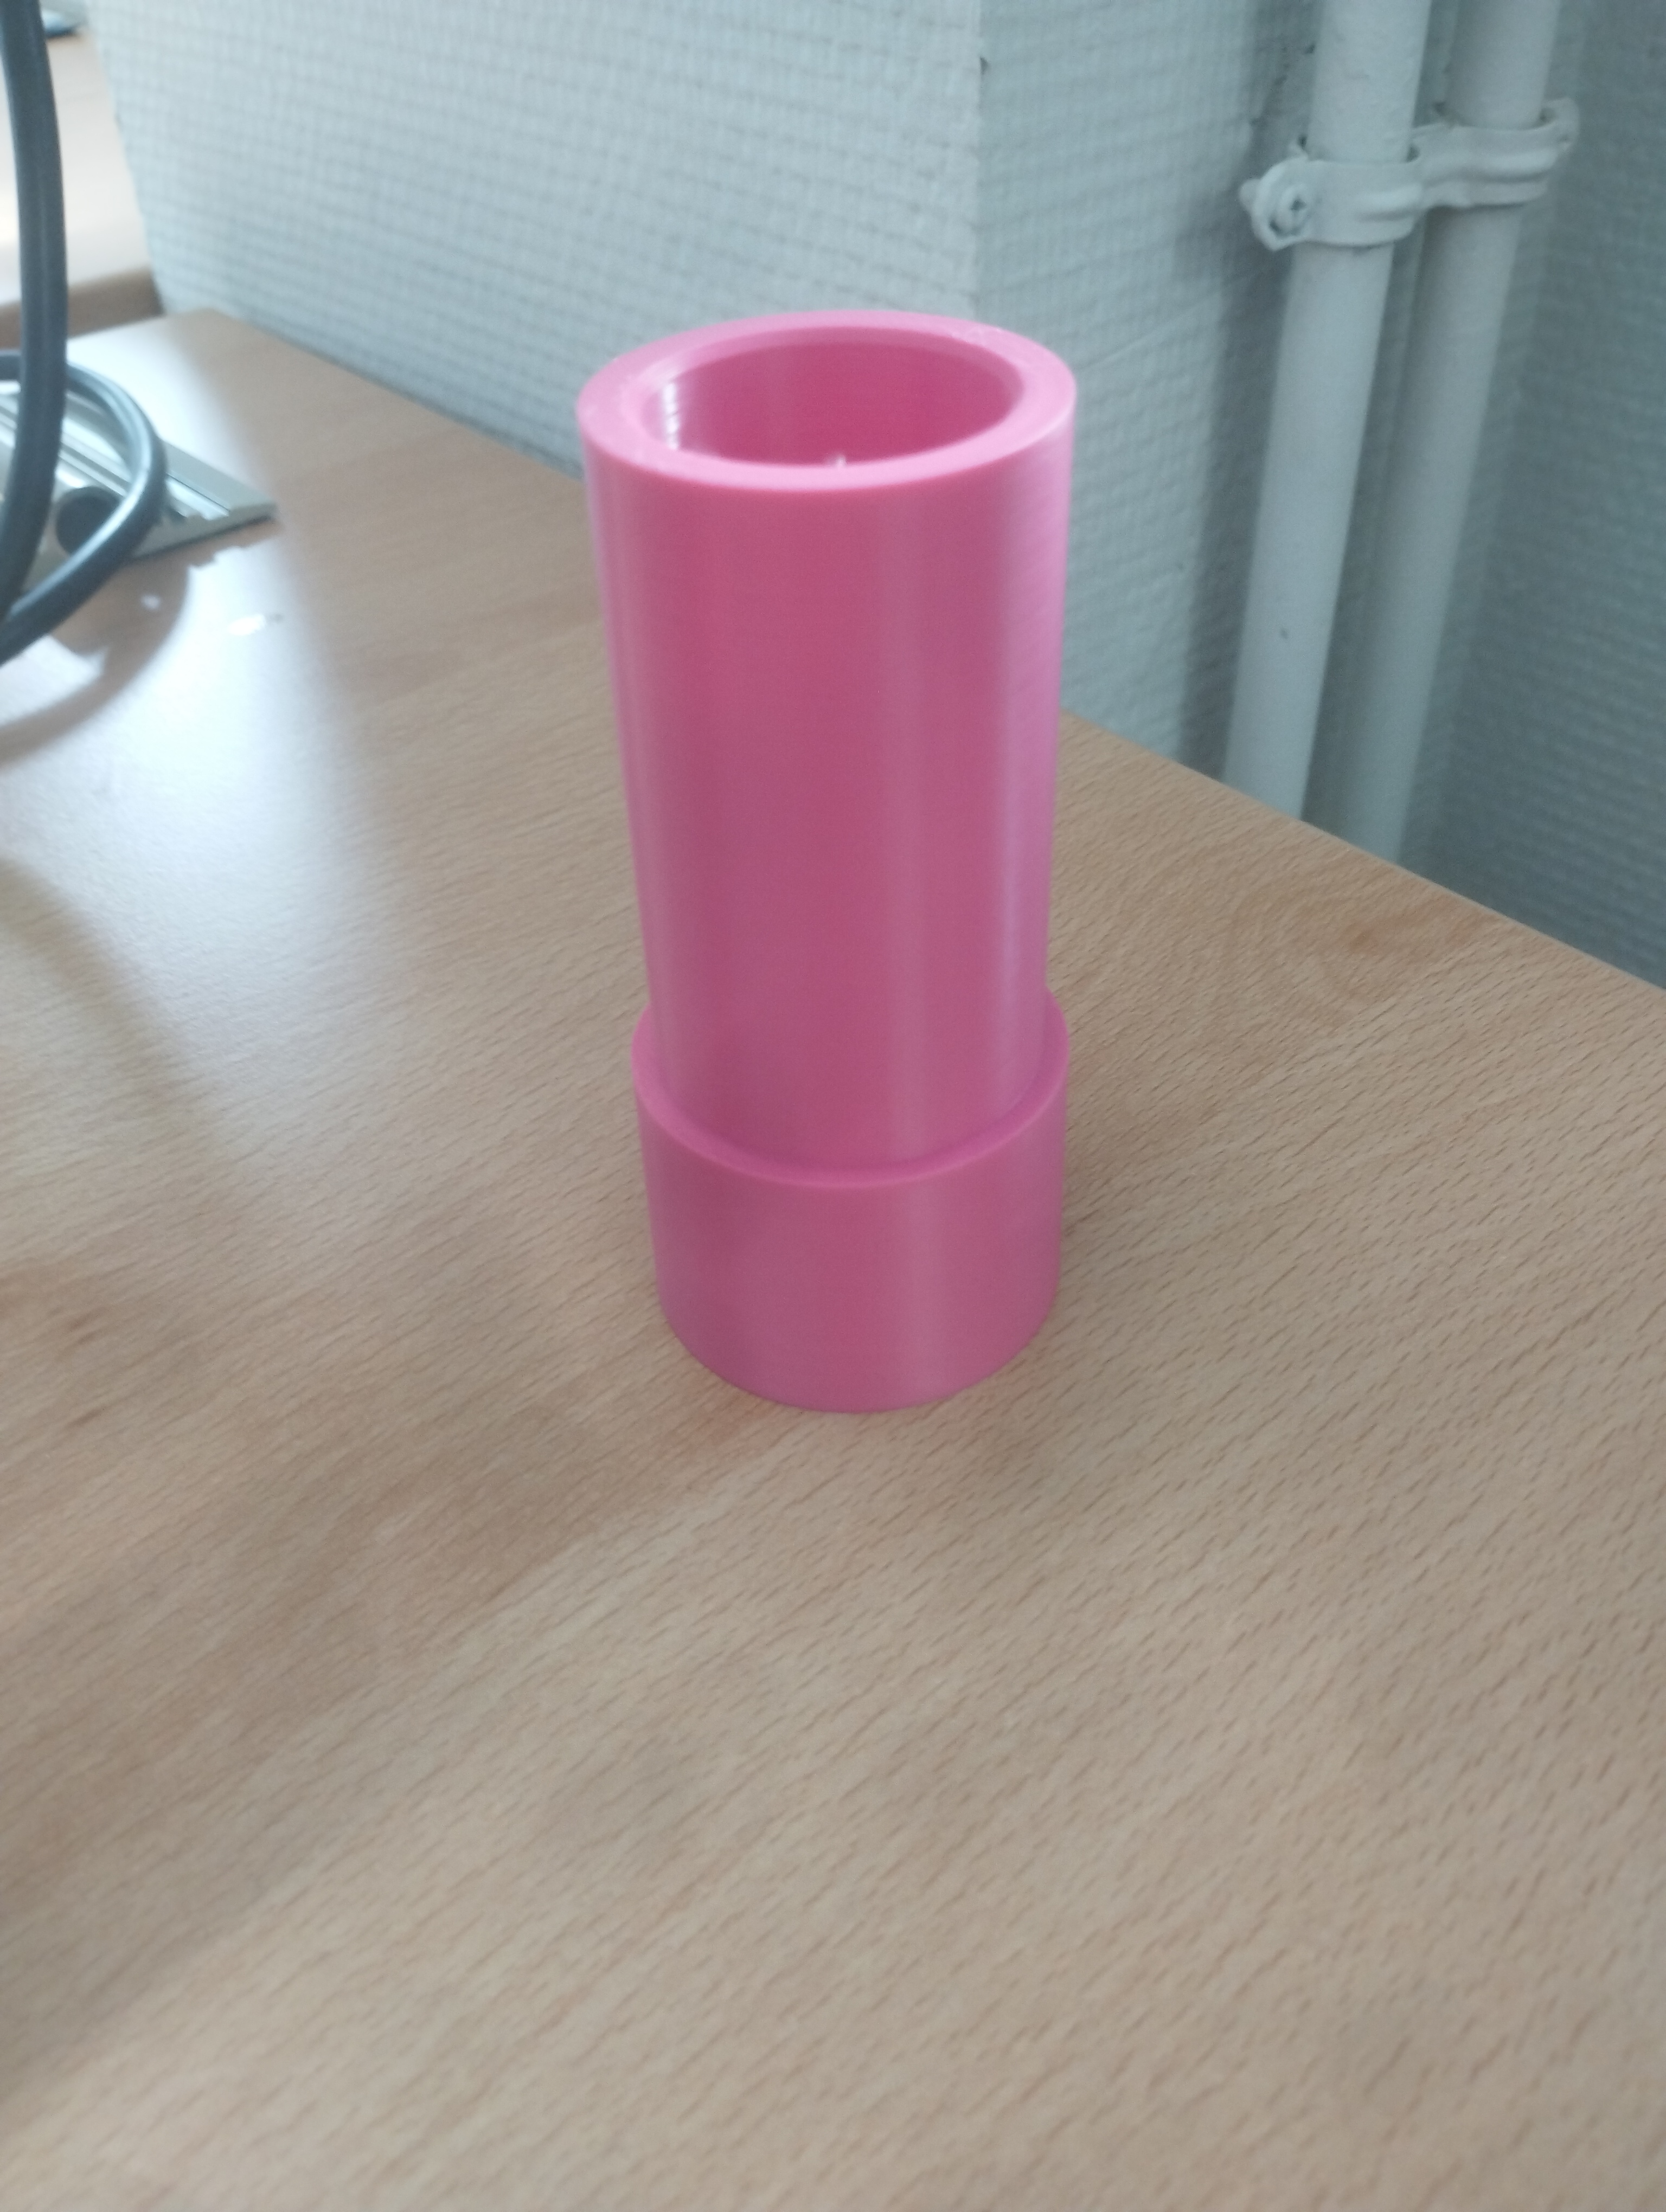
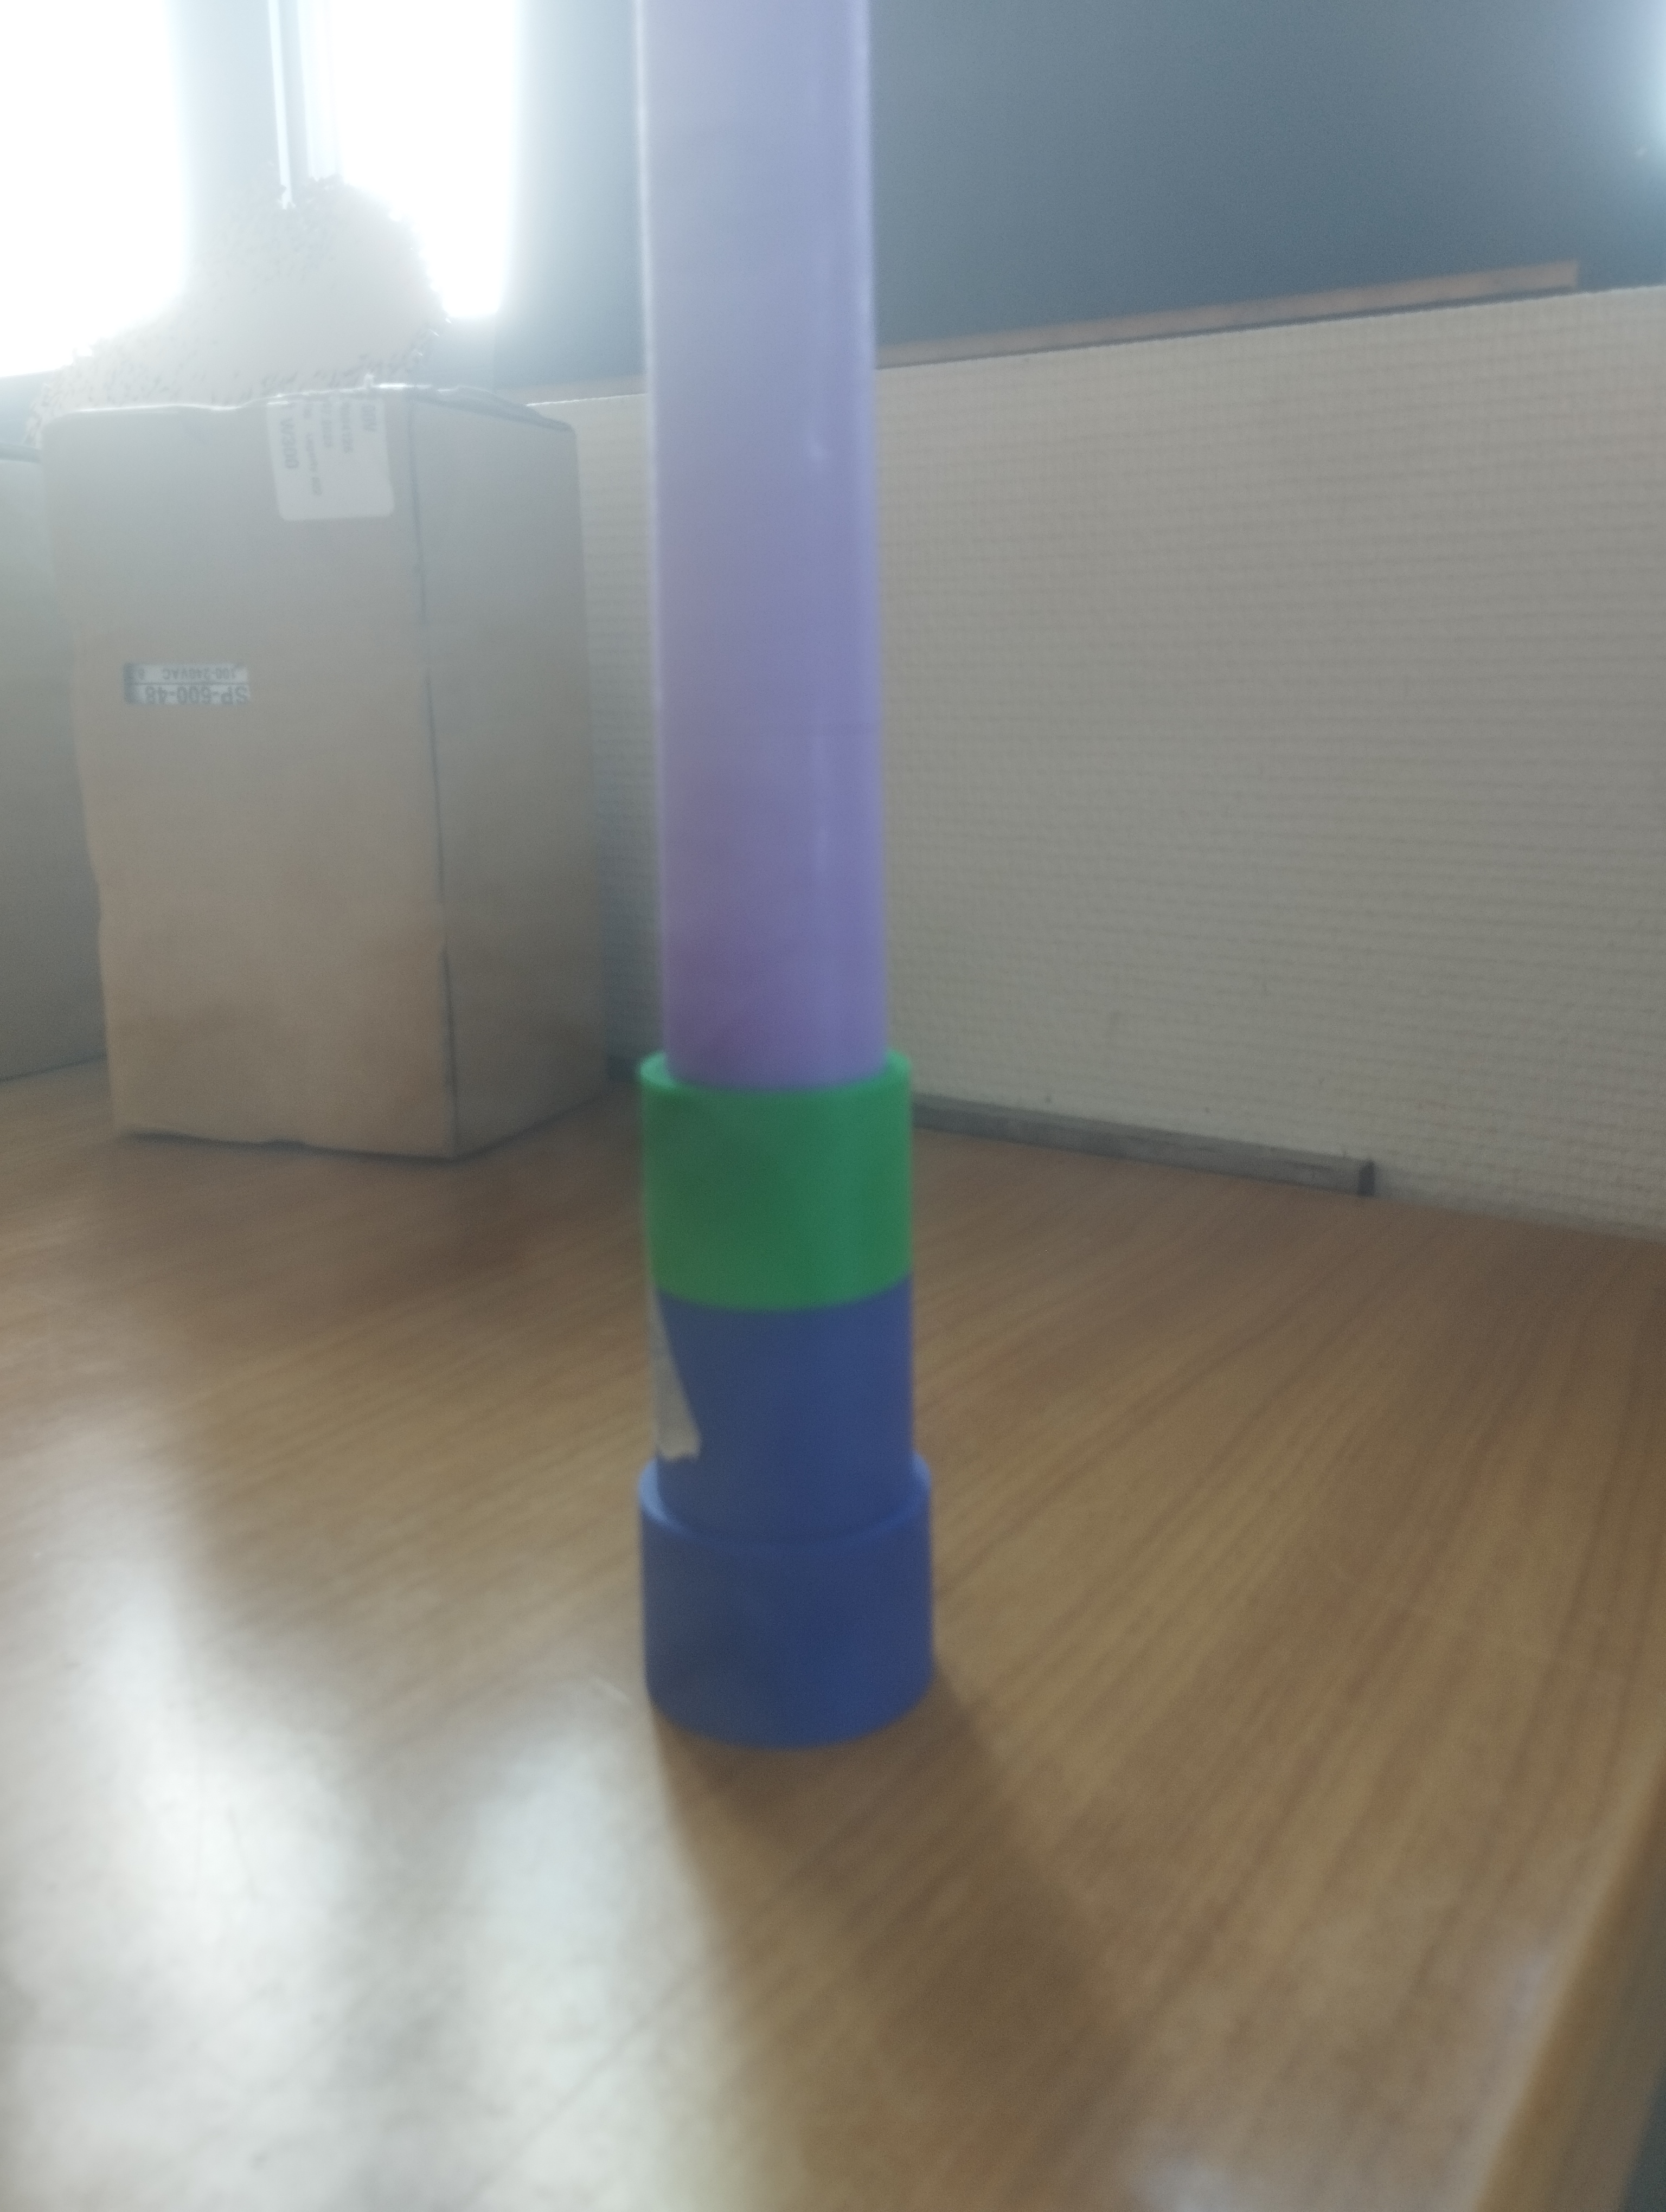
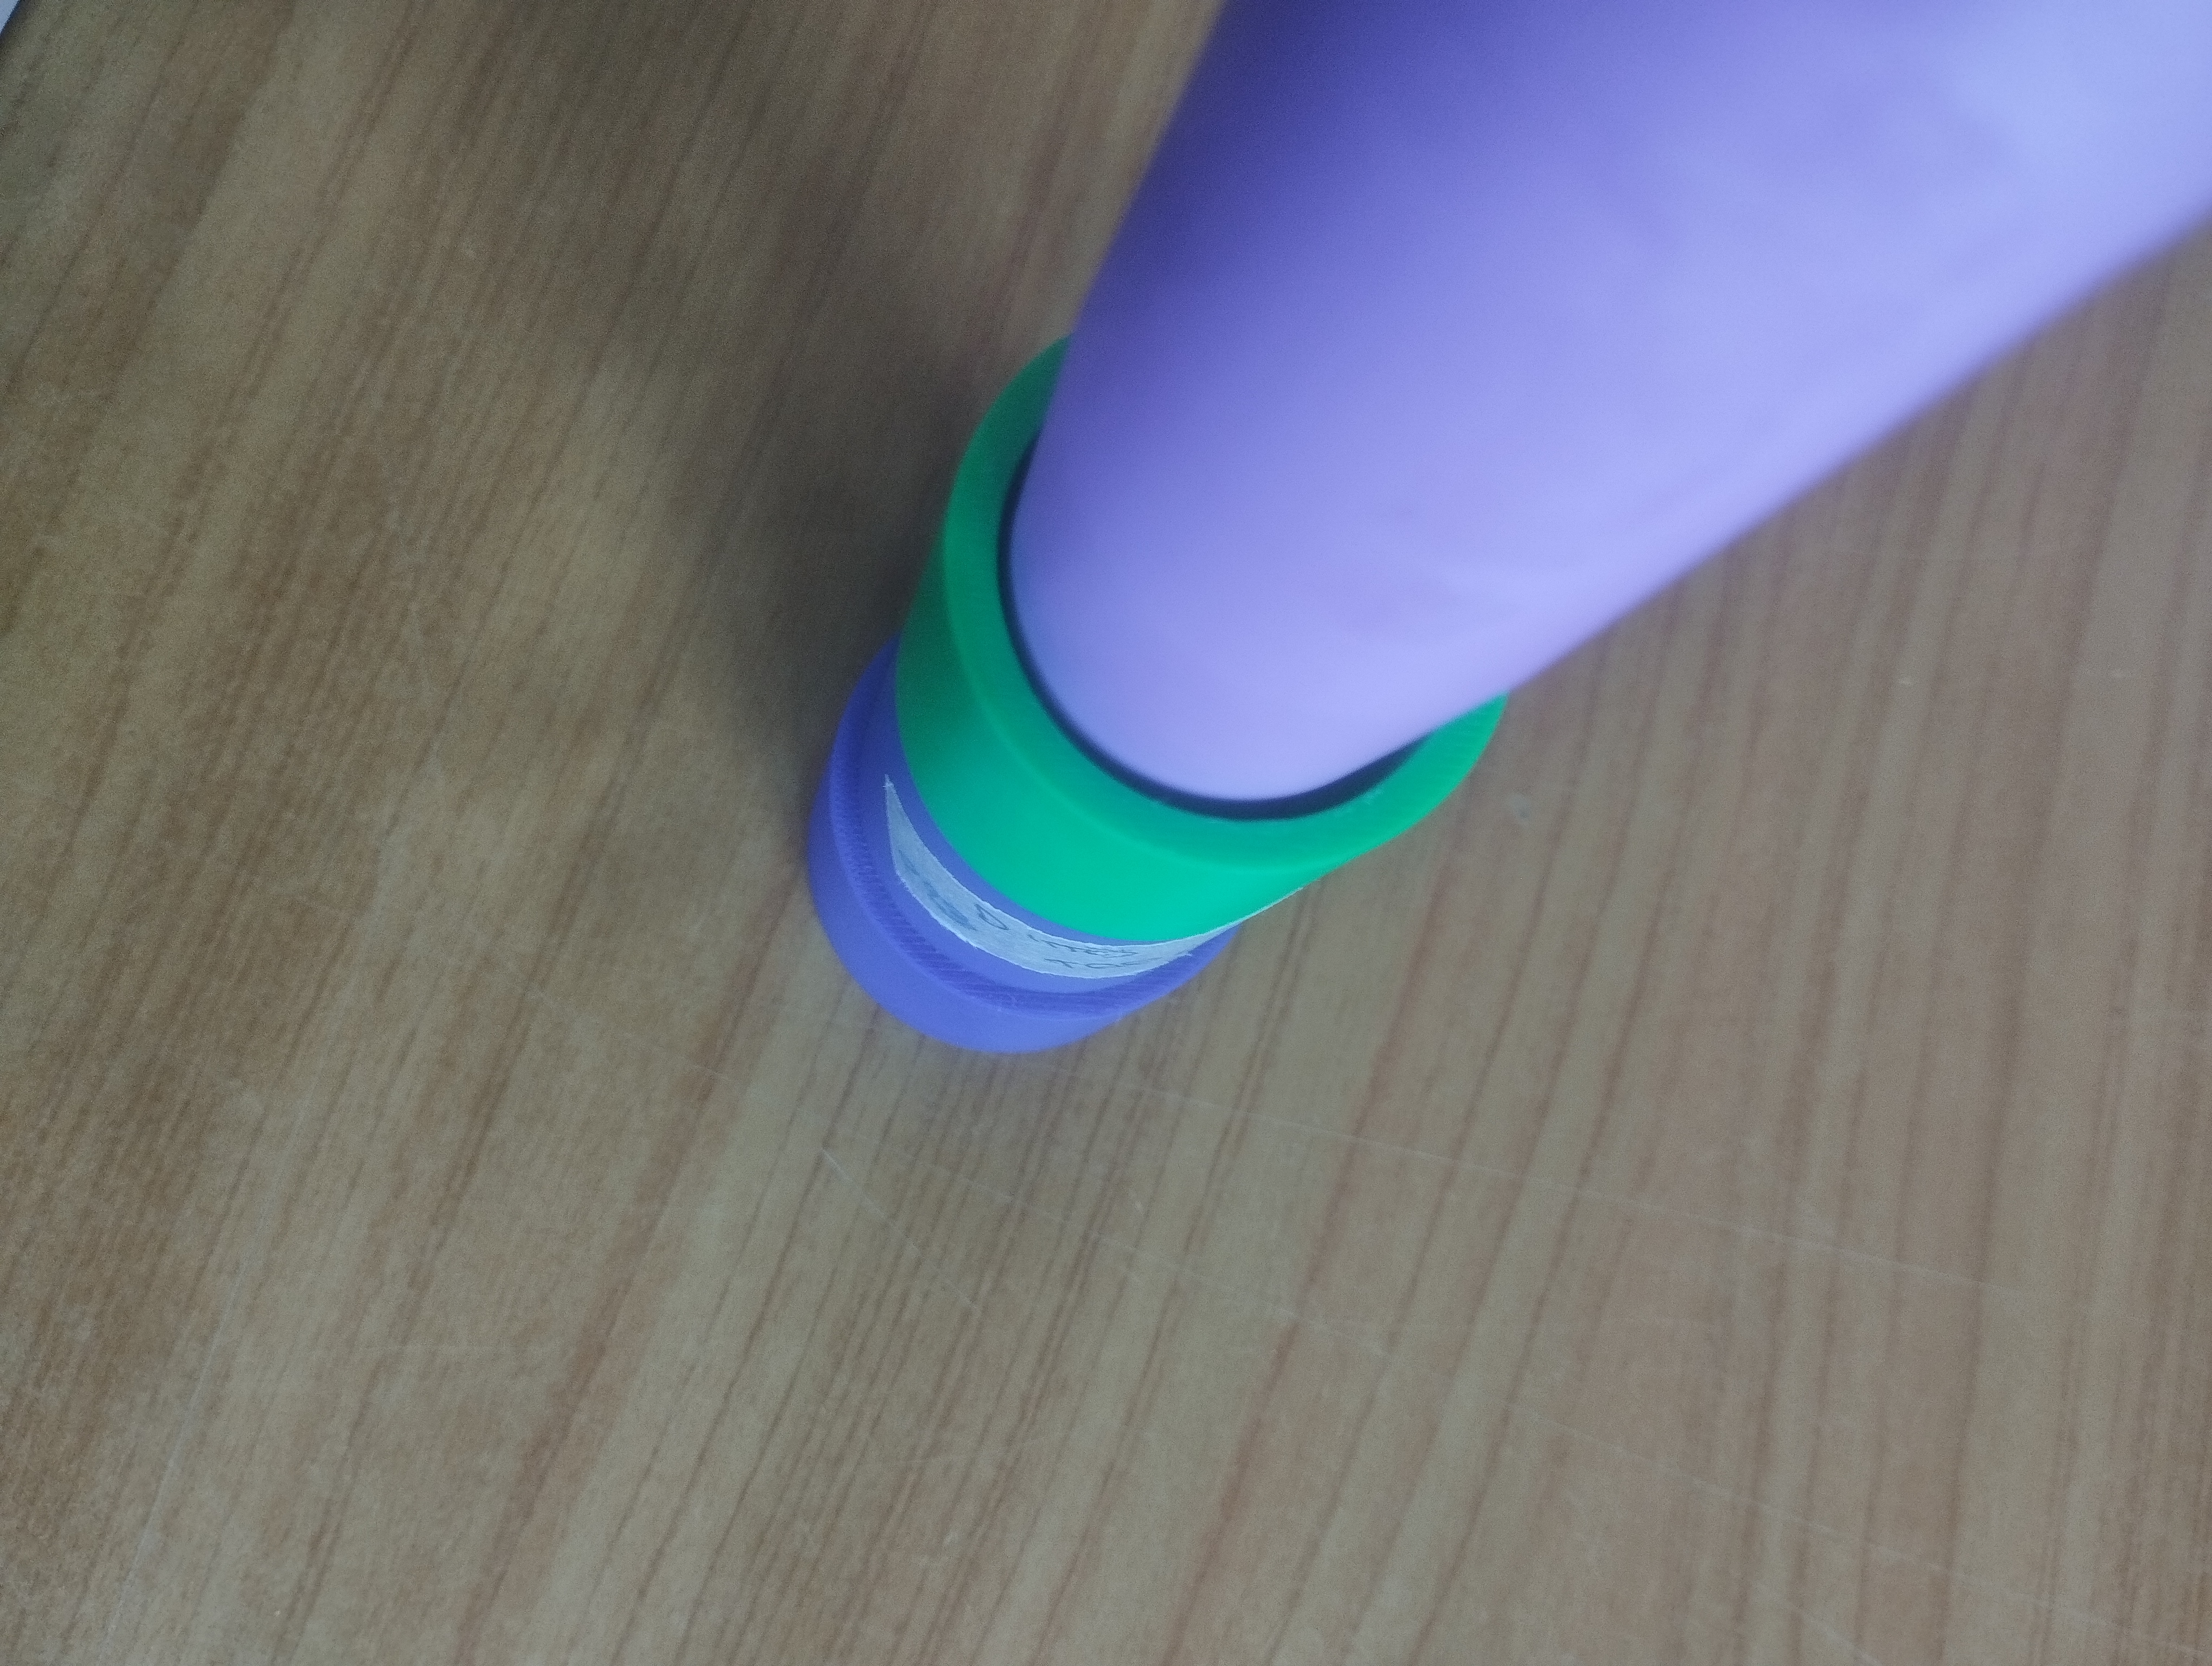
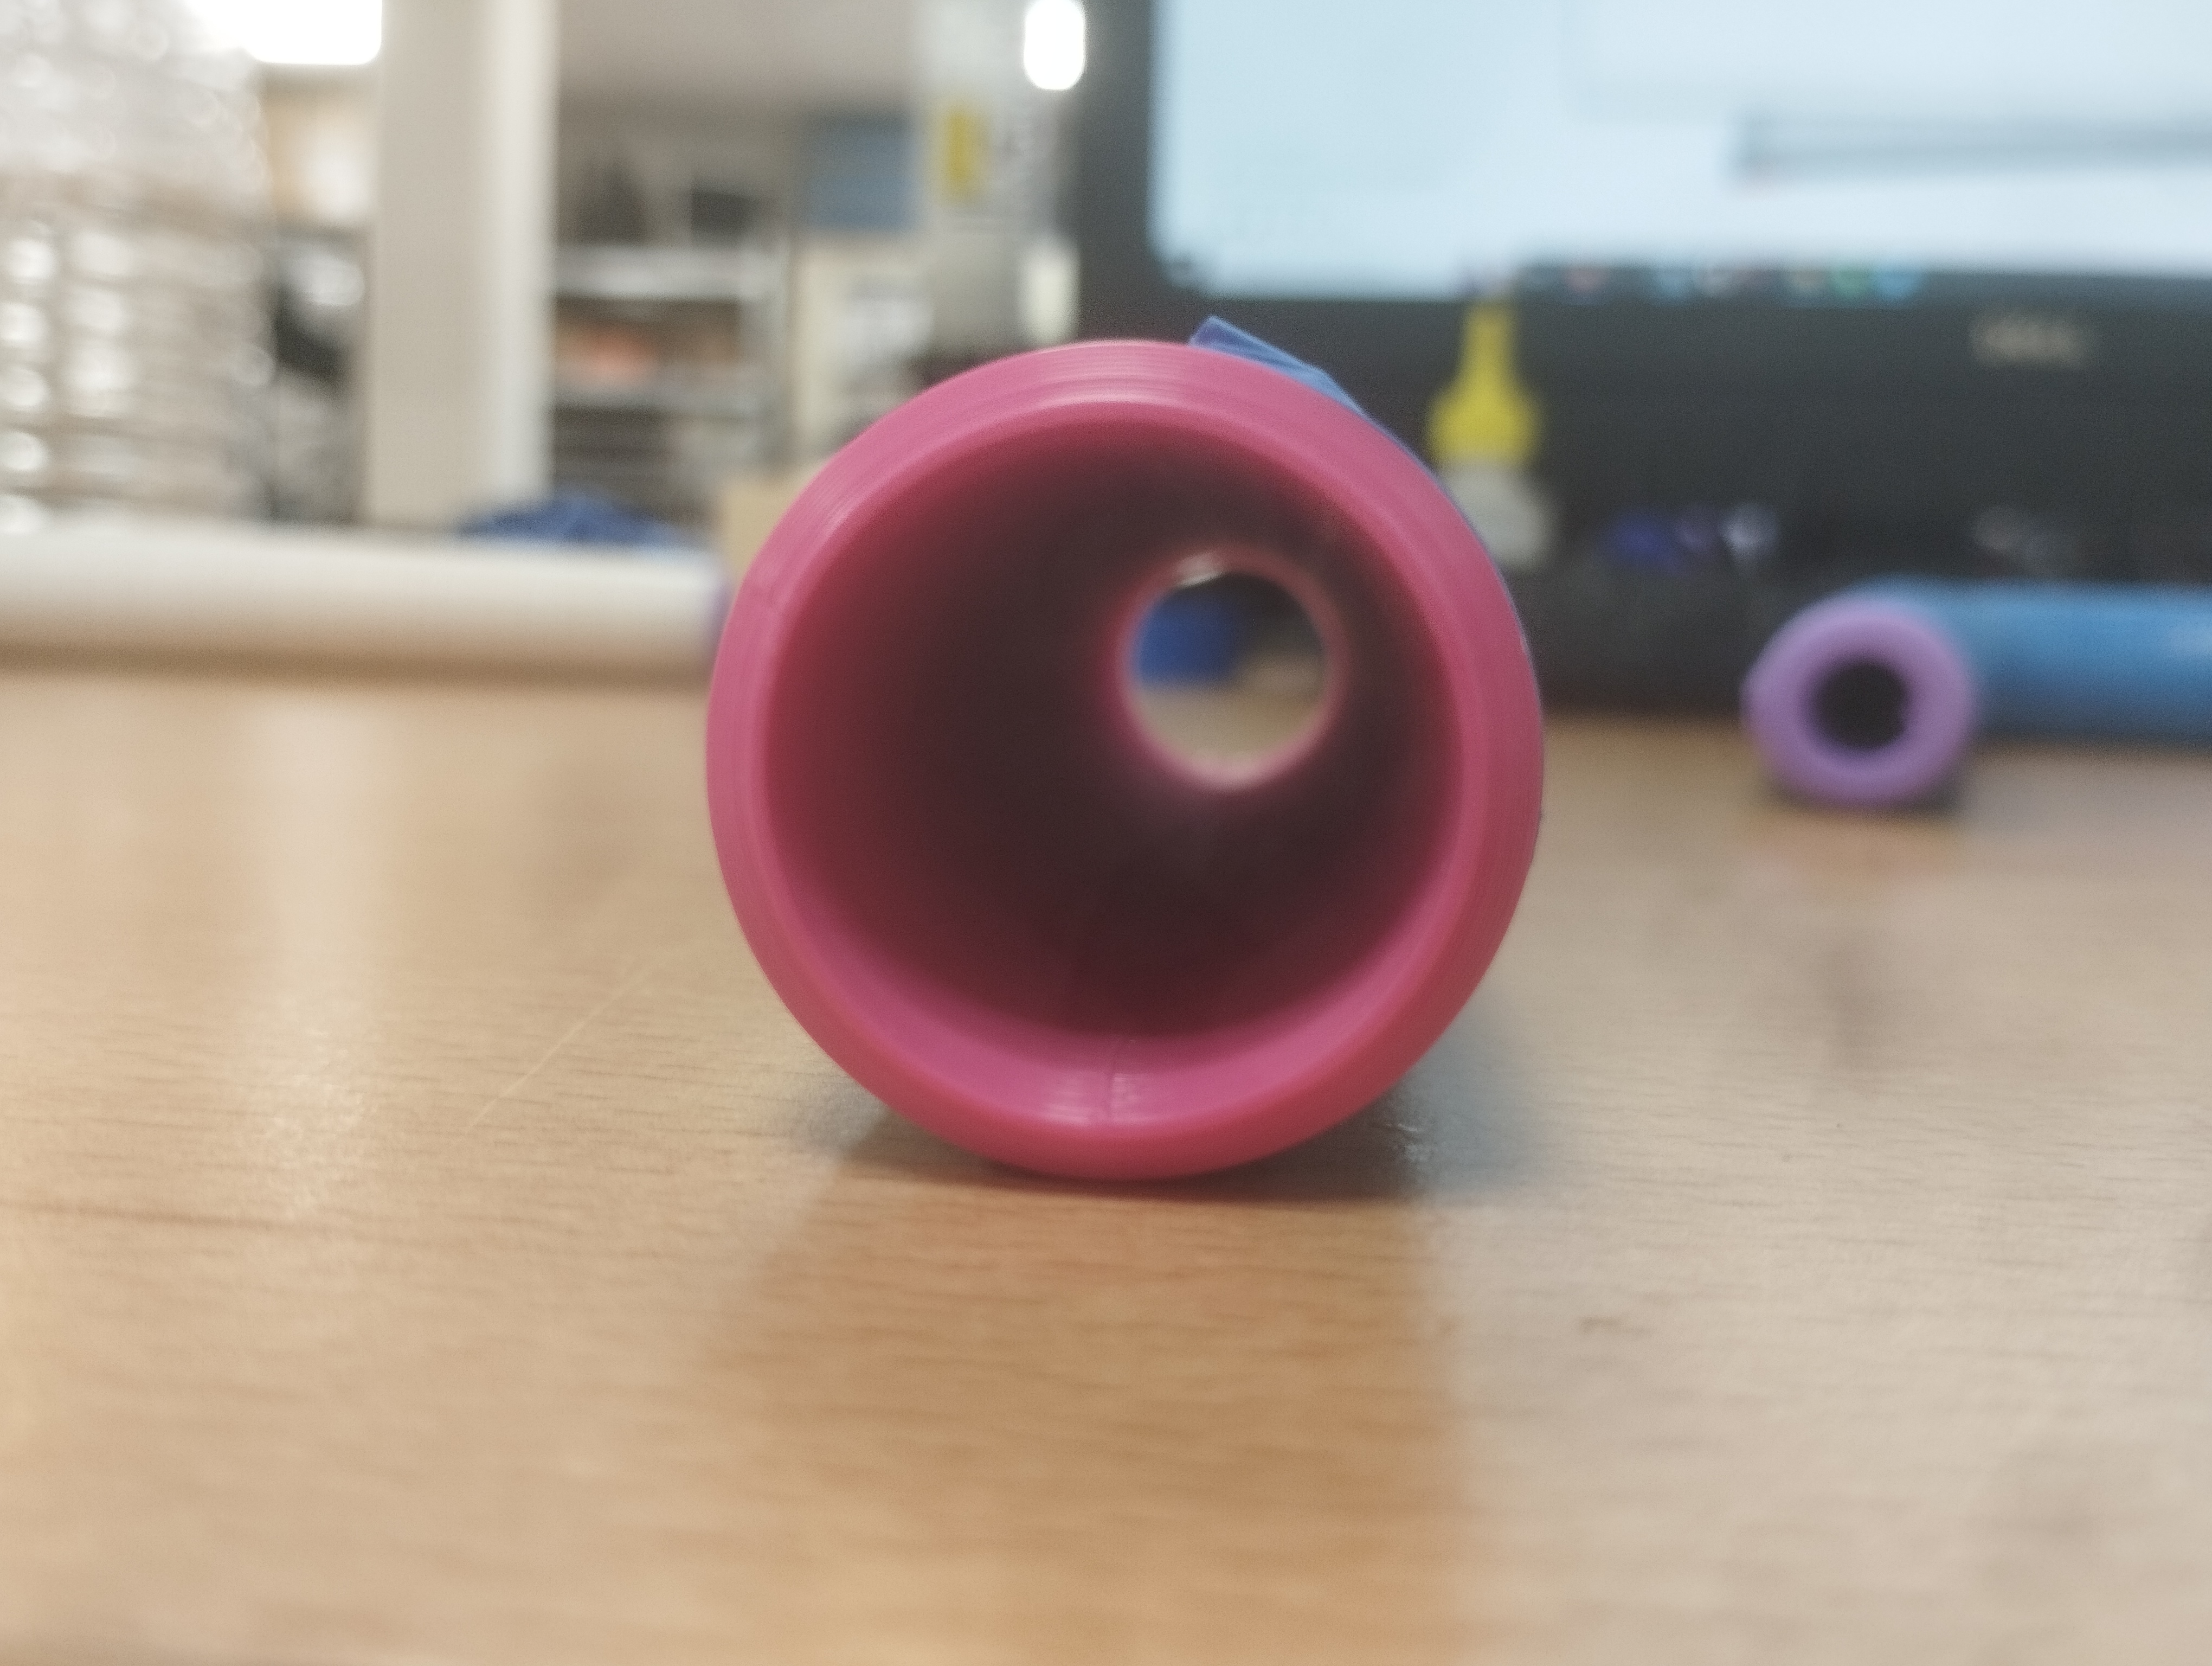
These are the bocals parts done, the pink it's the adjustable and the violet is the fixed. We can also see the differences between them.
Then i have waited some hours and than i decided to put some water inside the adjustabe and then i blew into it to see if water was coming out. The result was that there was some water coming out from a glue point, it wasn't a problem because the bocal part, like the full instrument, will be competely covered with tape, so that little hole will be covered too. But, after the experiment, i notice that that part wasn't strong like before the experiment, so i decided to aplly a little pressure to check if the glue was still working. The rusult? The piece broke exactly in that point; probabily the glue wasn't alredy dry. So that piece was no more useful and i decided to reprint it again but not in the same way.
Using FreeCad i unite the pieces and from 5 they become 2.
This should be better because with less junction there should be also less air spreading. Tomorrow i will check the result.
Meanwhile i have finished serpent. I made a gluing session every hour and now it's done 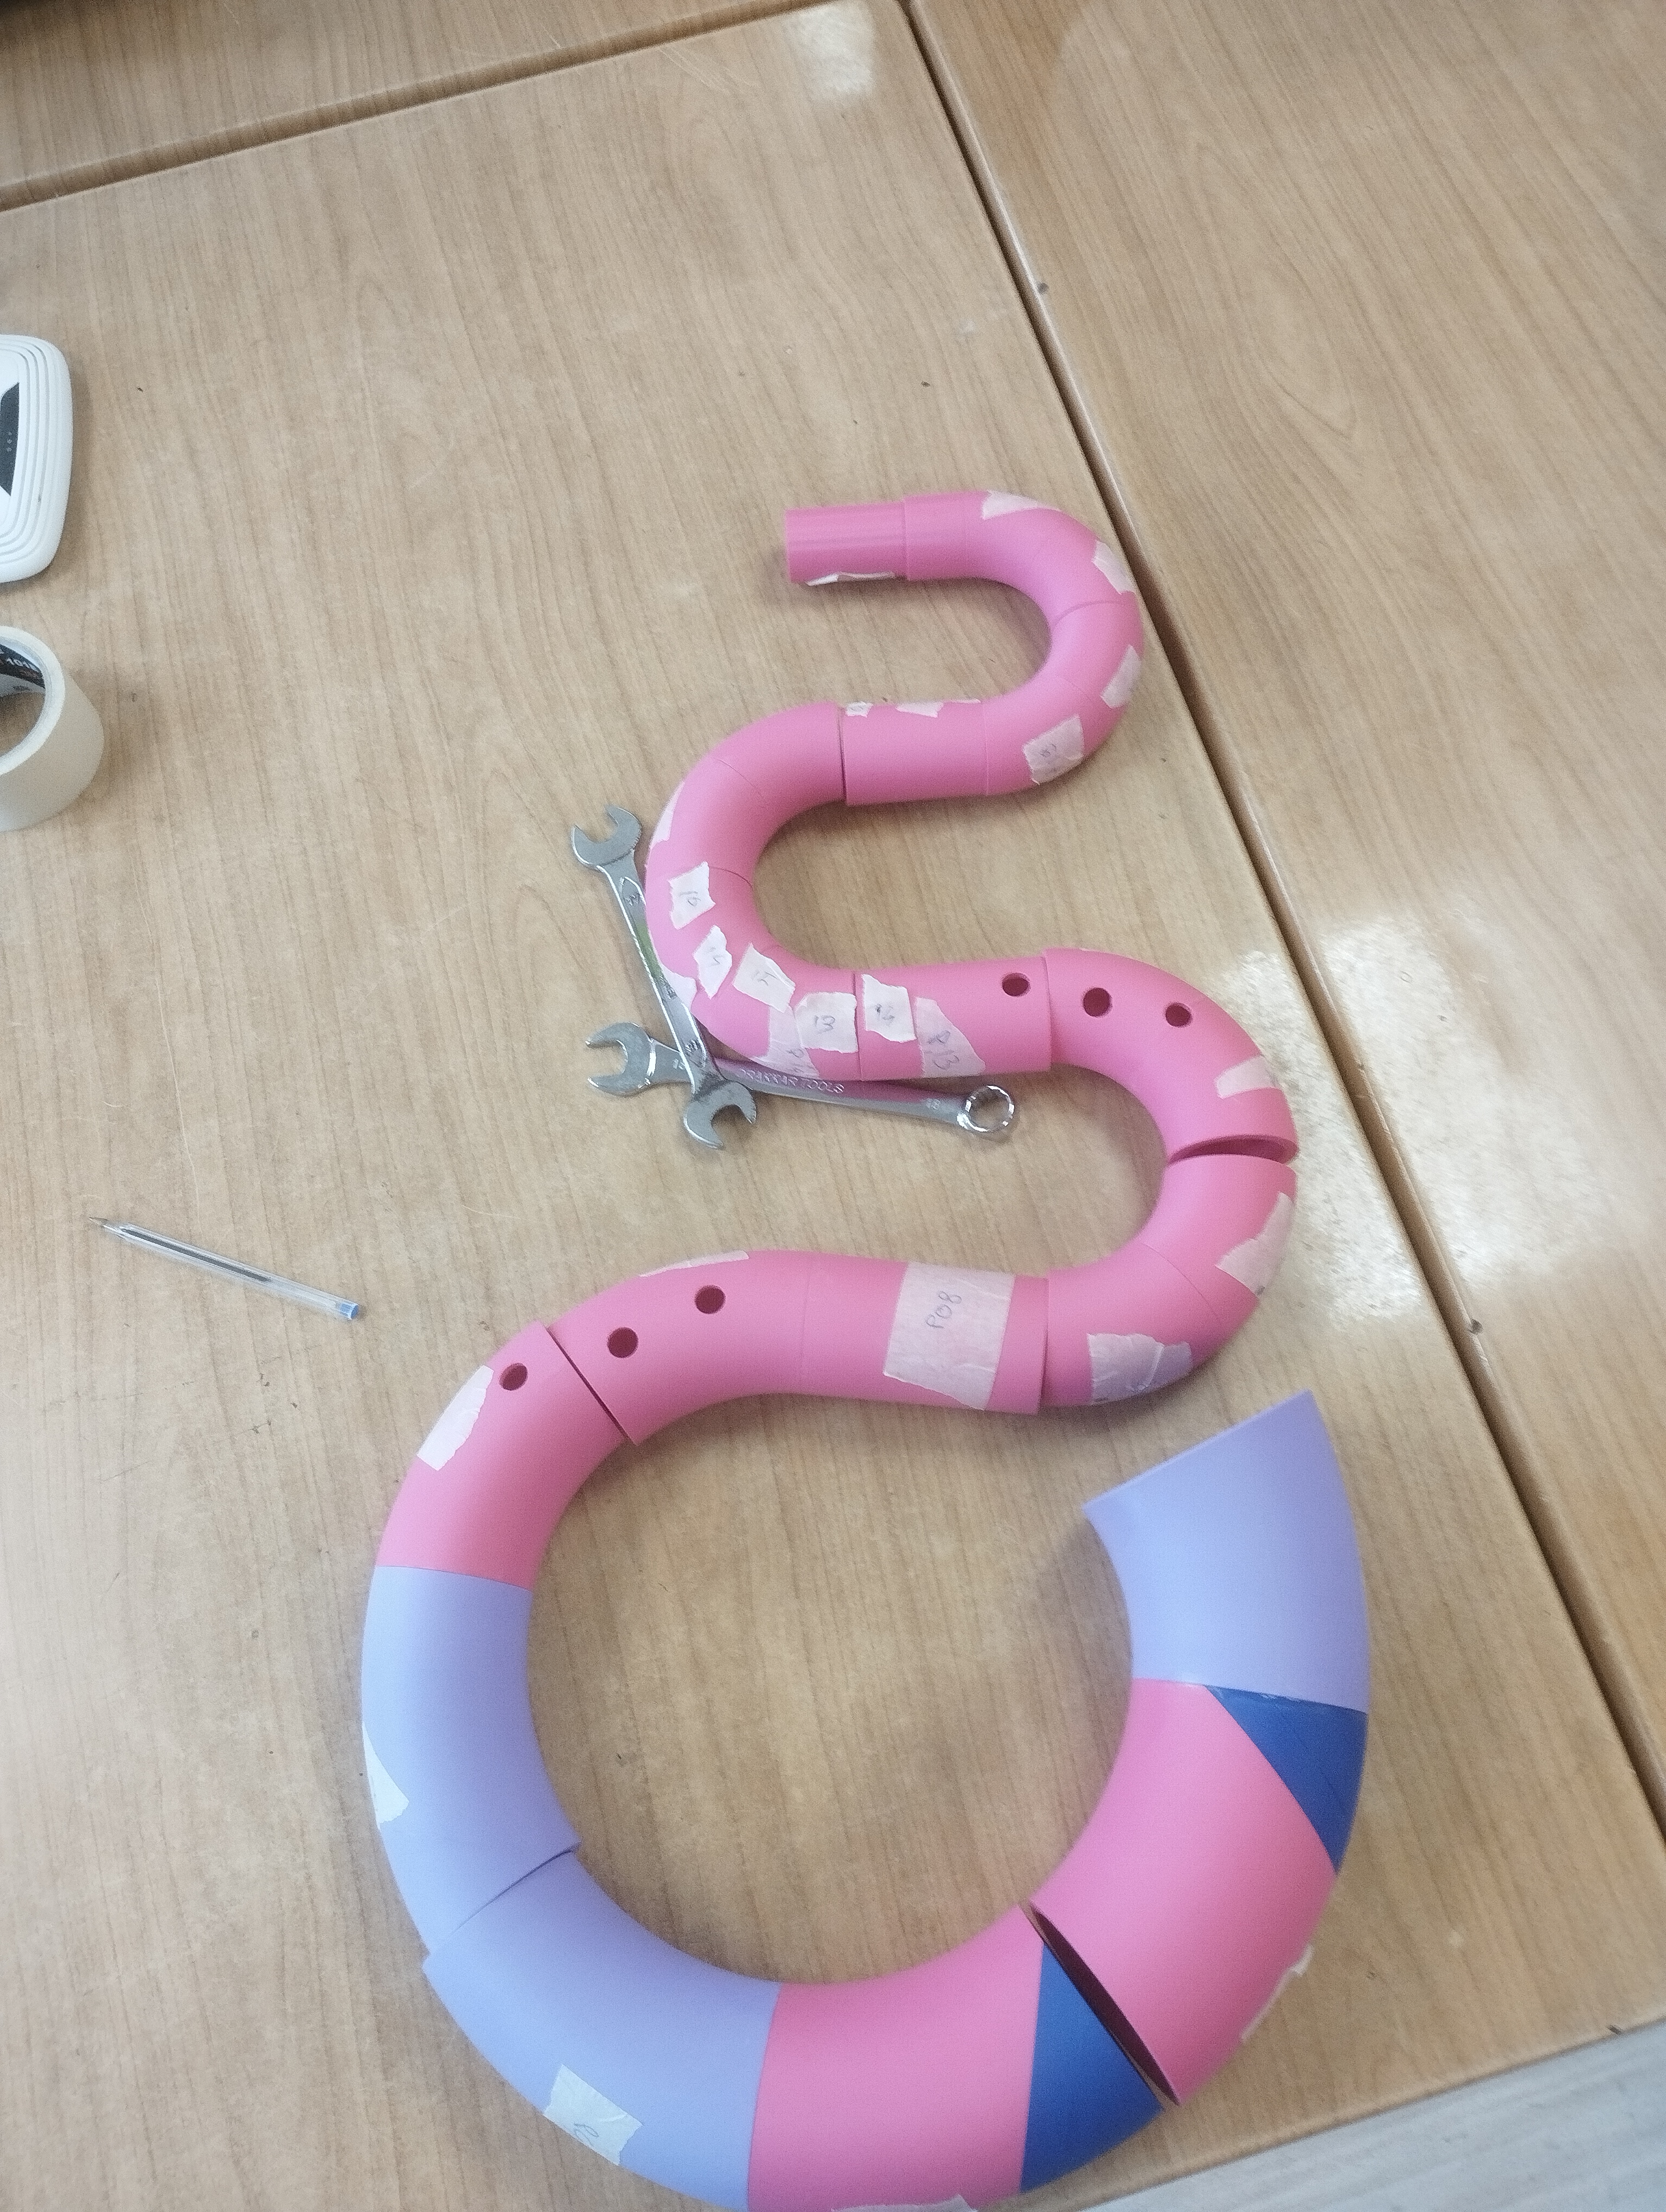
These are all the phase of the joining and this is him finished.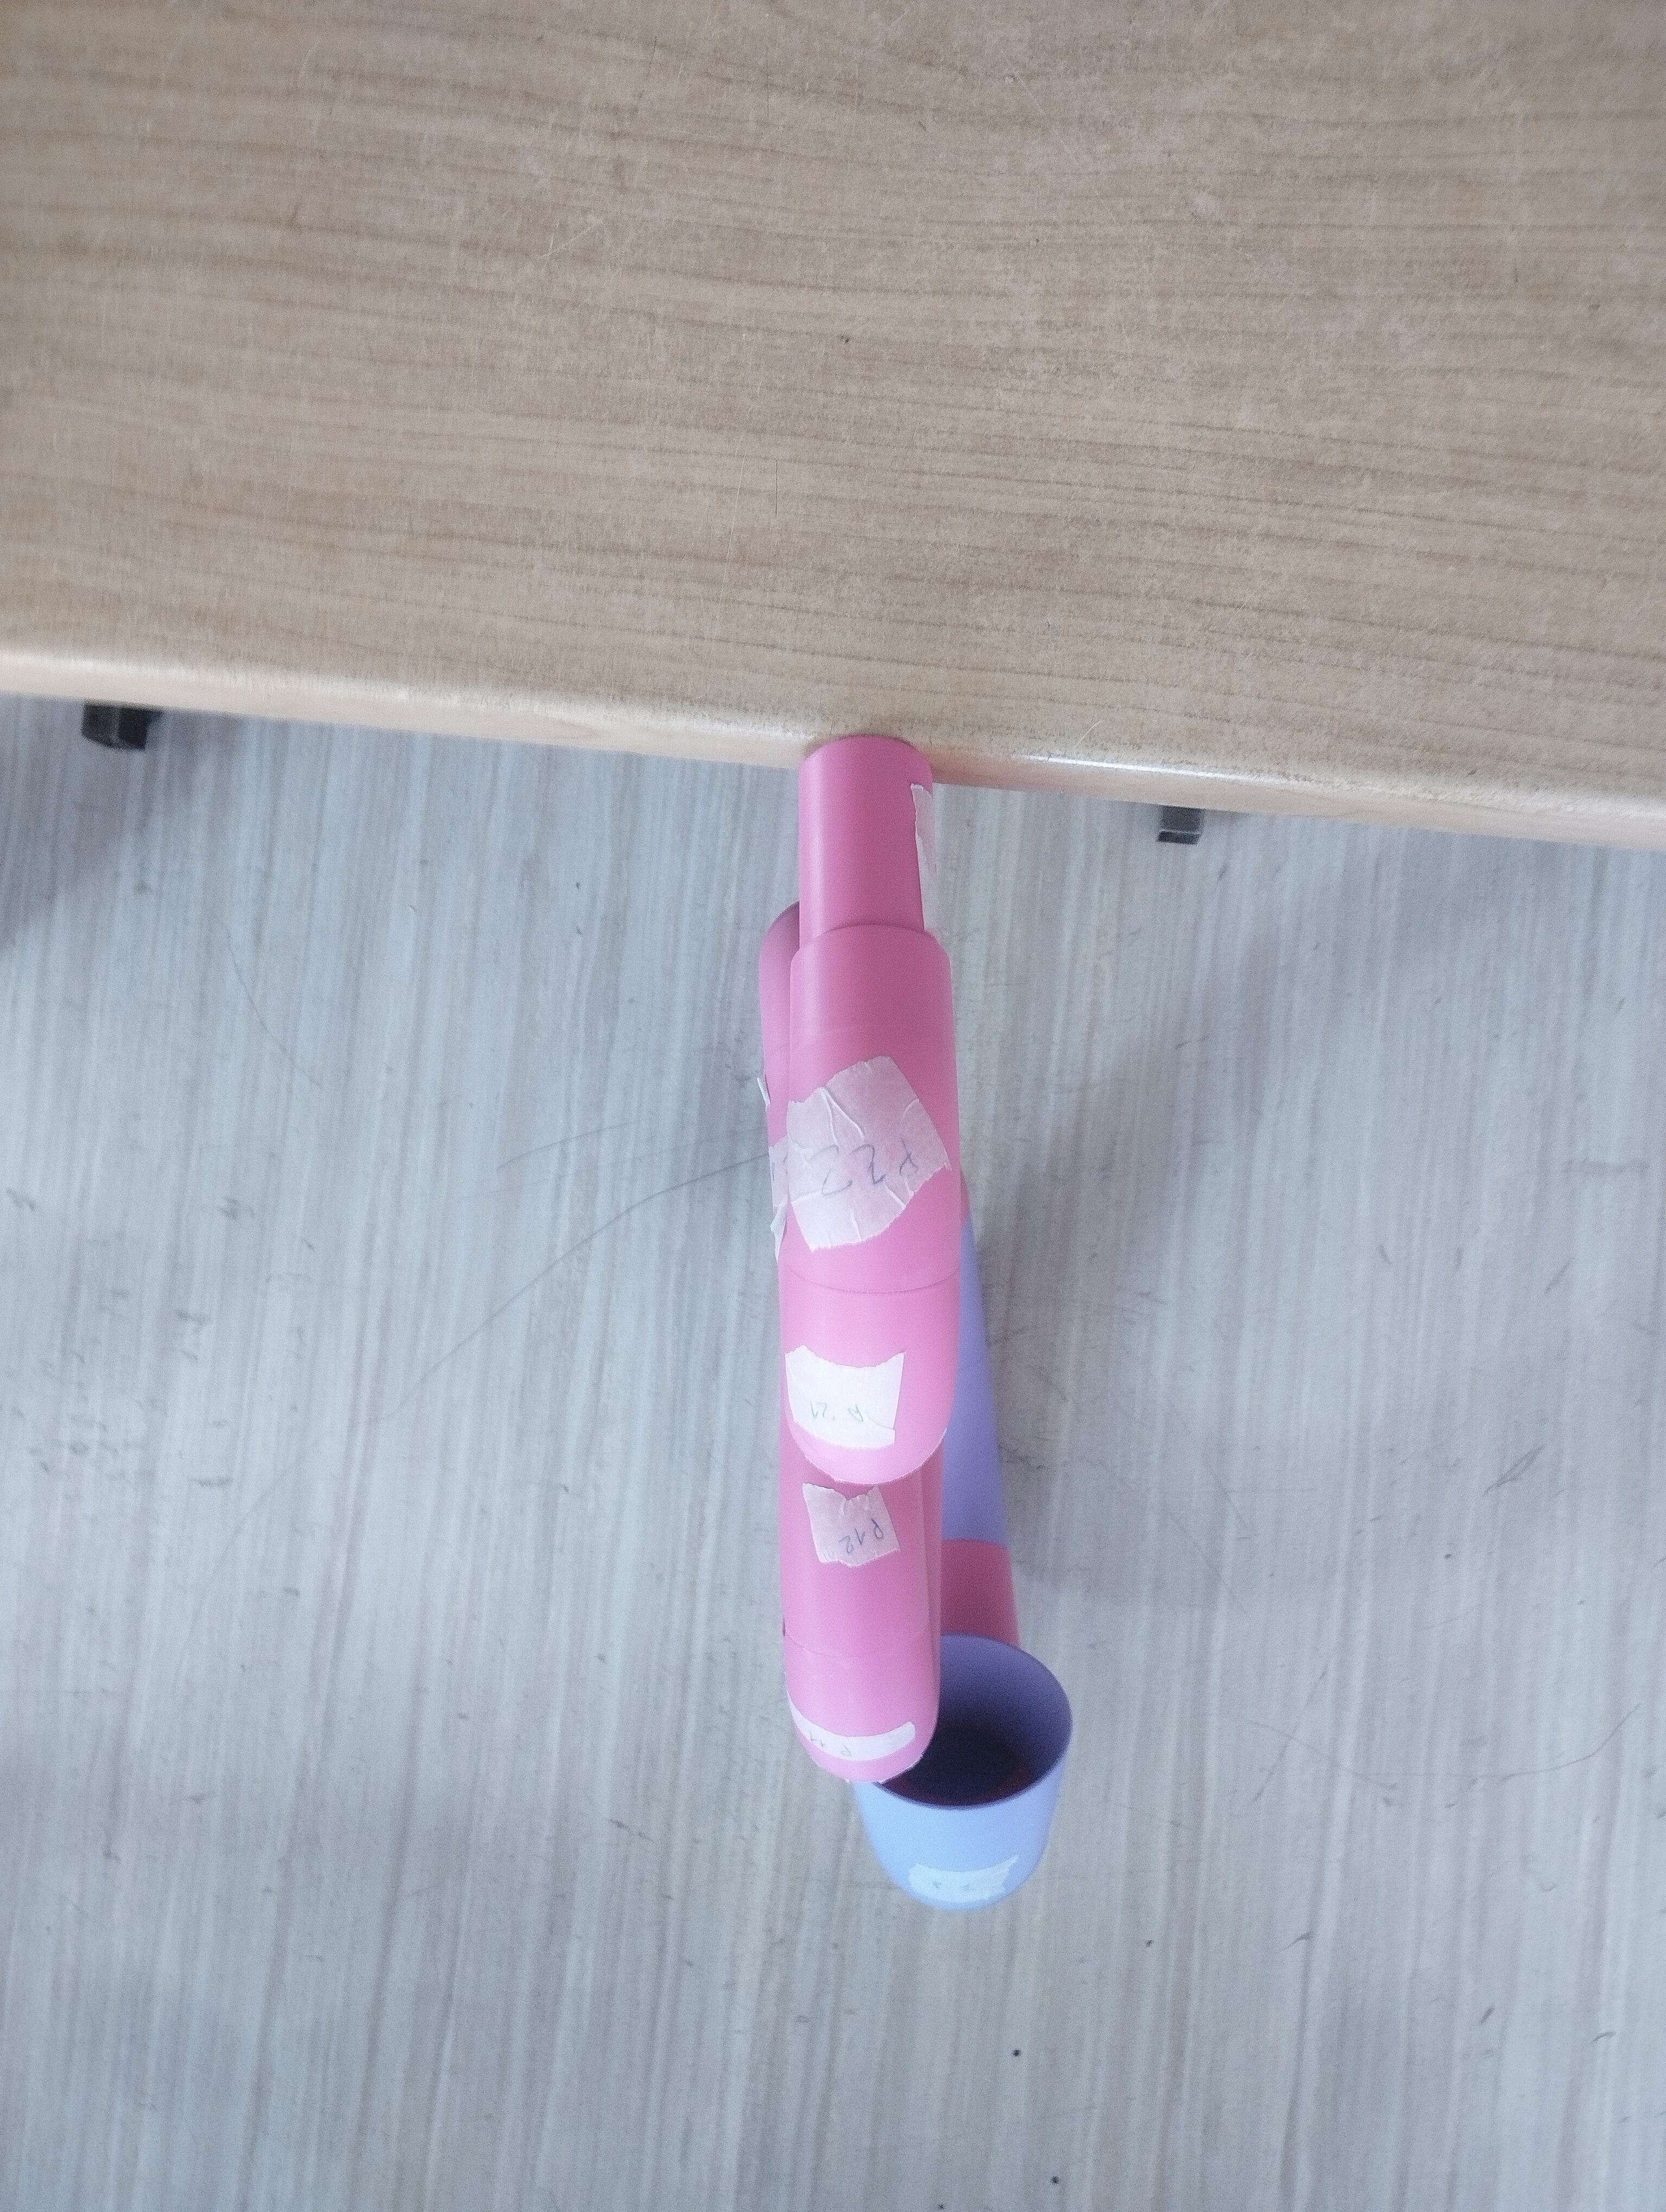

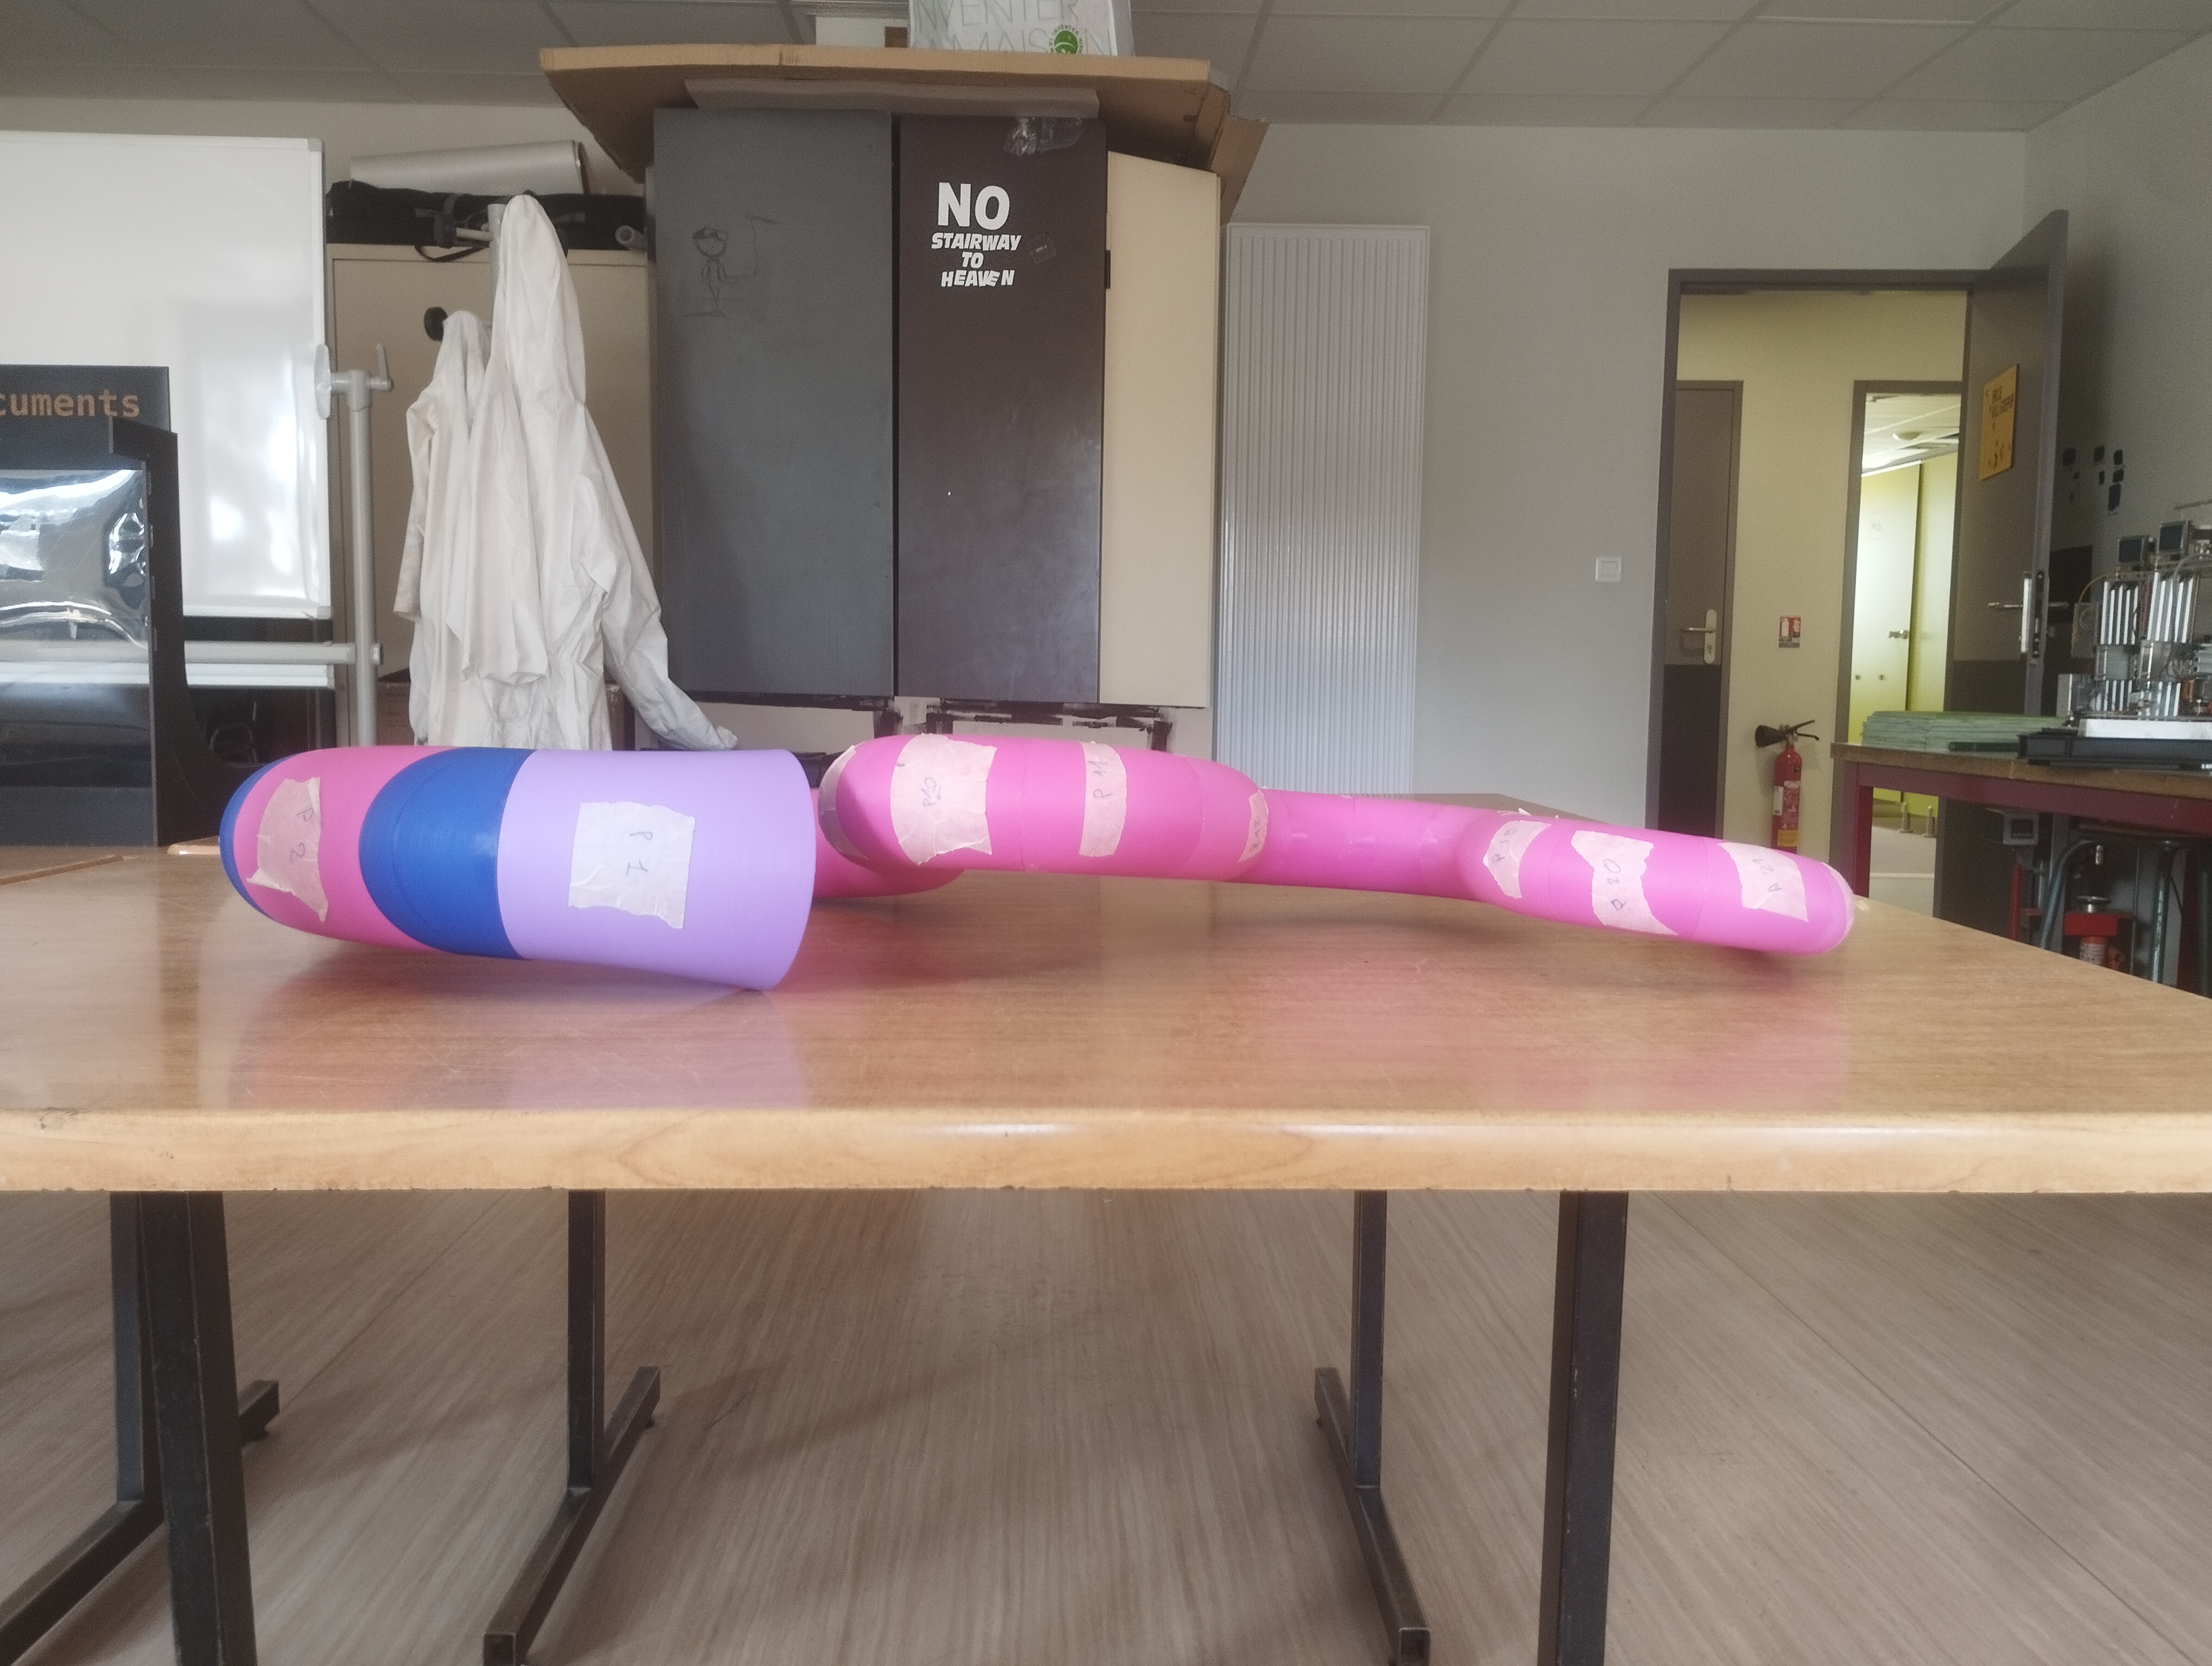
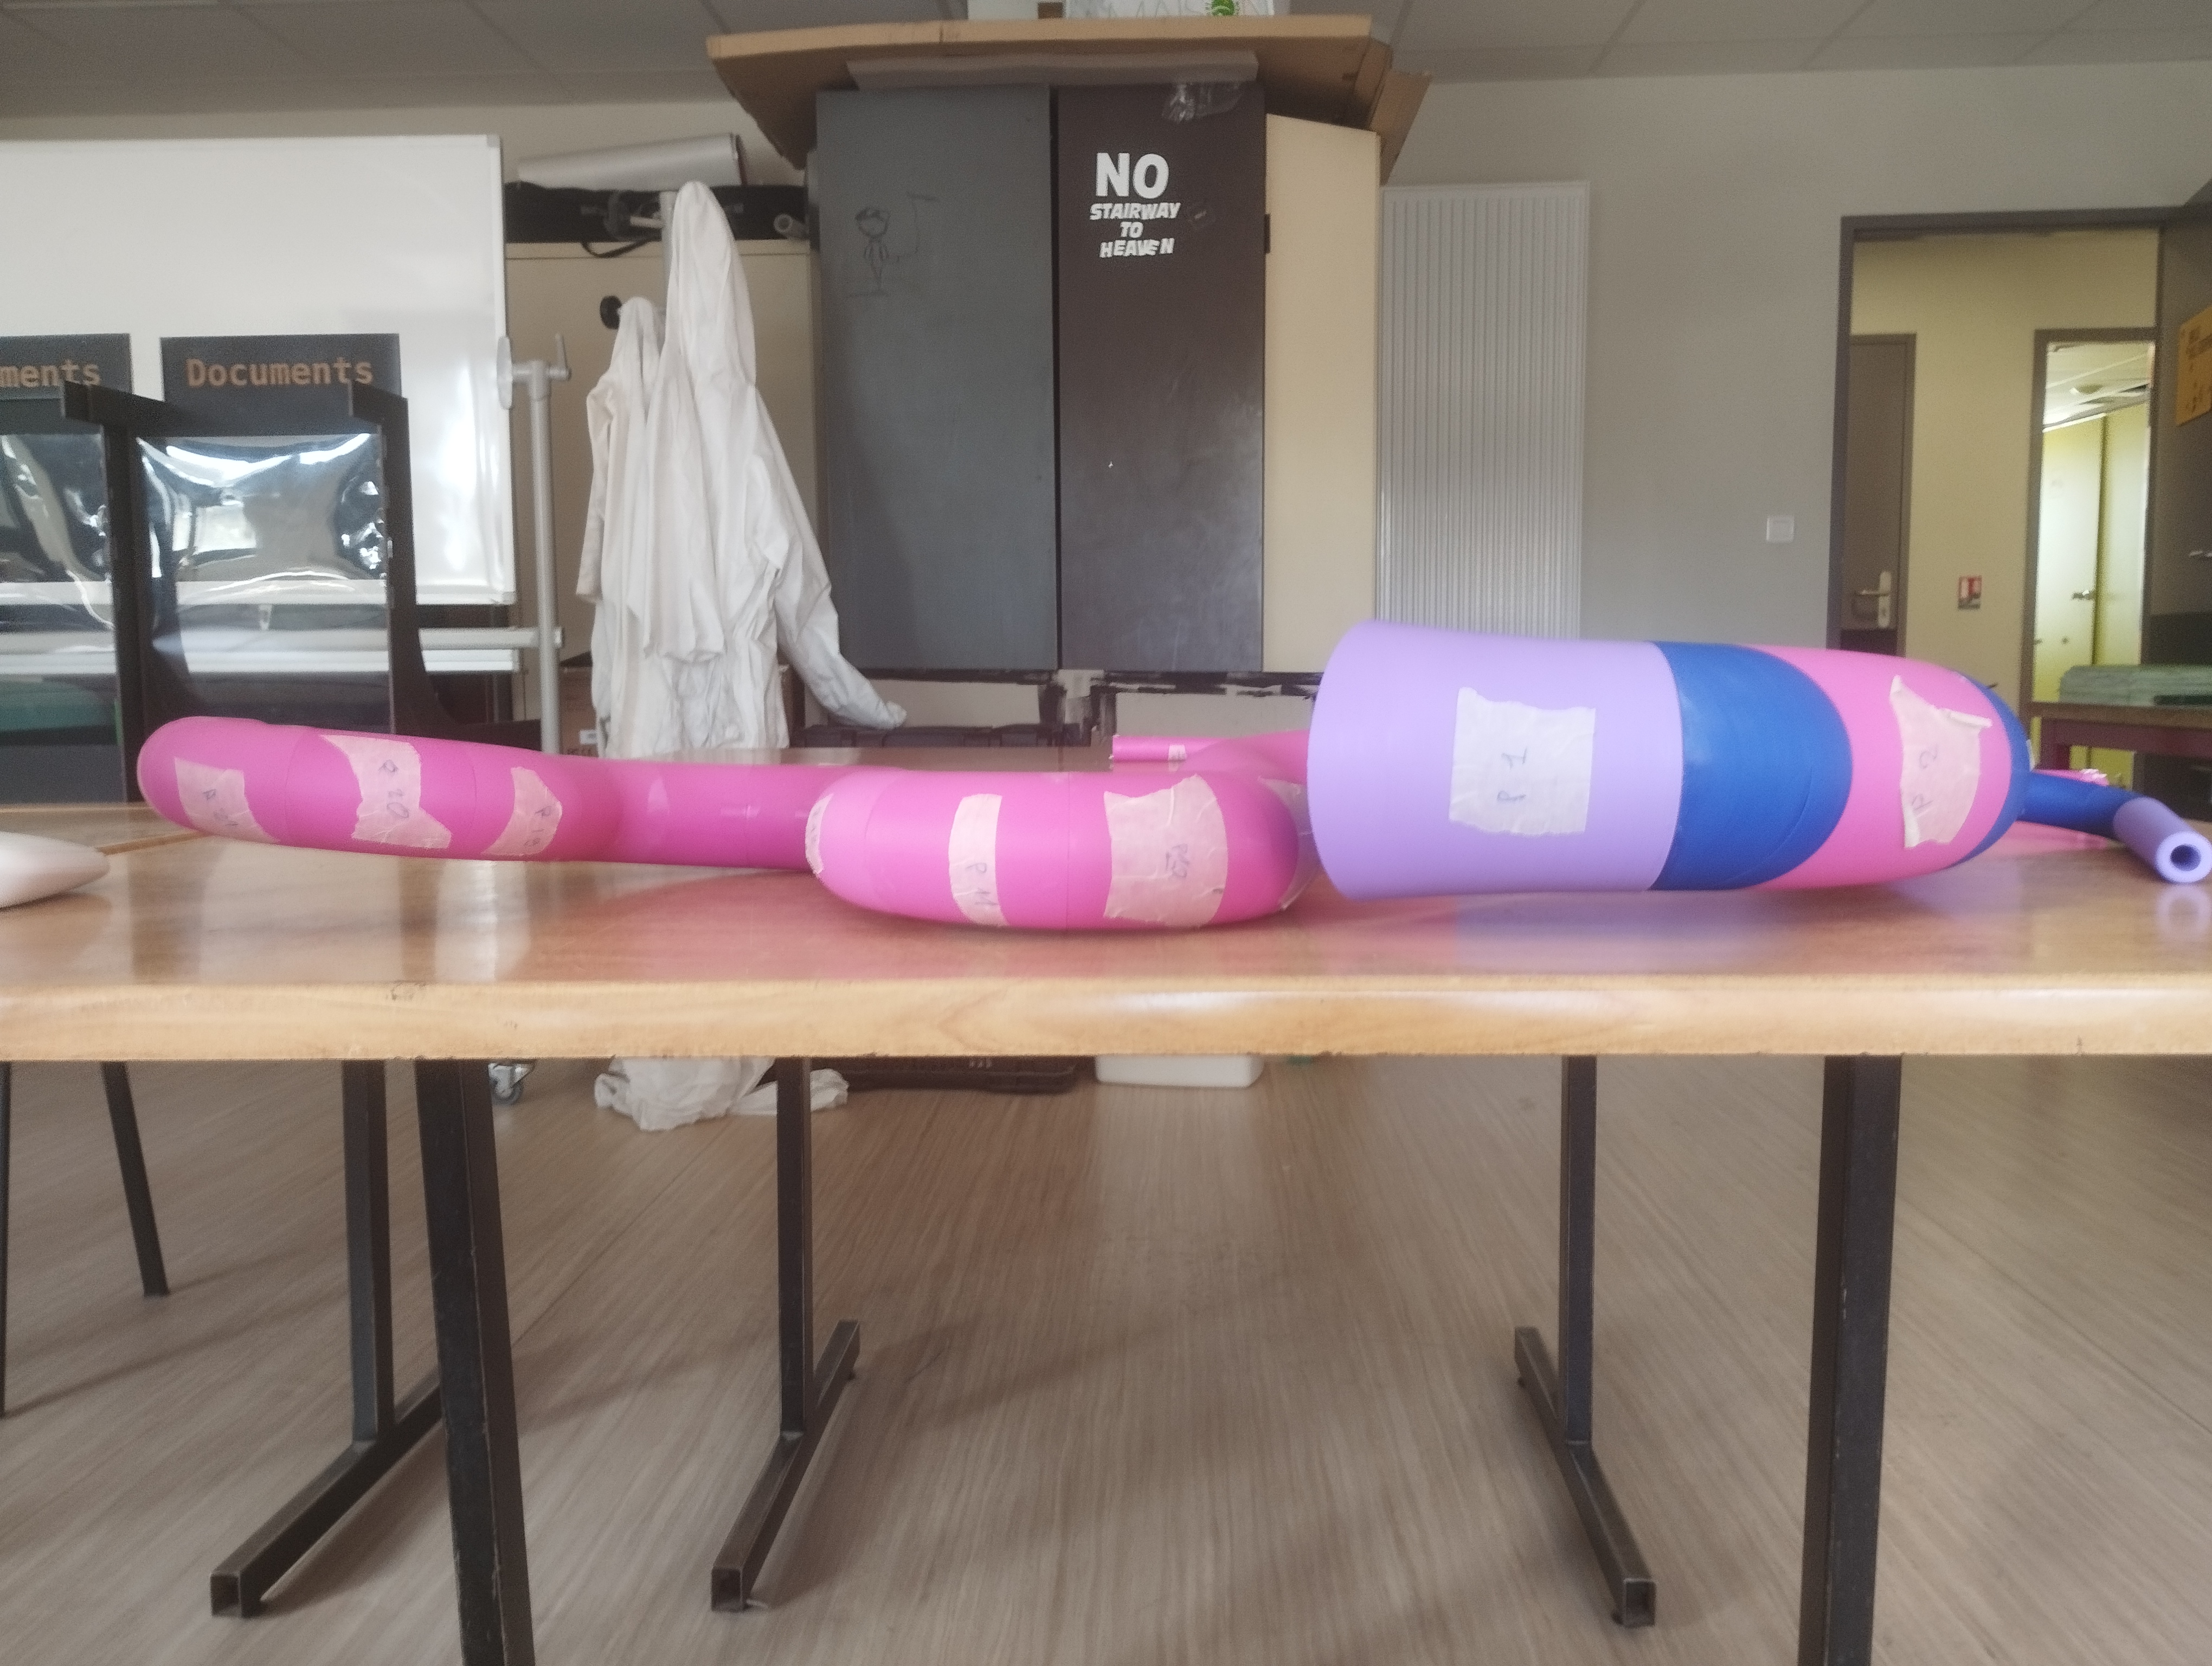
It is not completely straight, i don't know if it is normal or if it's not, or it shouldn't be like this but maybe there is no differences in terms of sound.
Last day of serpent(Pt.2) (20/09/23)
The pieces were ready but they are not perfect. The part the were in contact whit the support are ruined.
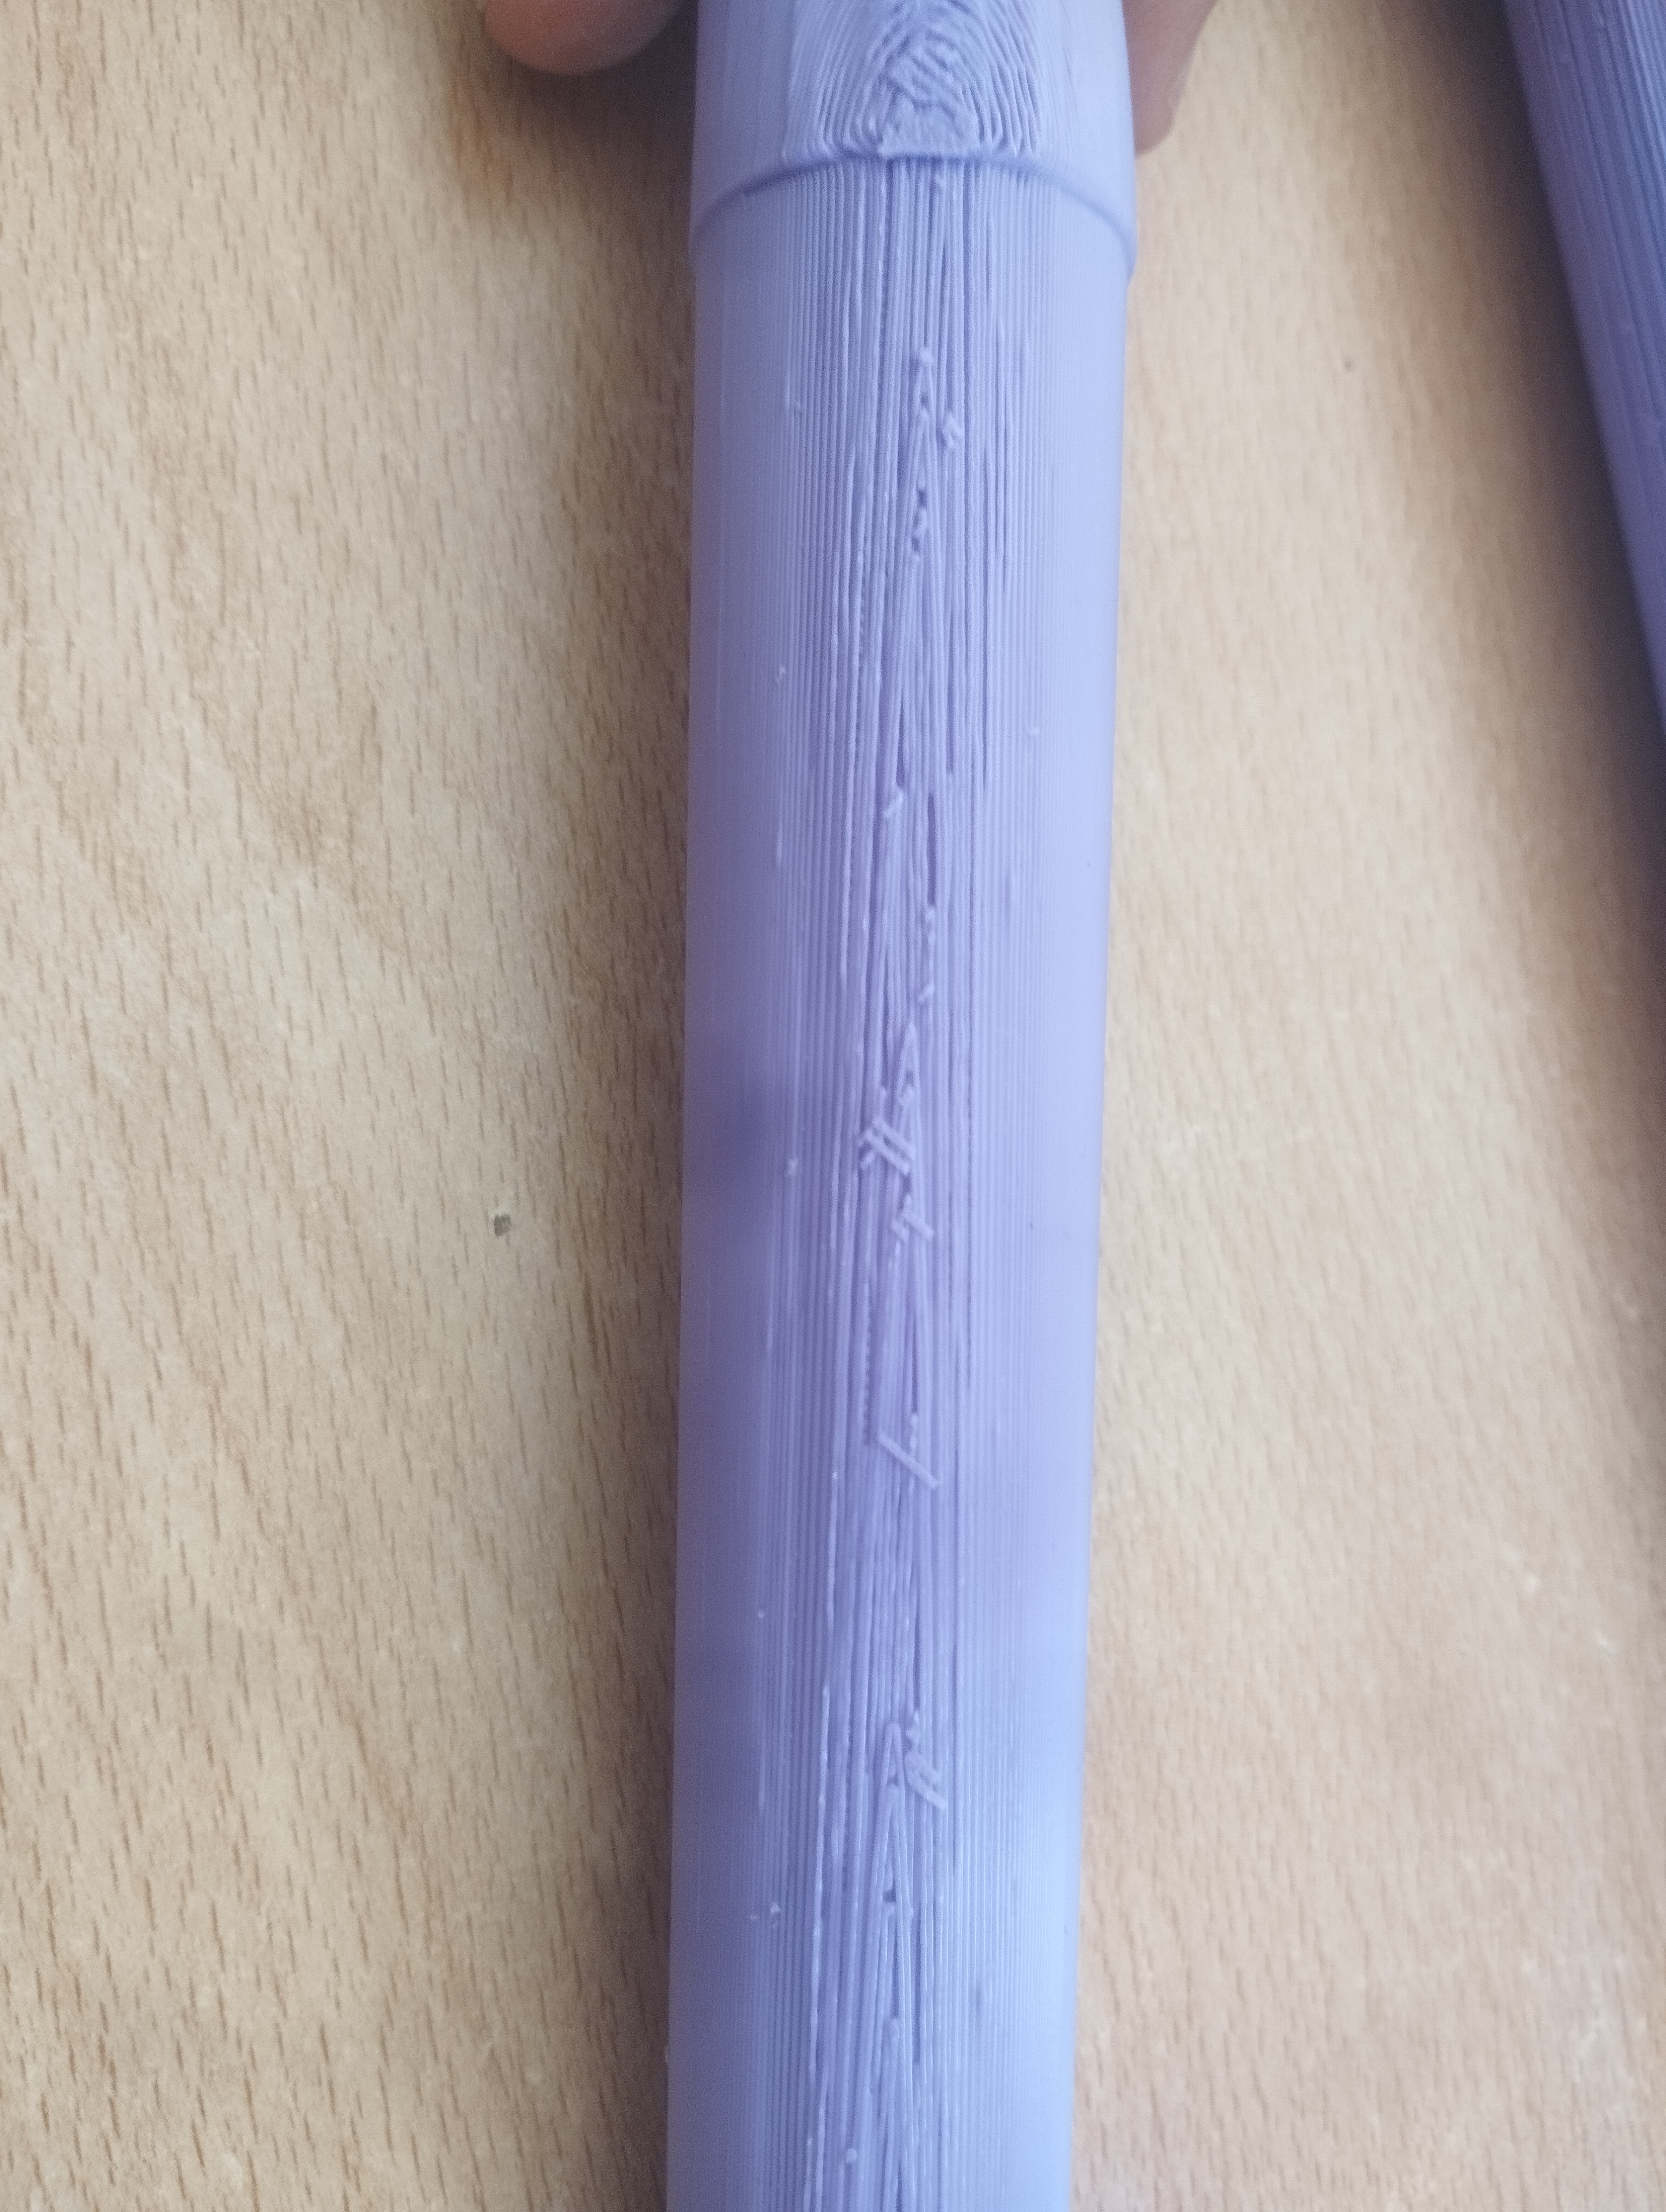
During the printing of all the serpent i noticed that the last layers, so at the top of the parts, were a little bit ruined; but it that case is only a little issue, nothing serious. Now the piece are ruined in all their lenght, which could be a problem also in term of sound. Also inside the pieces there were some residue of filament: this is all the PLA that i grated outside them.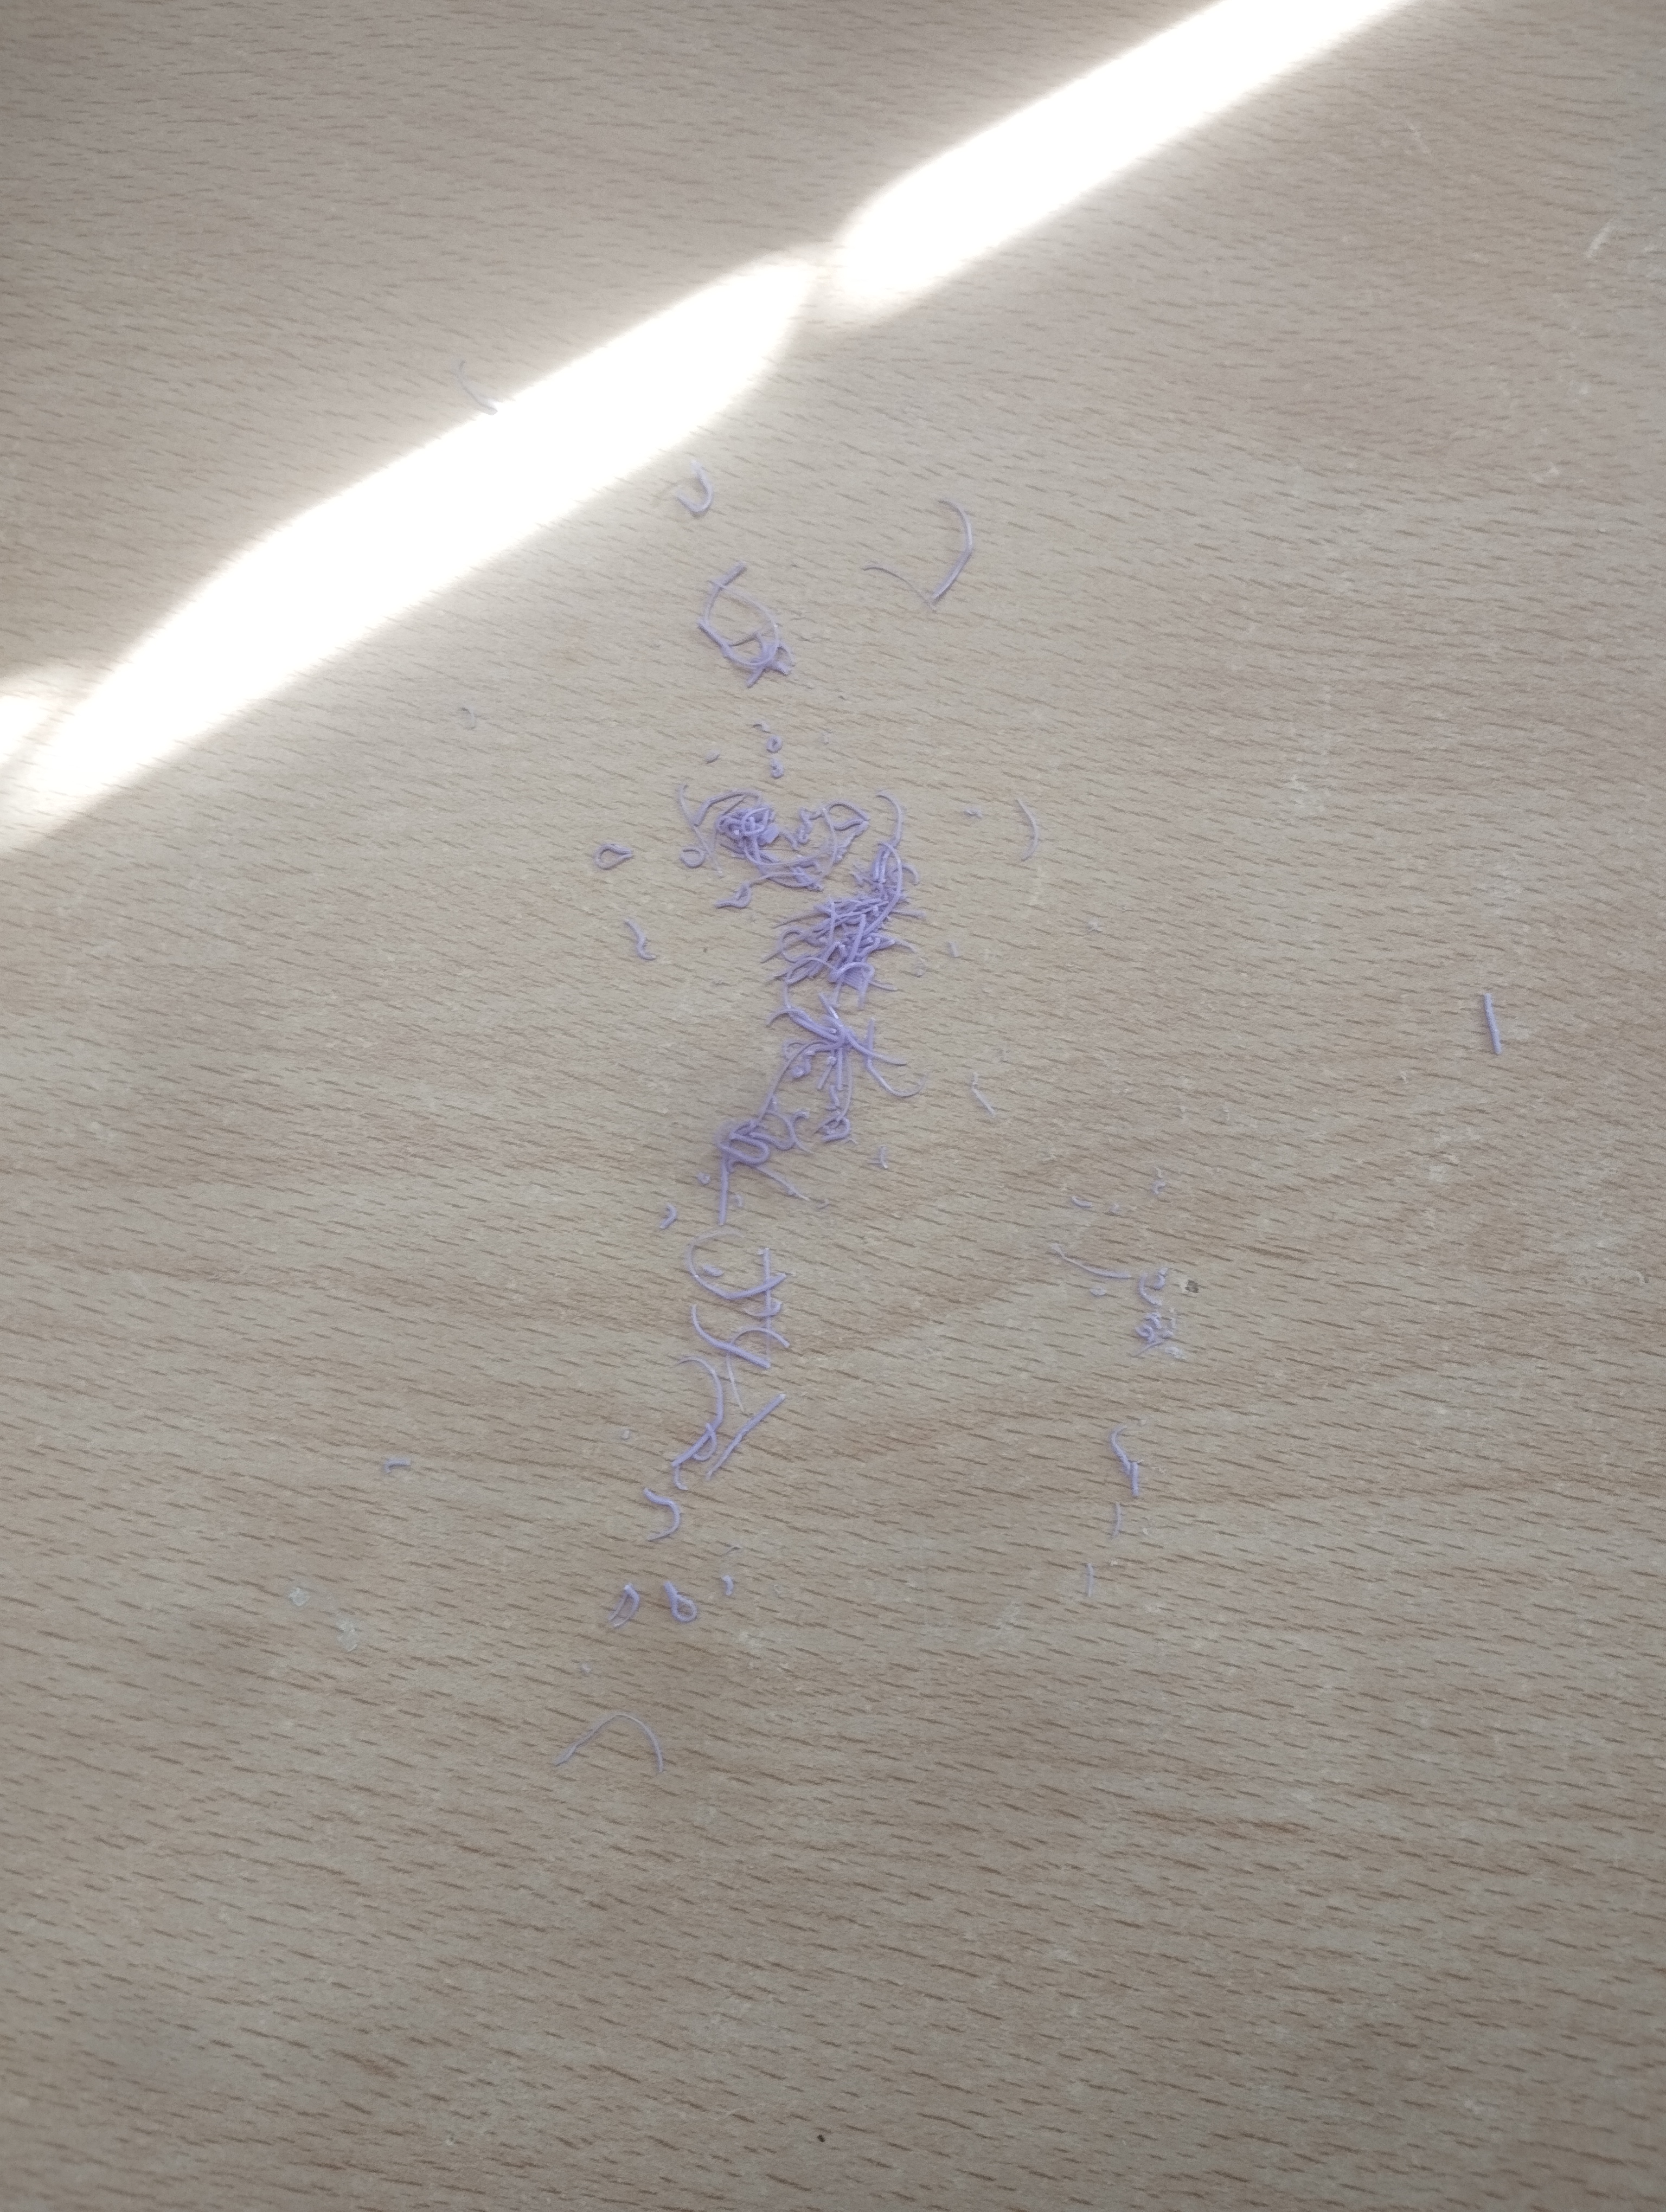
I've tried the same water test but teh result is not very good. some water came out from the ruined part and this is not a good thing. I have still to decide what to do with this components. The water come out expecially in the point were the pieces 4 and 5 are linked, but only in the side ruined. So i think that there wouldn't water loss if this problem were alone, and there is water loss only because this two problems are combined.
Now i have glued the two parts and tomorrow i will test it. Meanwhile i have glued all the mouthpiece together, they are three and very small, they are all composited by 2 pieces and they are very easy to assembly, they don't even have the pin holes!!
PS: i noticed that the work that i did on FreeCad for the bocal part was not accurate: the pieces are not aligned very well, furthermore i also changed the verse of one of the 5 starting pieces.
Now all the parts should be ready and it remain only to cover the serpent with the tape. It isn't difficult, but i have to keep attention at two things in particular:
-First: i can't cover the holes for the fingers, otherwise it became impossible to play the instrument, and it will be boring also to find the holes again.
-Second: the bocal part have to fit in the piece 23 and there is not to many space inside it, so i have to keep attention baecause if i put too much tape the bocal part won't fit and, in that case, i will have to restart covering.
Last day of serpent(Pt.3) (21/09/23)
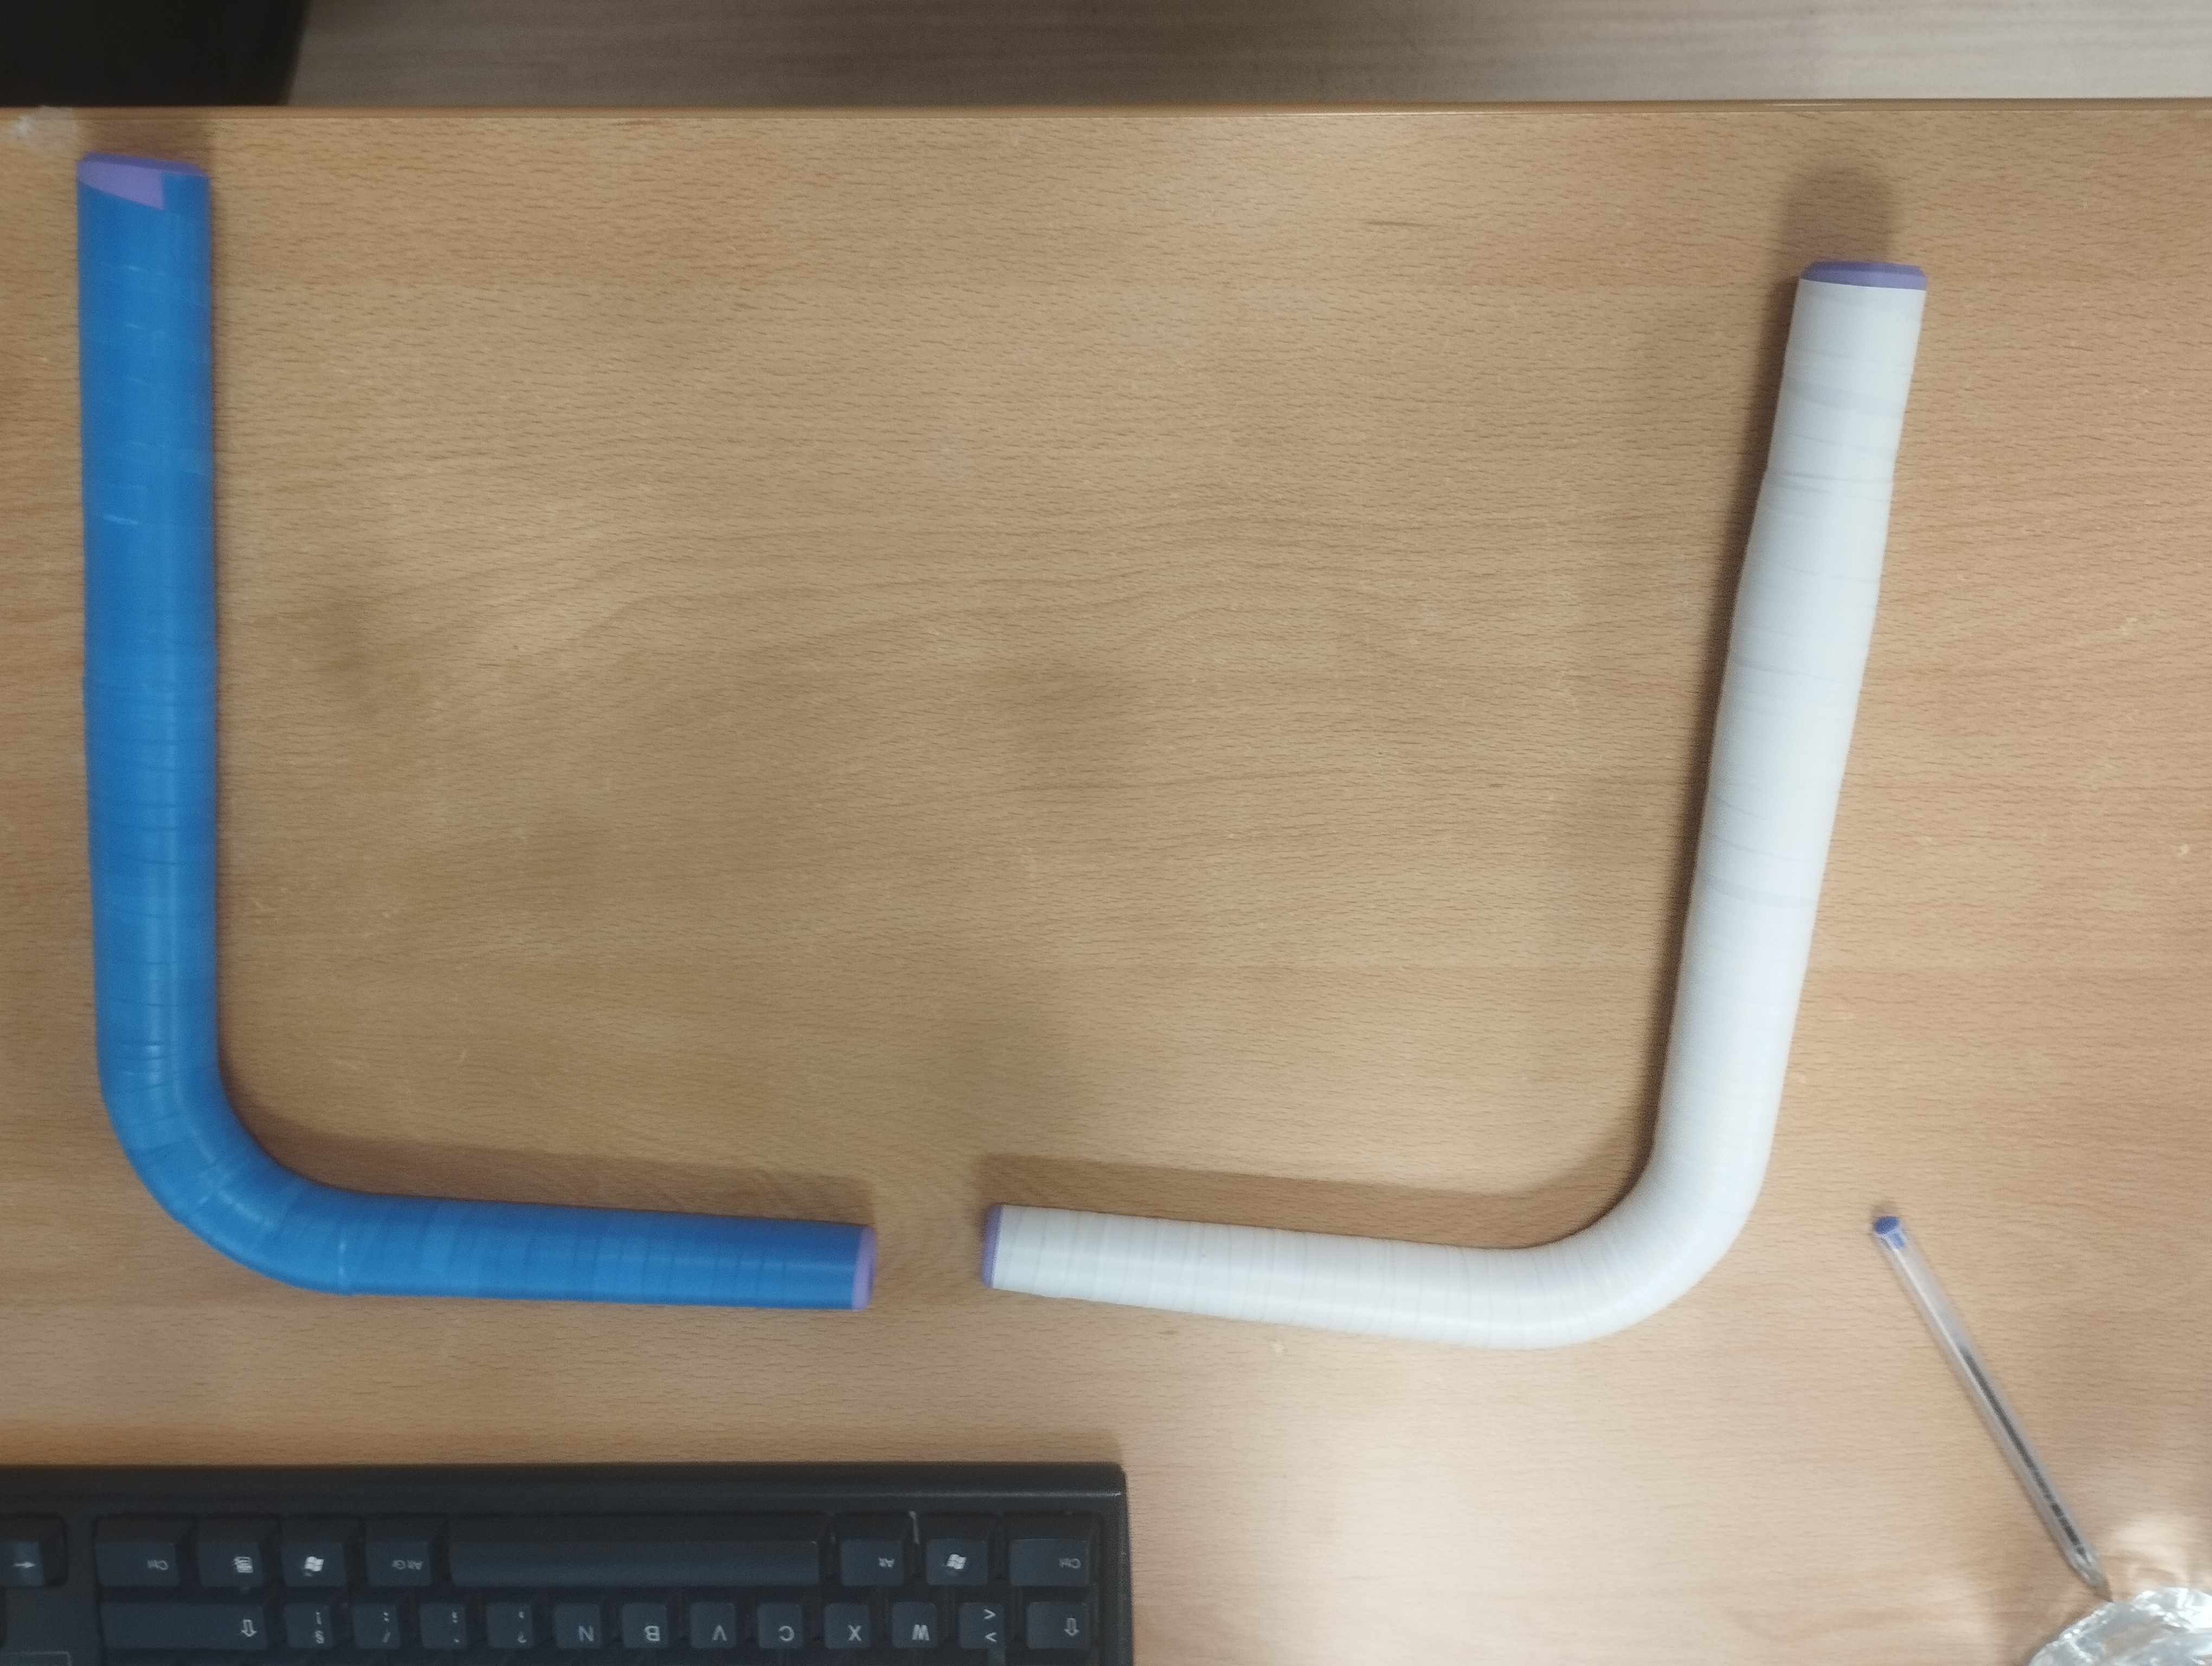
Today i started covering the bocal parts whit the tape, using elecrtical tape. I used two different color so it's easy to recognize them. For the adjustable one i used blu tape, and for the fixed one i used white tape.
The fixed type it's ok, but the adjustable have an issue: it doesn't fit w=very weel in the neck of the serpent. It's not a design problem, that pieces are ruined, so their shape is not exactly as it should be and due to this it's a little bit difficult insert it and remove it from the serpent. I don't think that i can solve this problem, unless i reprint in the right way.
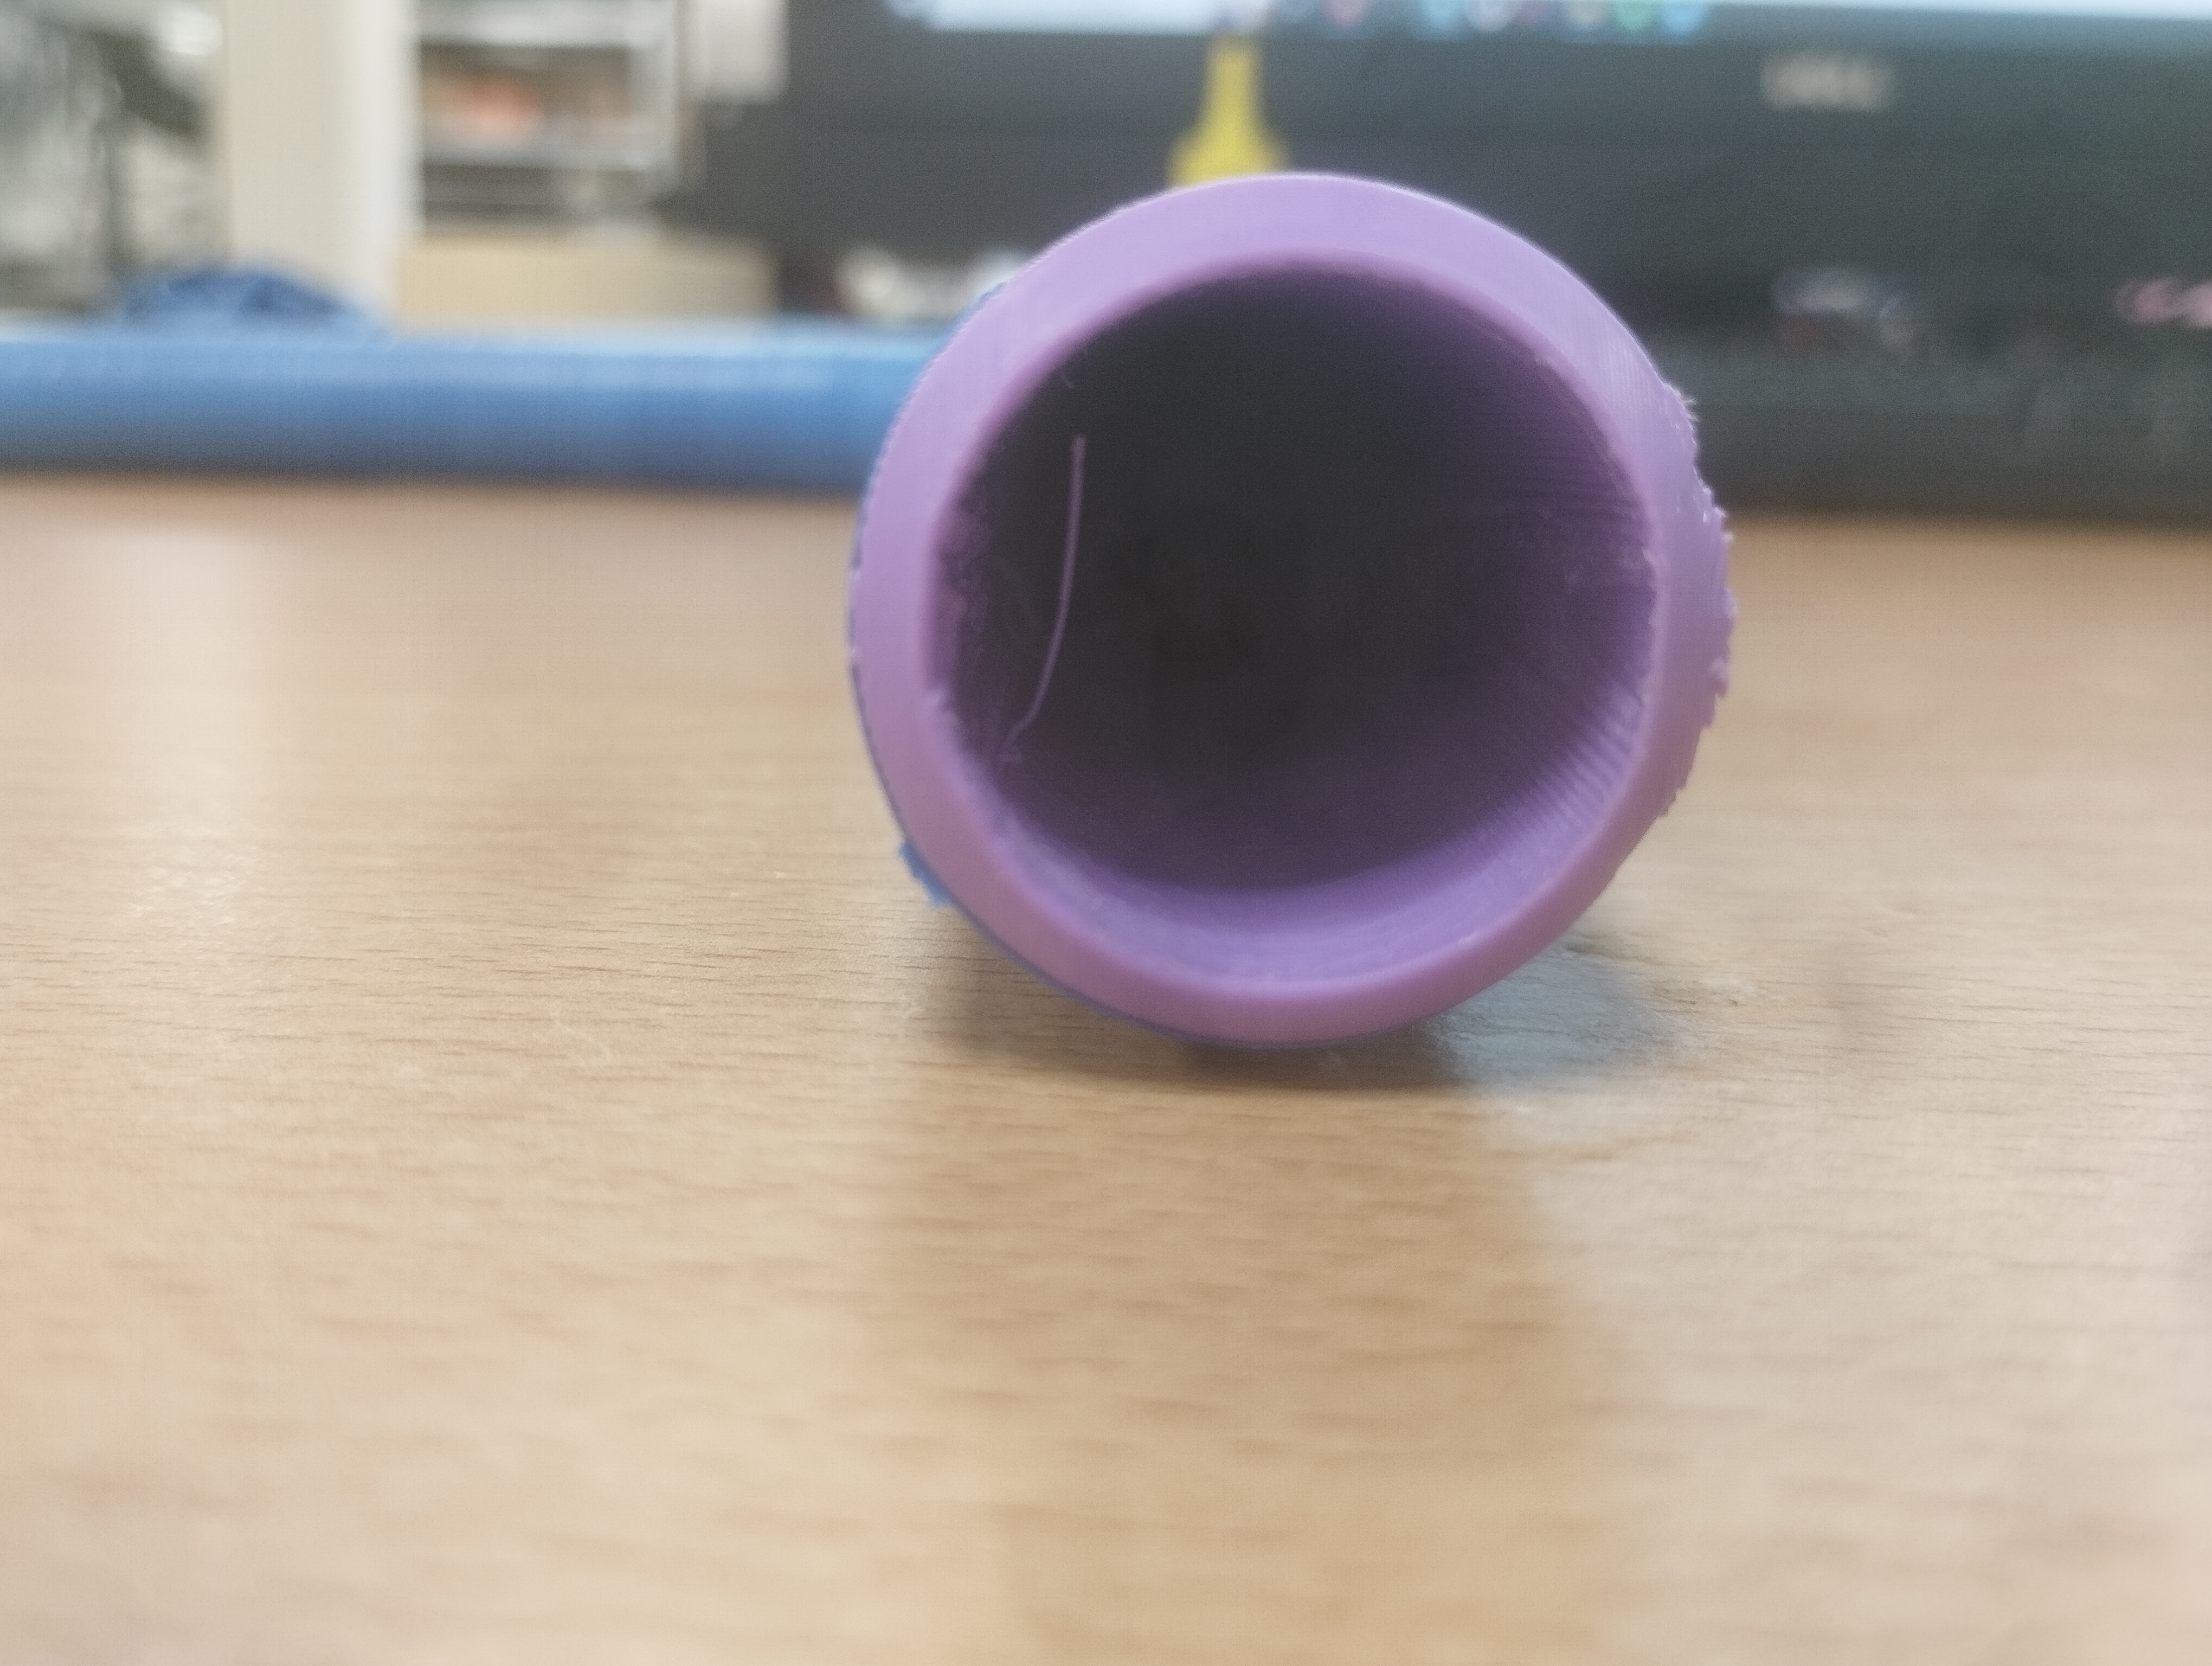
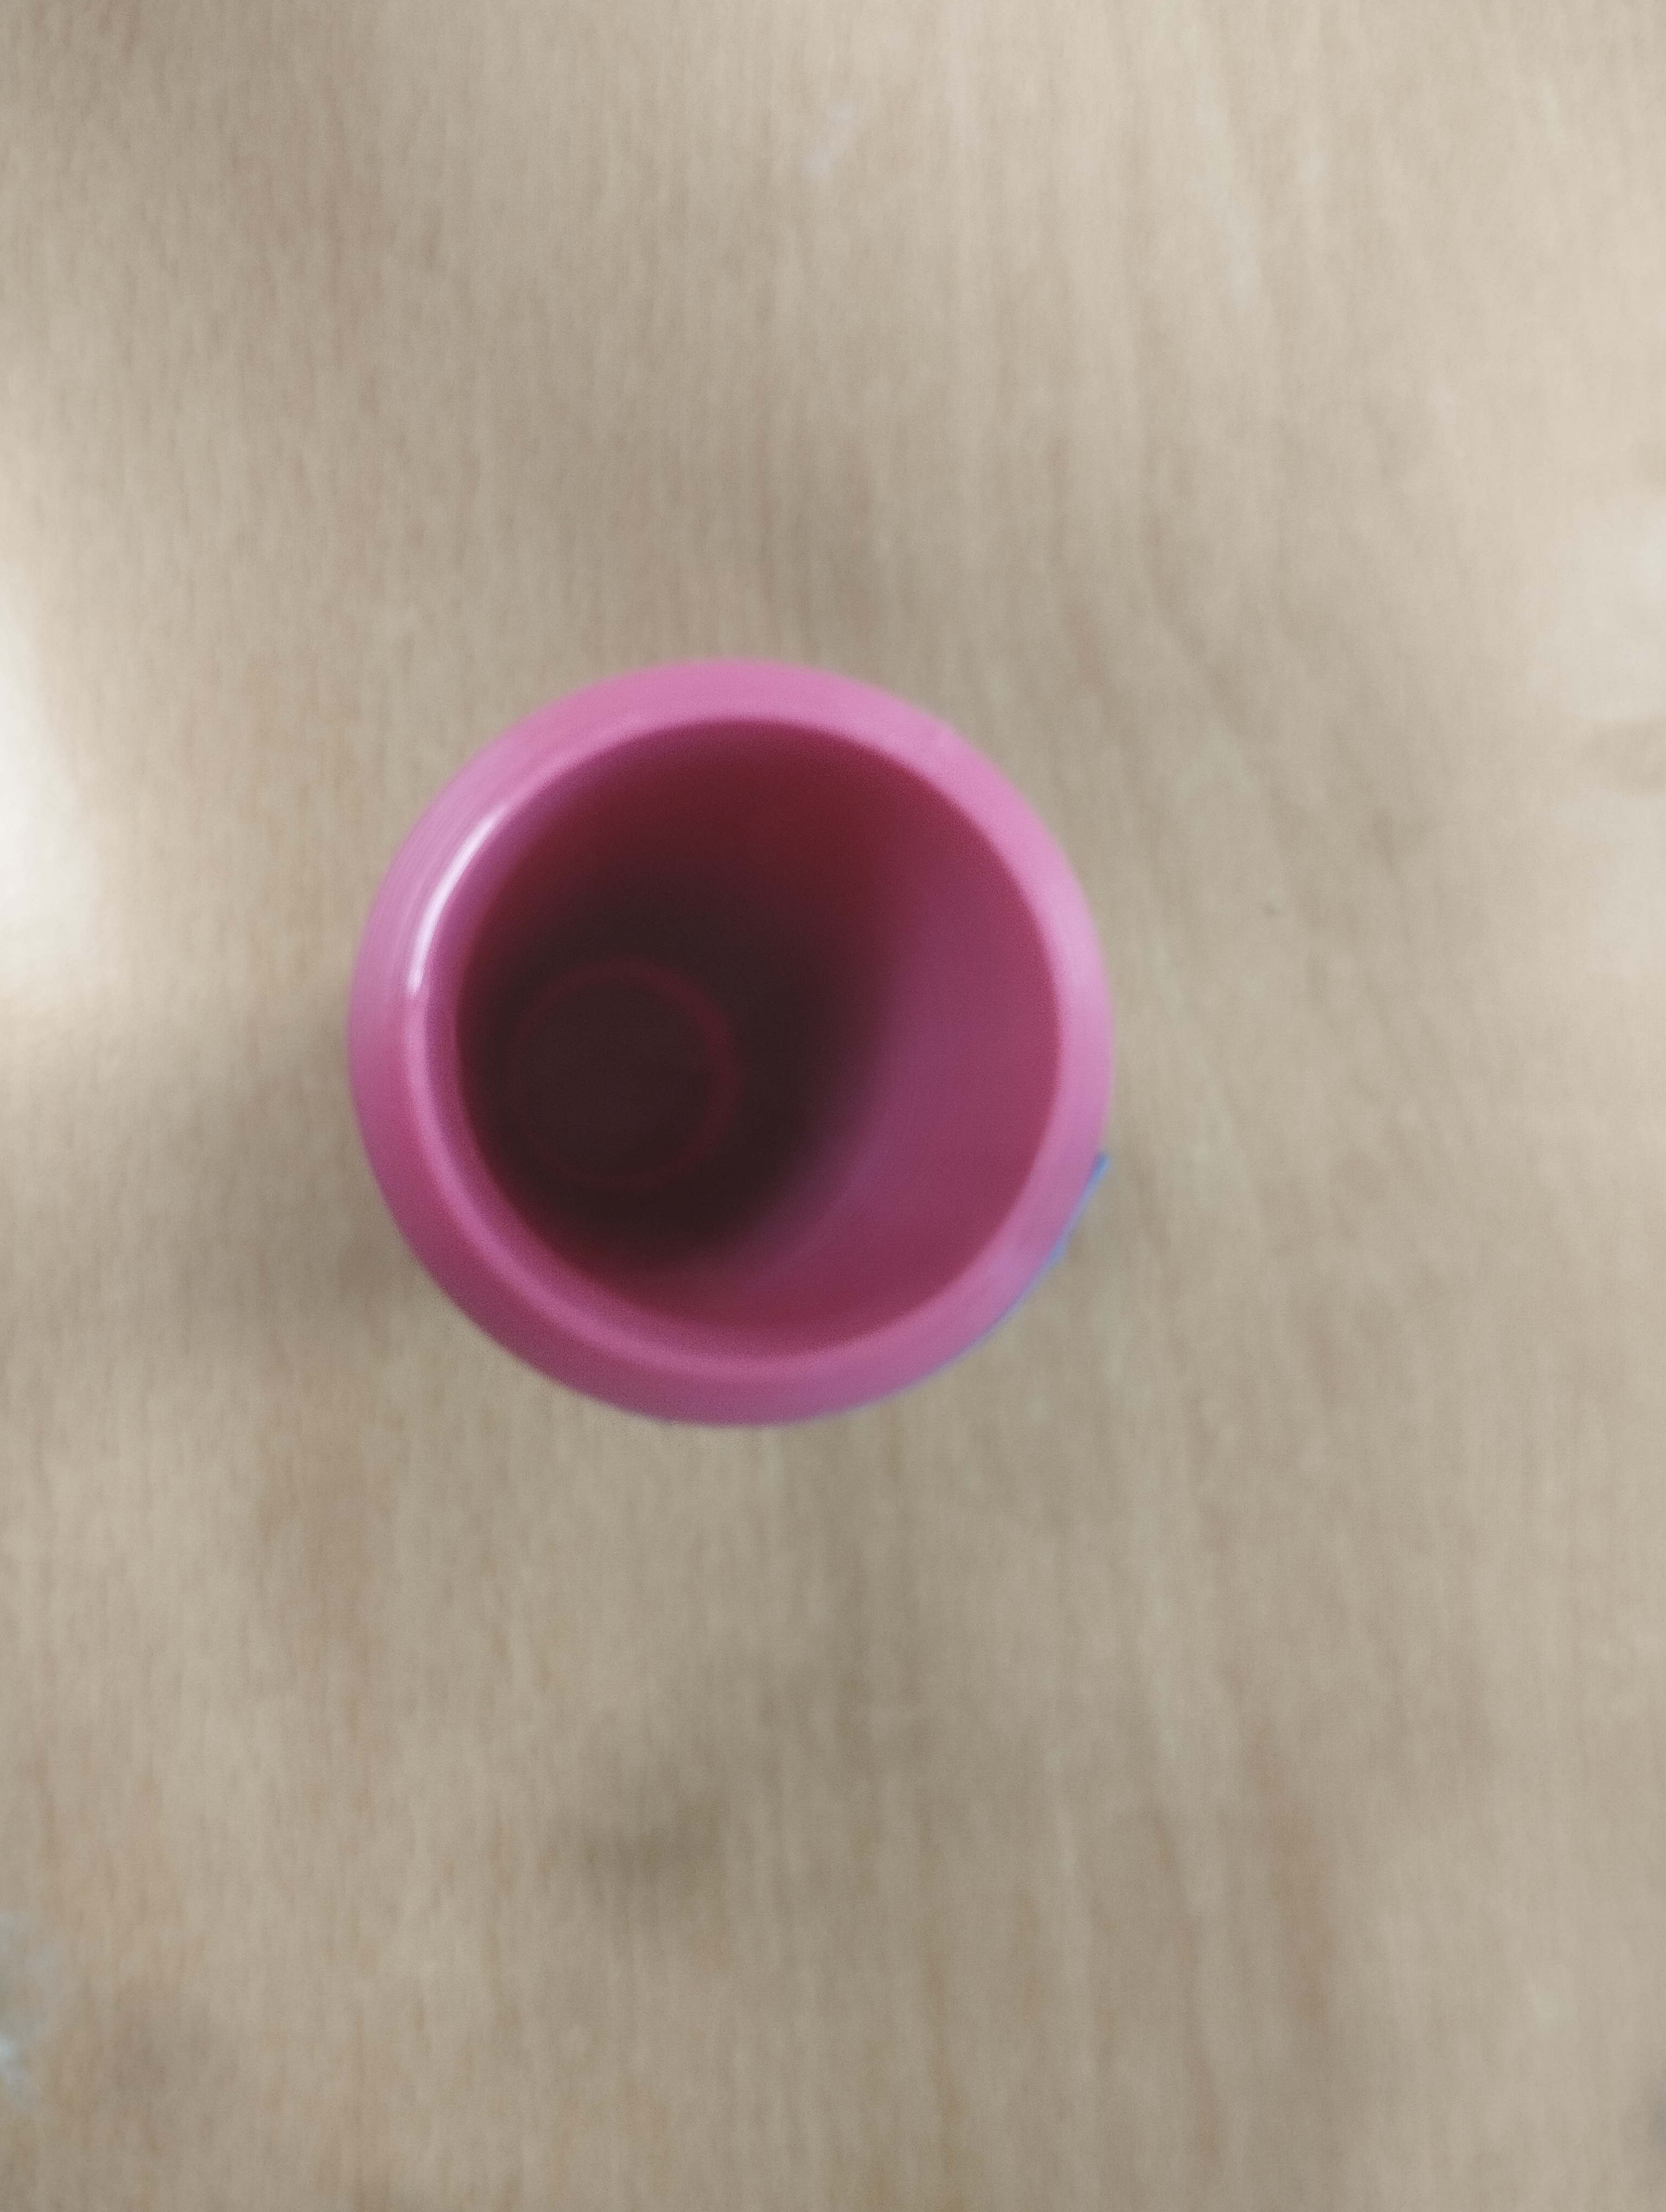
These are the bocal parts done, and the differences beetween the piece ruined and how it should be.

Now i will do the same test to the piece to see if with the bocal parts have improved.
Yes, with the tape it's better, there is still some leaks but only a few. Anyway the fixed type worked better than the adjustable.
I was thinking about how decrease the number of the pieces, and at first i thought that thee only pieces that can be printed togheter are that straight pieces that have a curved one on their top, like this: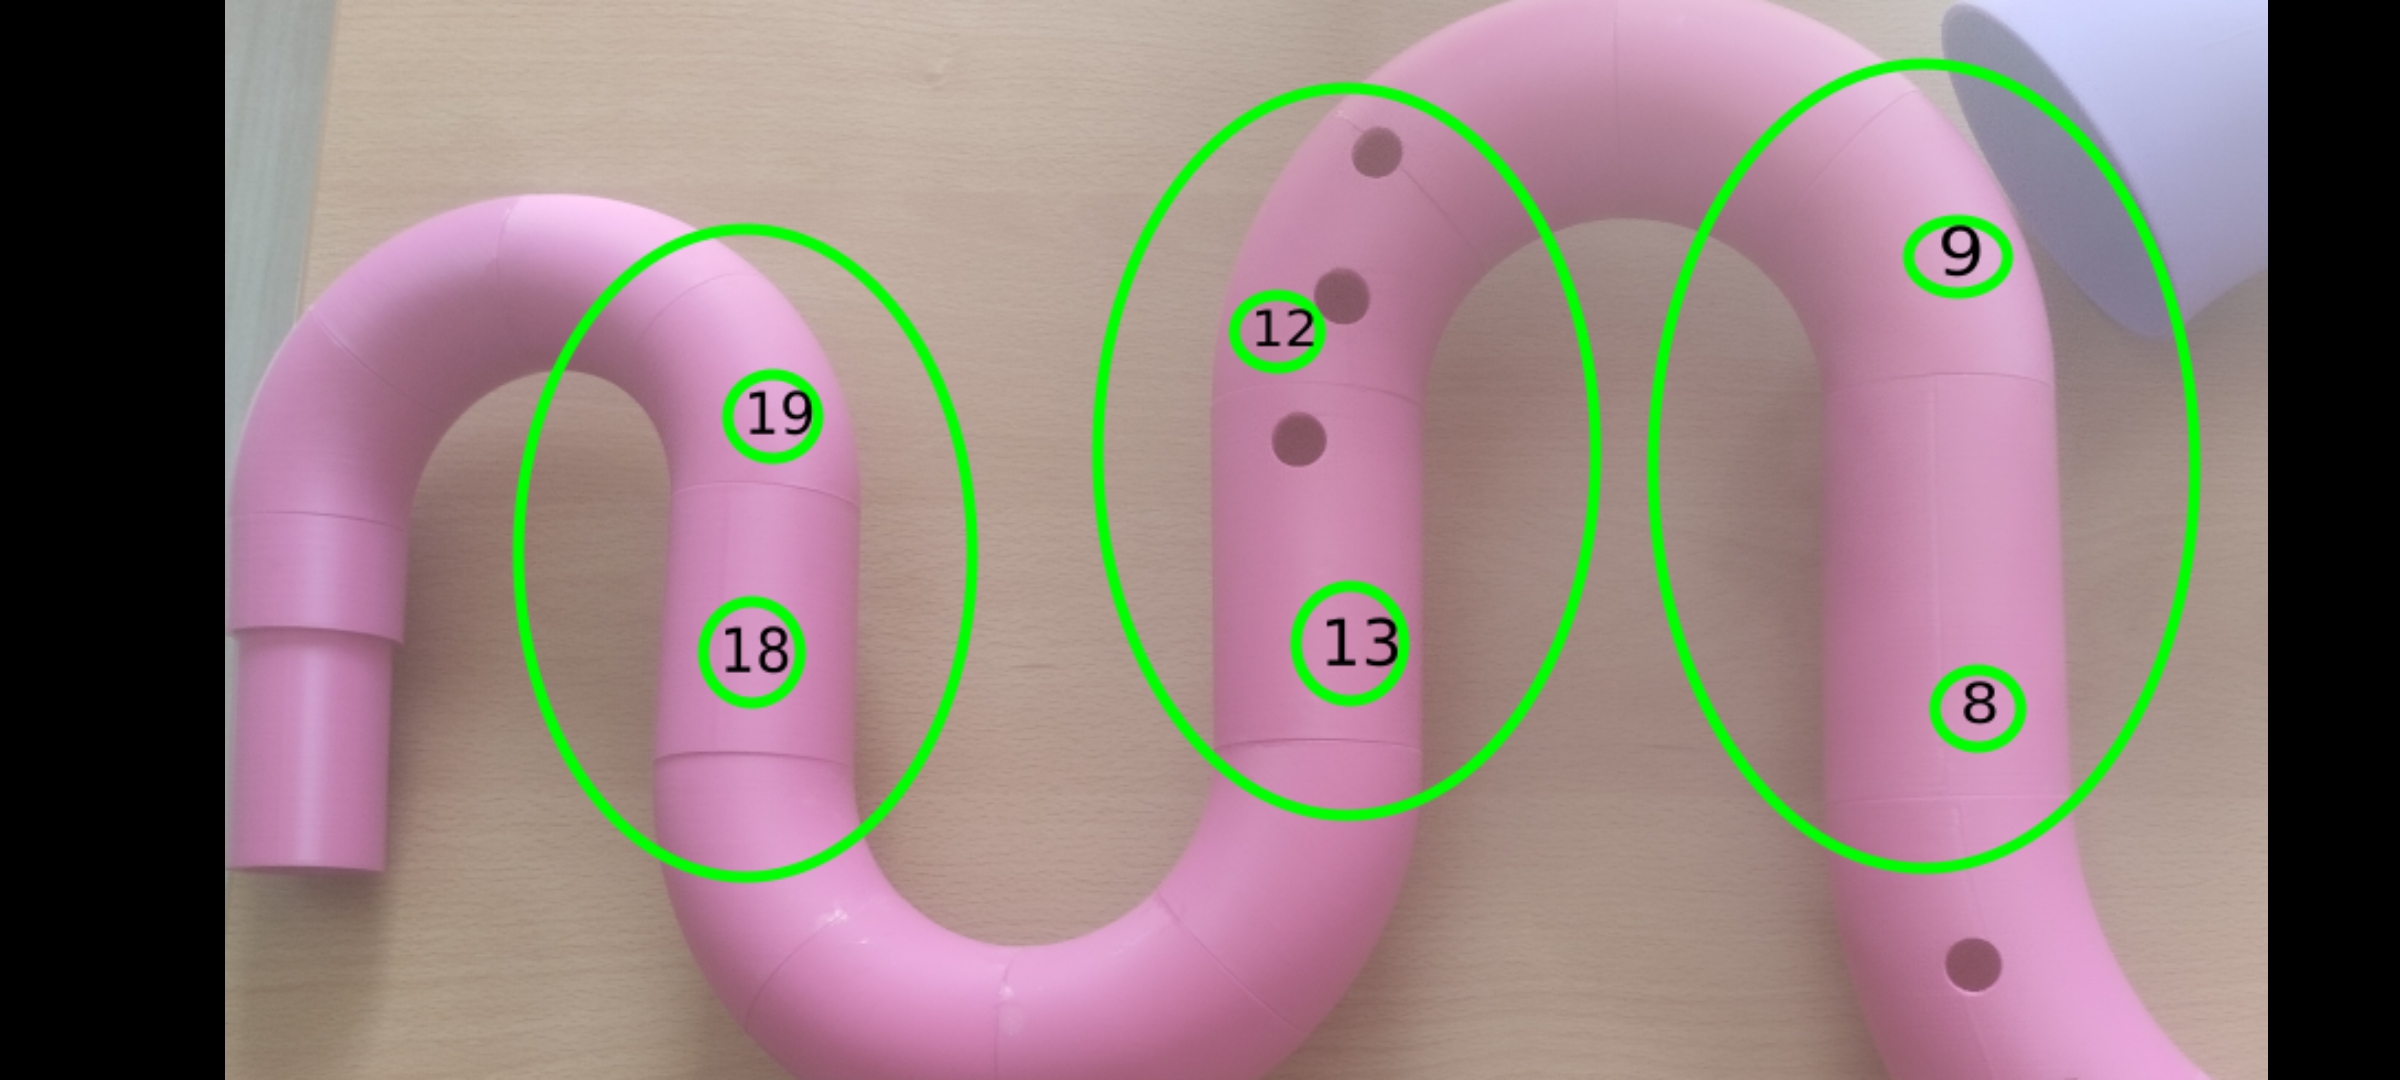
but they are only three so i wouldn't have a big profit: only three pieces less than the original.
After this reasoning i noticed that ther are some parts in the instrument, whose shape is similar to a bridge: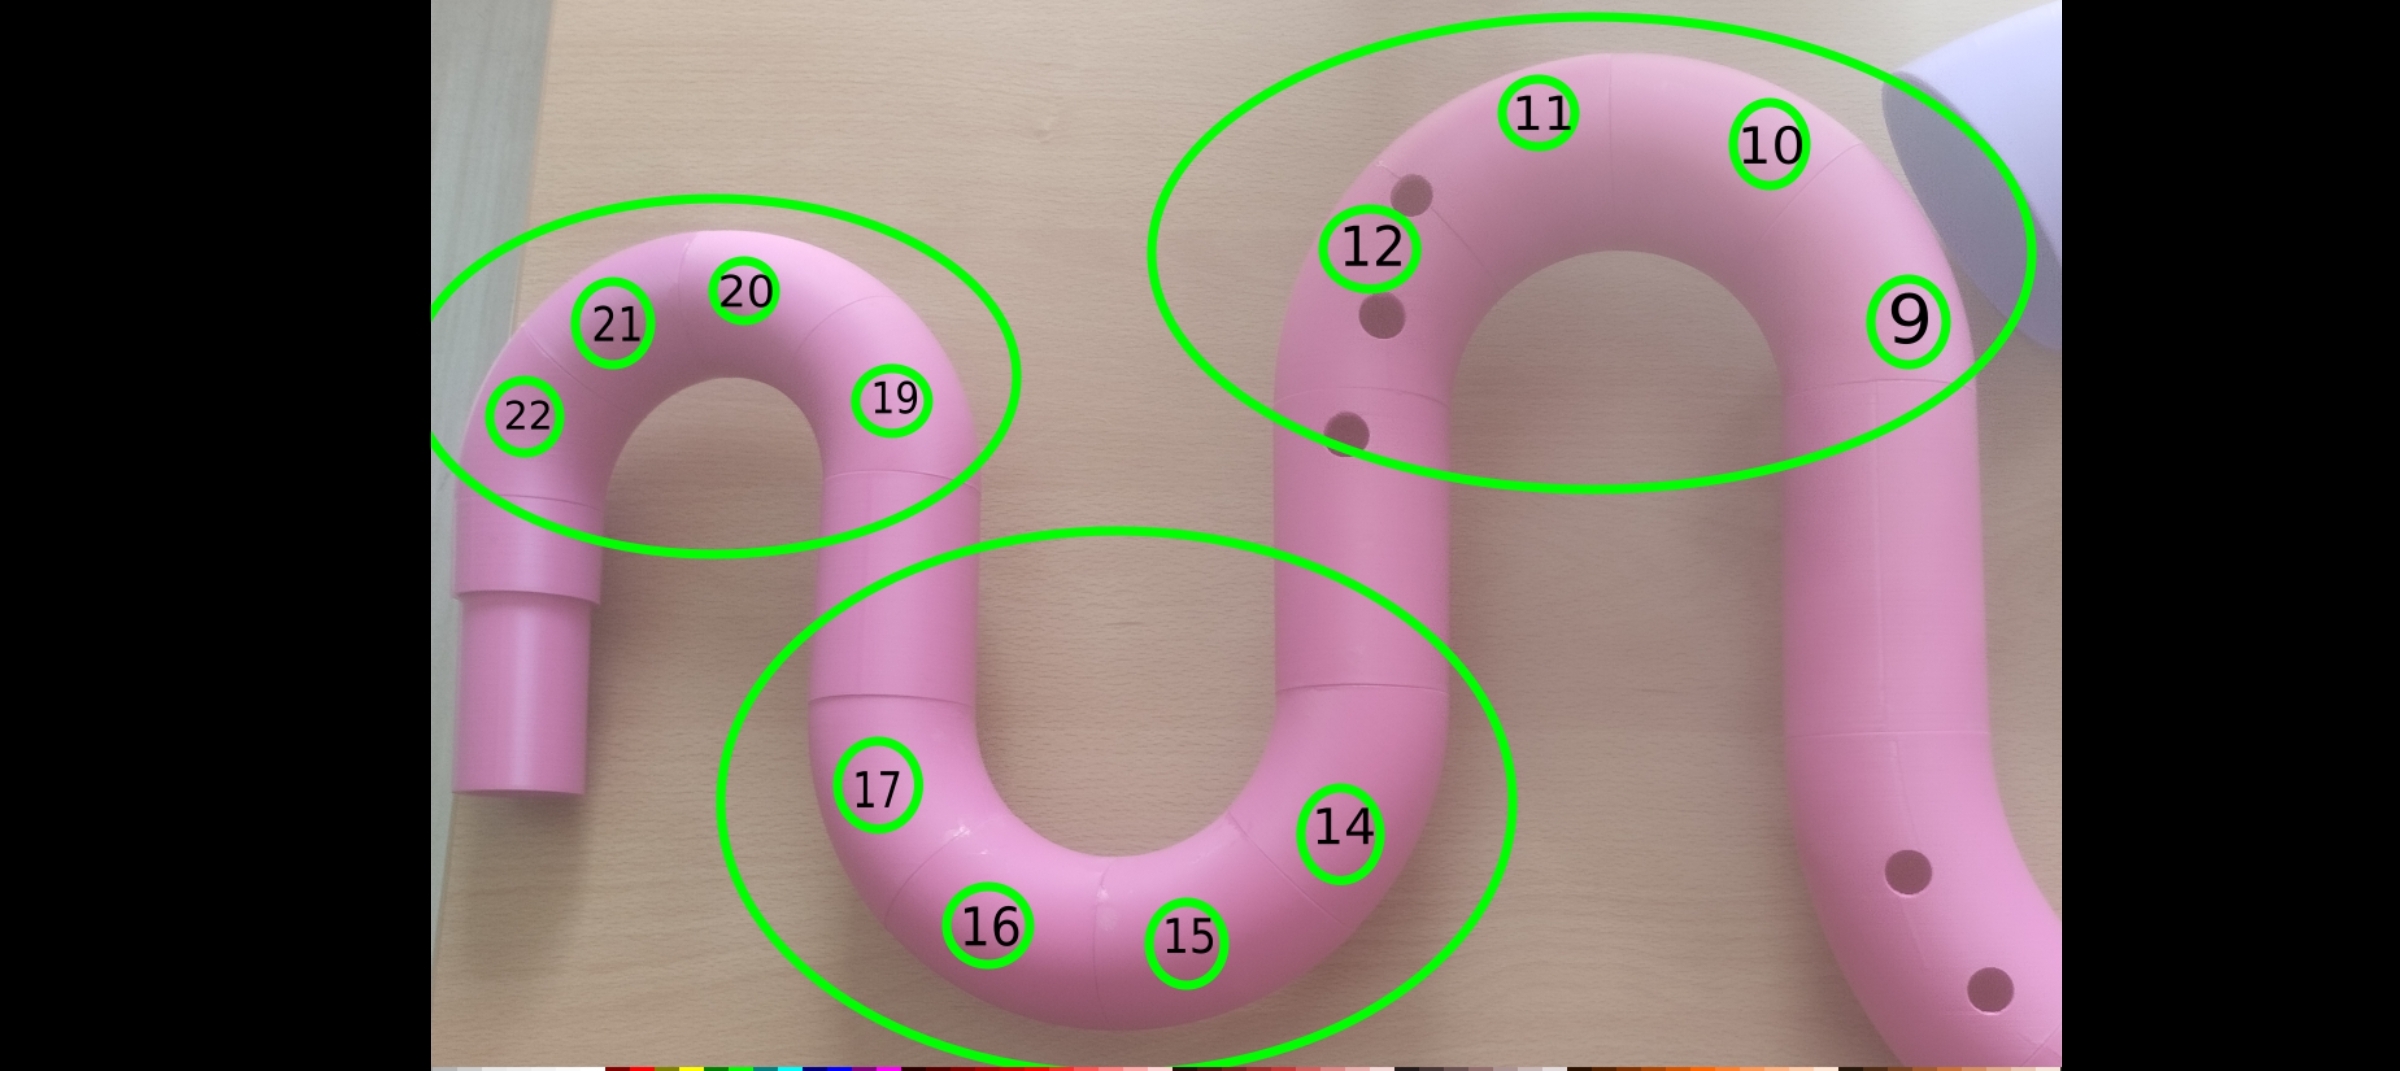
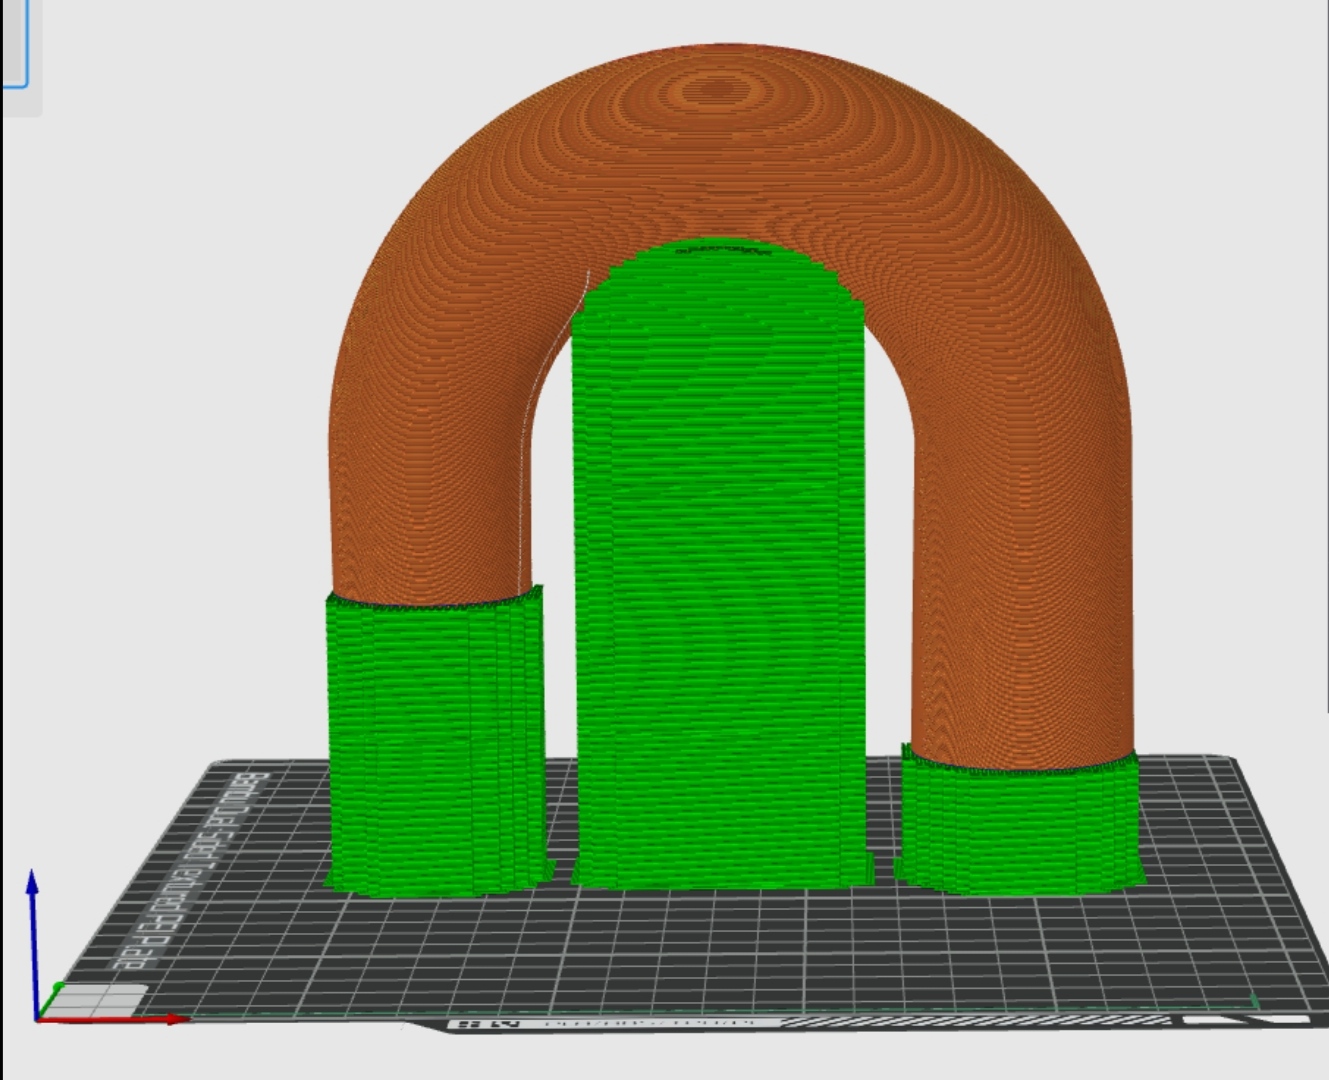
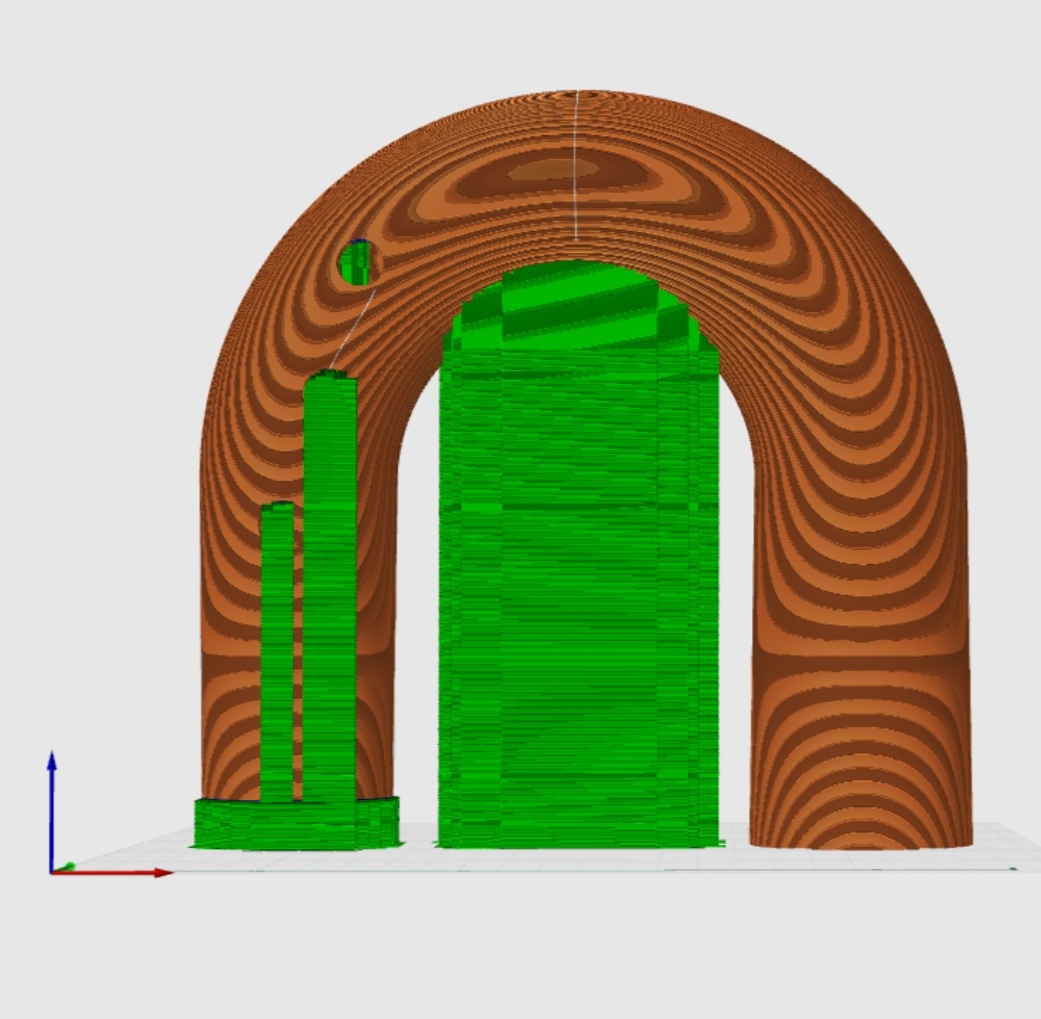
I think (and i hope) that it's possible to print them togheter, they only need some supports. There are three bridges, so i decided to start with the smallest one, because it's an easier printing and this is still an idea in my mind so i will also avoid big waste of materials. I opened FreeCad and, linked the pieces 22-21-19-18 together as i did with the bocal parts and i loaded the file in the printer's program.
I've already started the printing, tomorrow i will check the result.
Bridge day number one (22/09/23)
The first thing i did it's check the printing, the result it's this: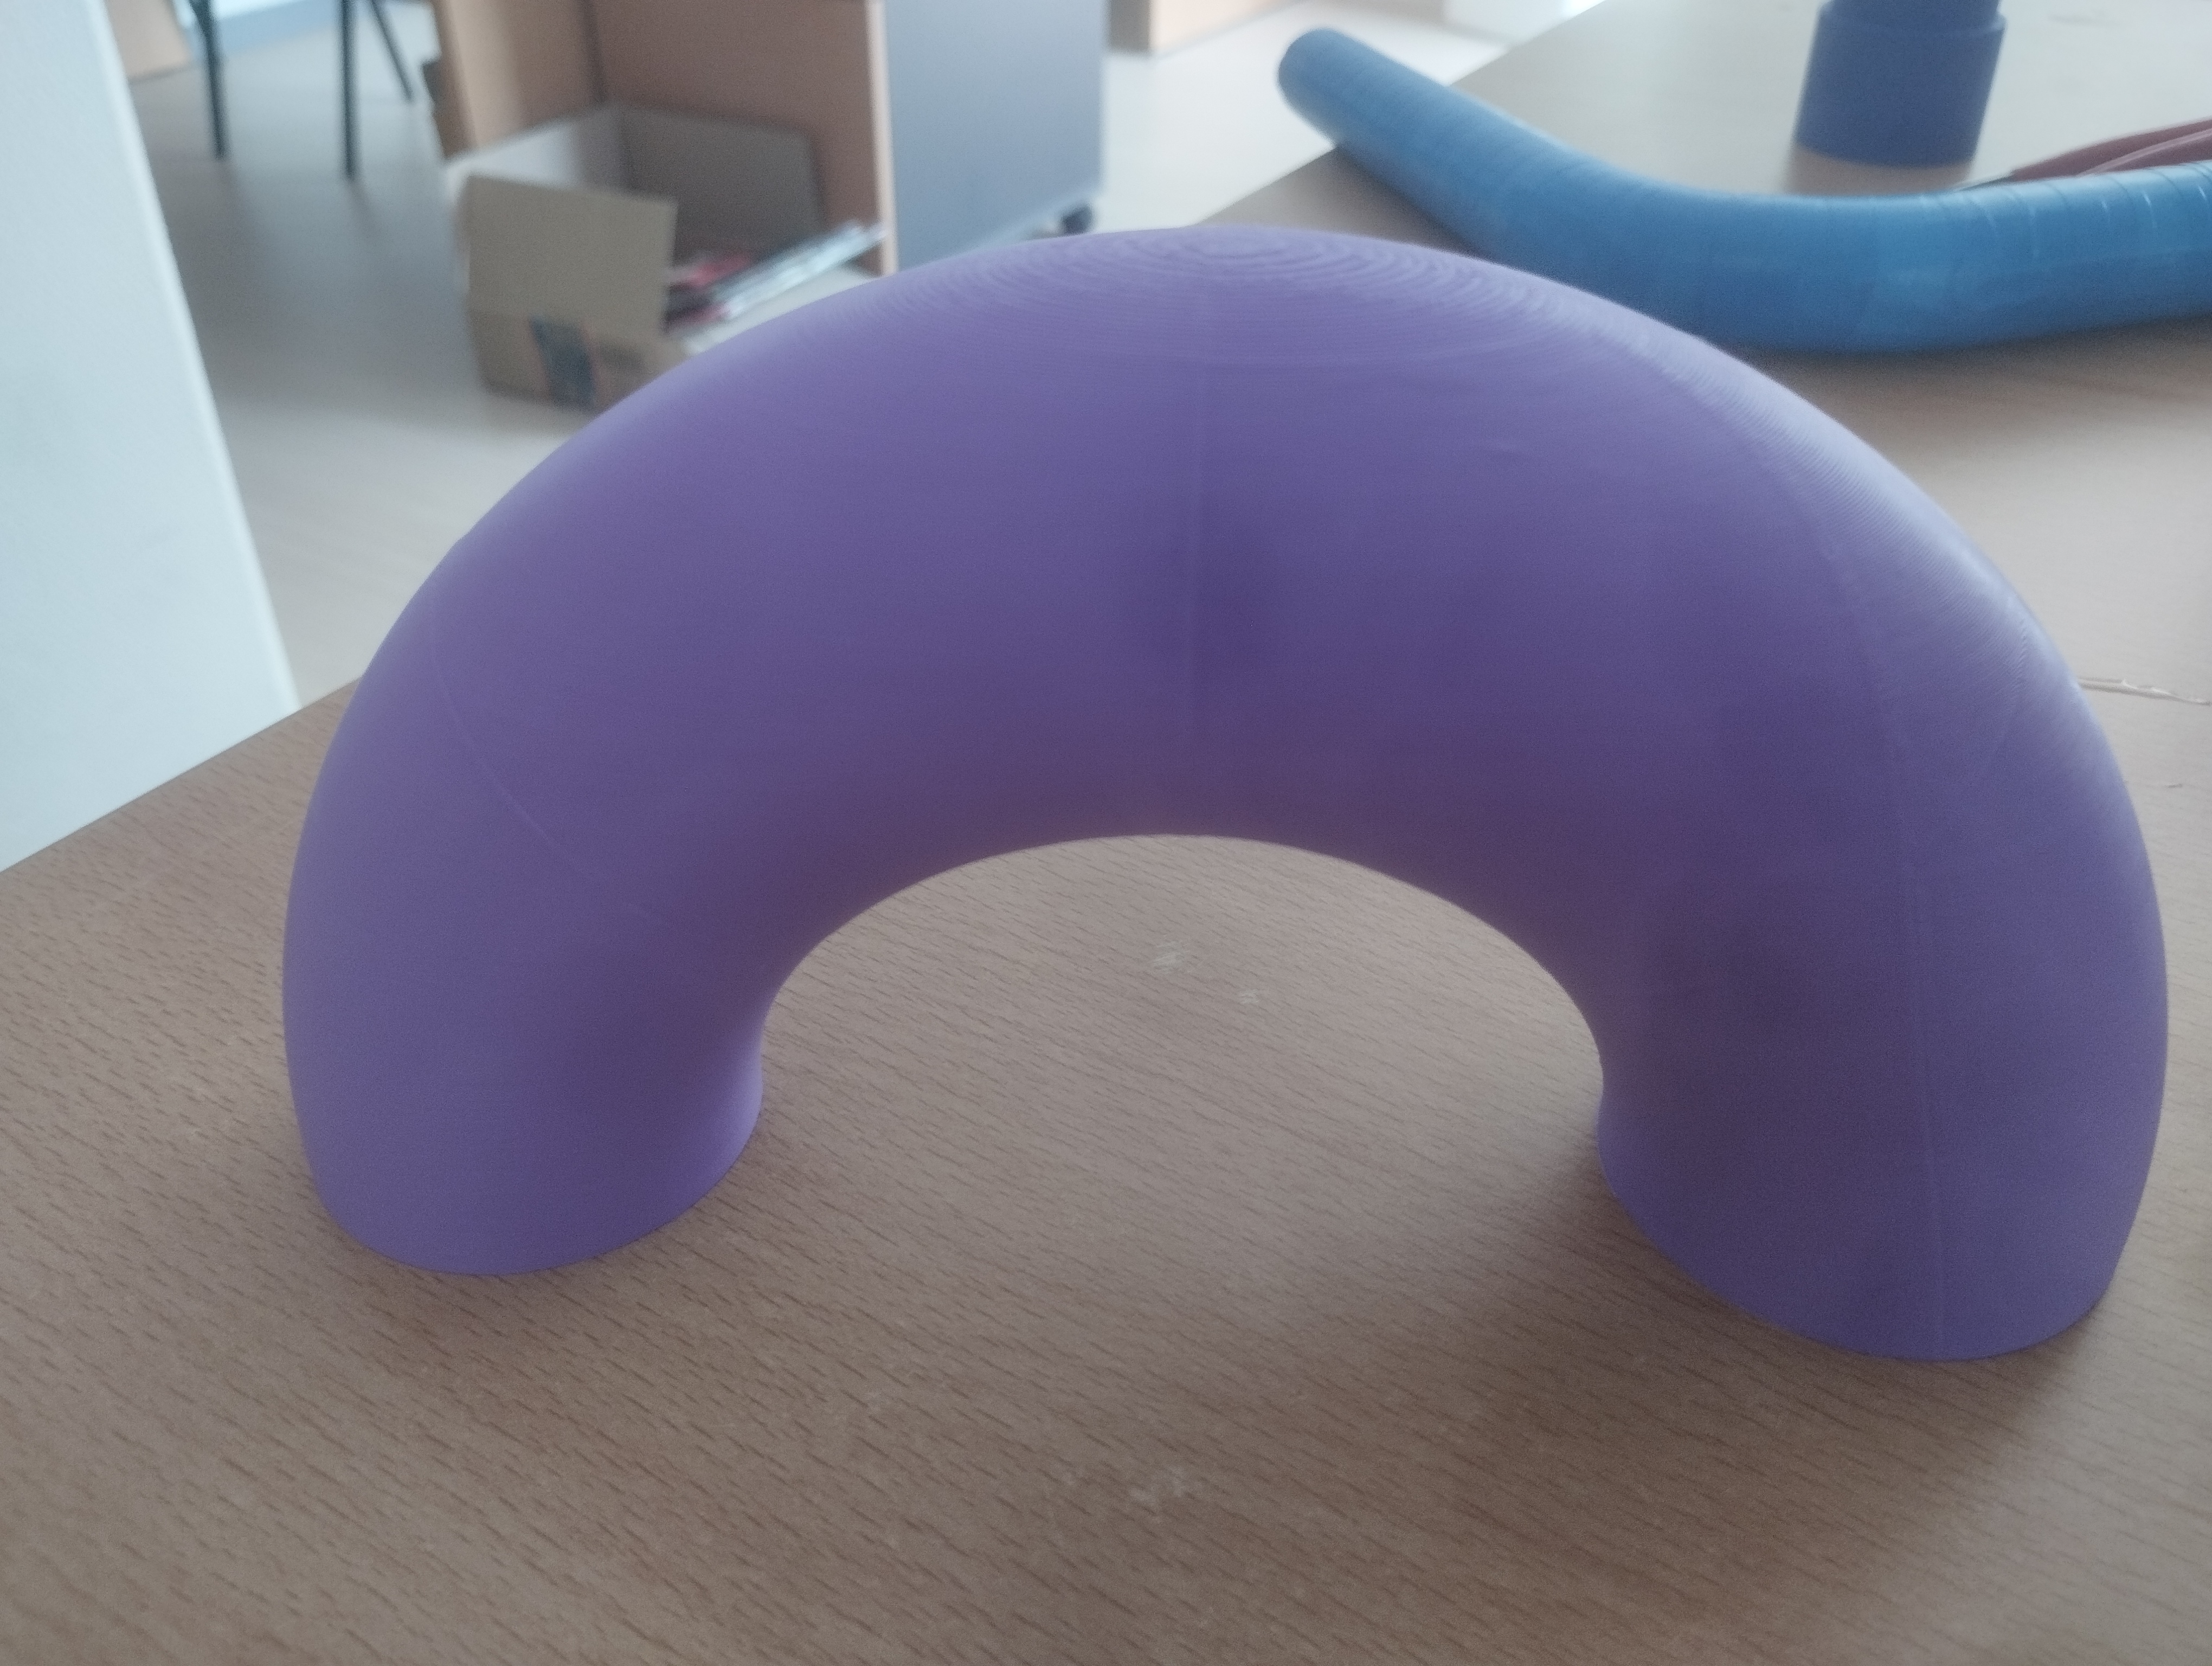
I have some bad and good news.
Good news: the printing is ok, my idea worked but (Bad news):
- First of all: this morning, while i was checking the files of the printing; i noted that i didn't linked toghter in the right way, infact we can still see the bordersof the original pieces (maybe it's difficult to see in the photo).
- The piece are ruined in the part that were printed on the support, like the last time.
- I did the water test and the result are still the same: the water come out from the ruined points, that it's also the same point of a junction. I think that also in this case the problem is teh combination of them.
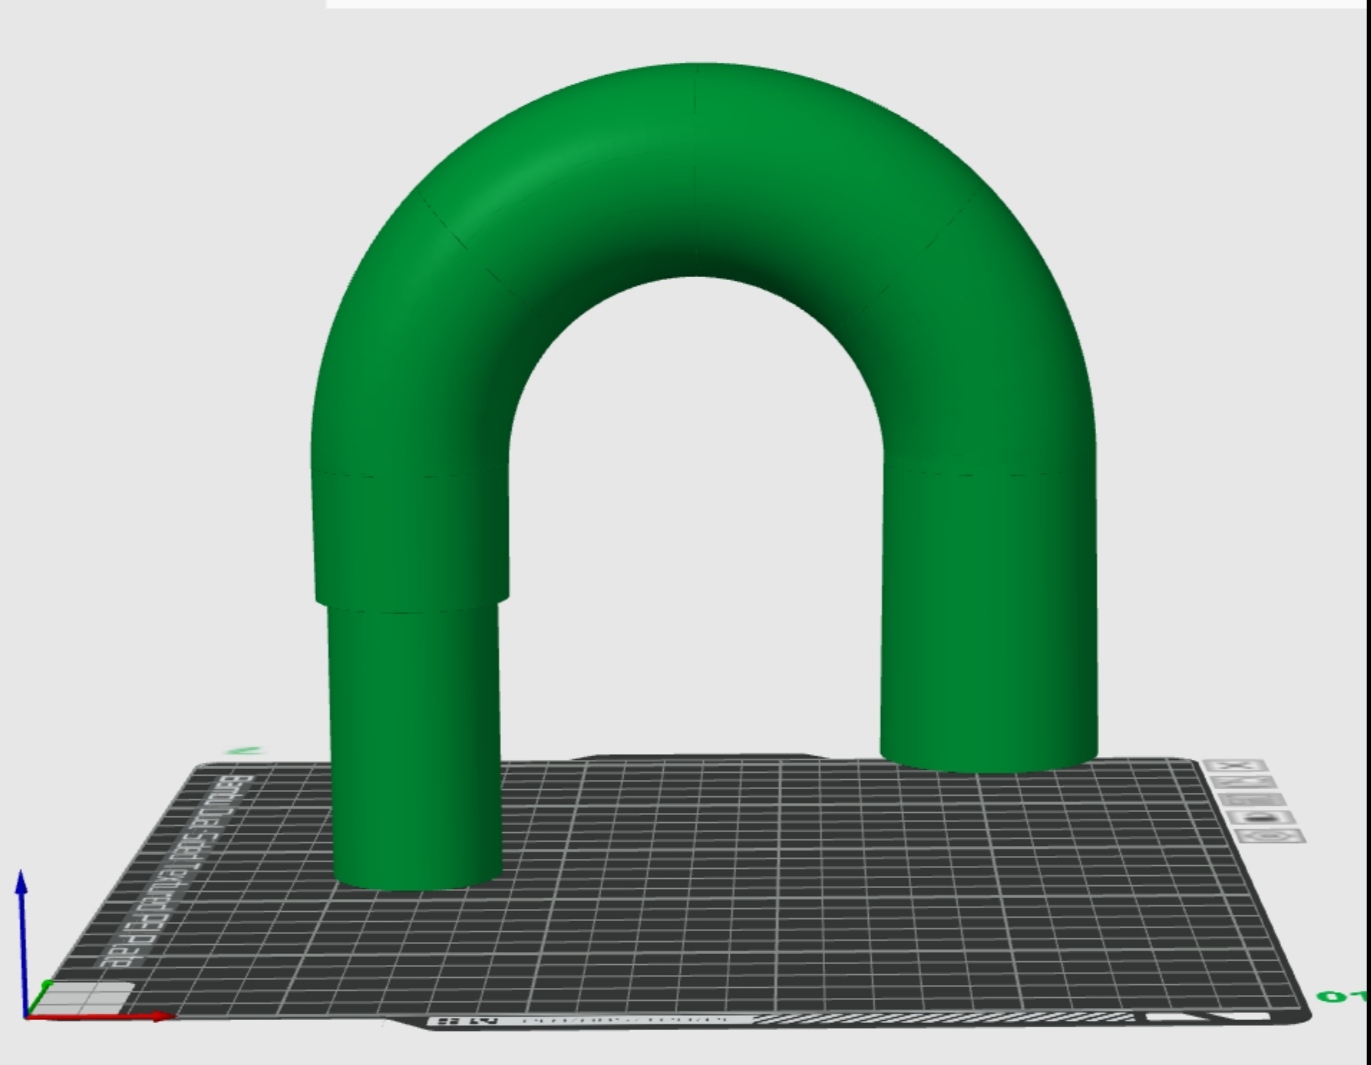
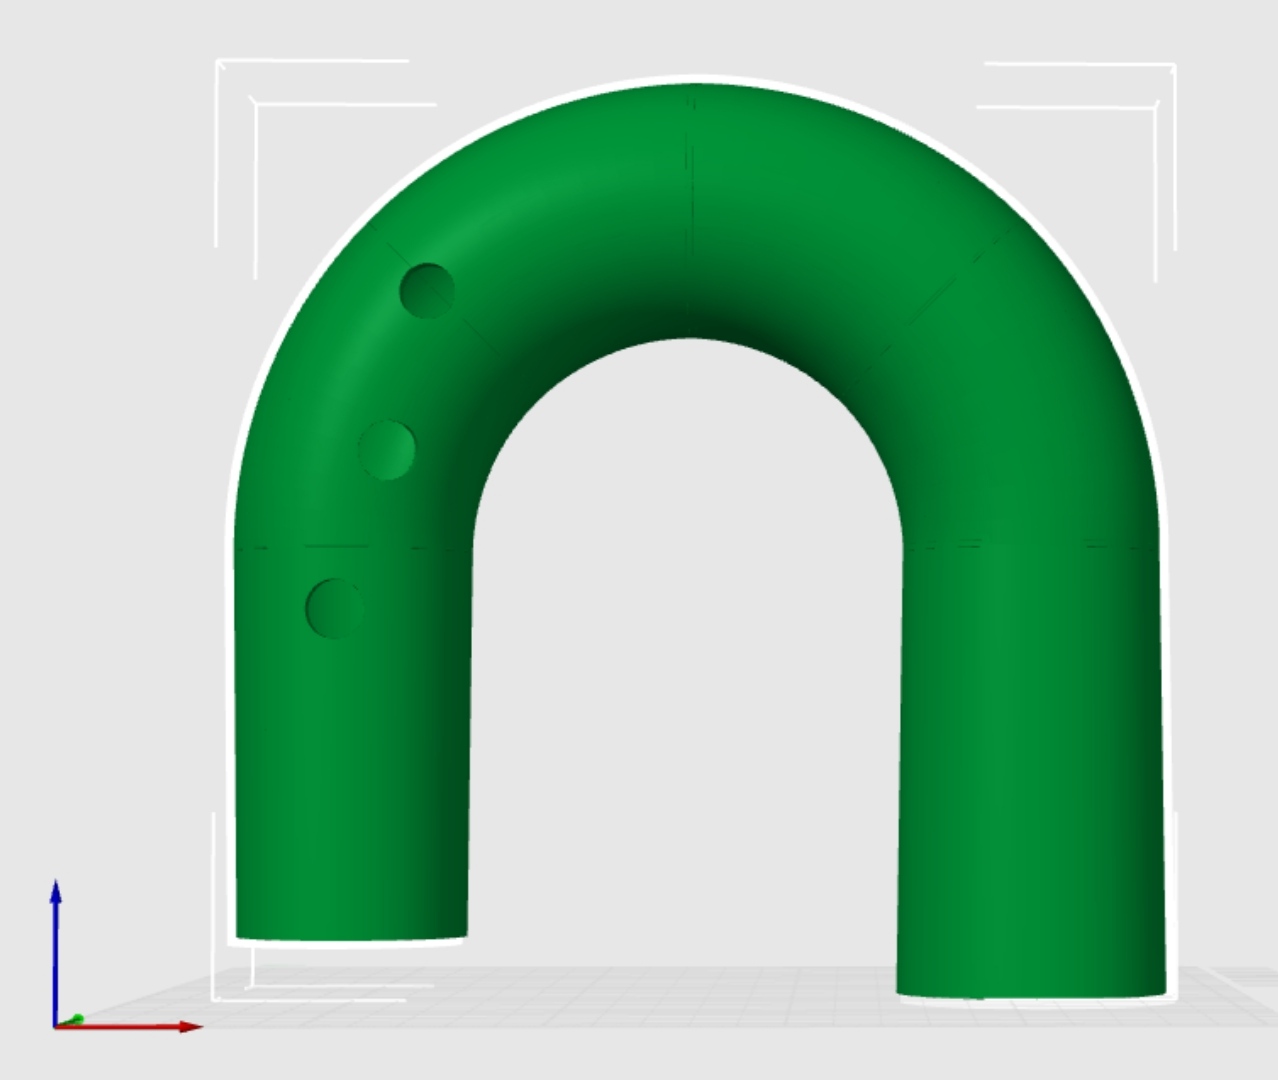
I would like to add the project of this printing but i have already deleted all the files (i am stupid). This morning i fixed the bridge on FreeCad and then i started the printing. While i am waiting the result i will add the project ( i keep them this time cause i think they are good).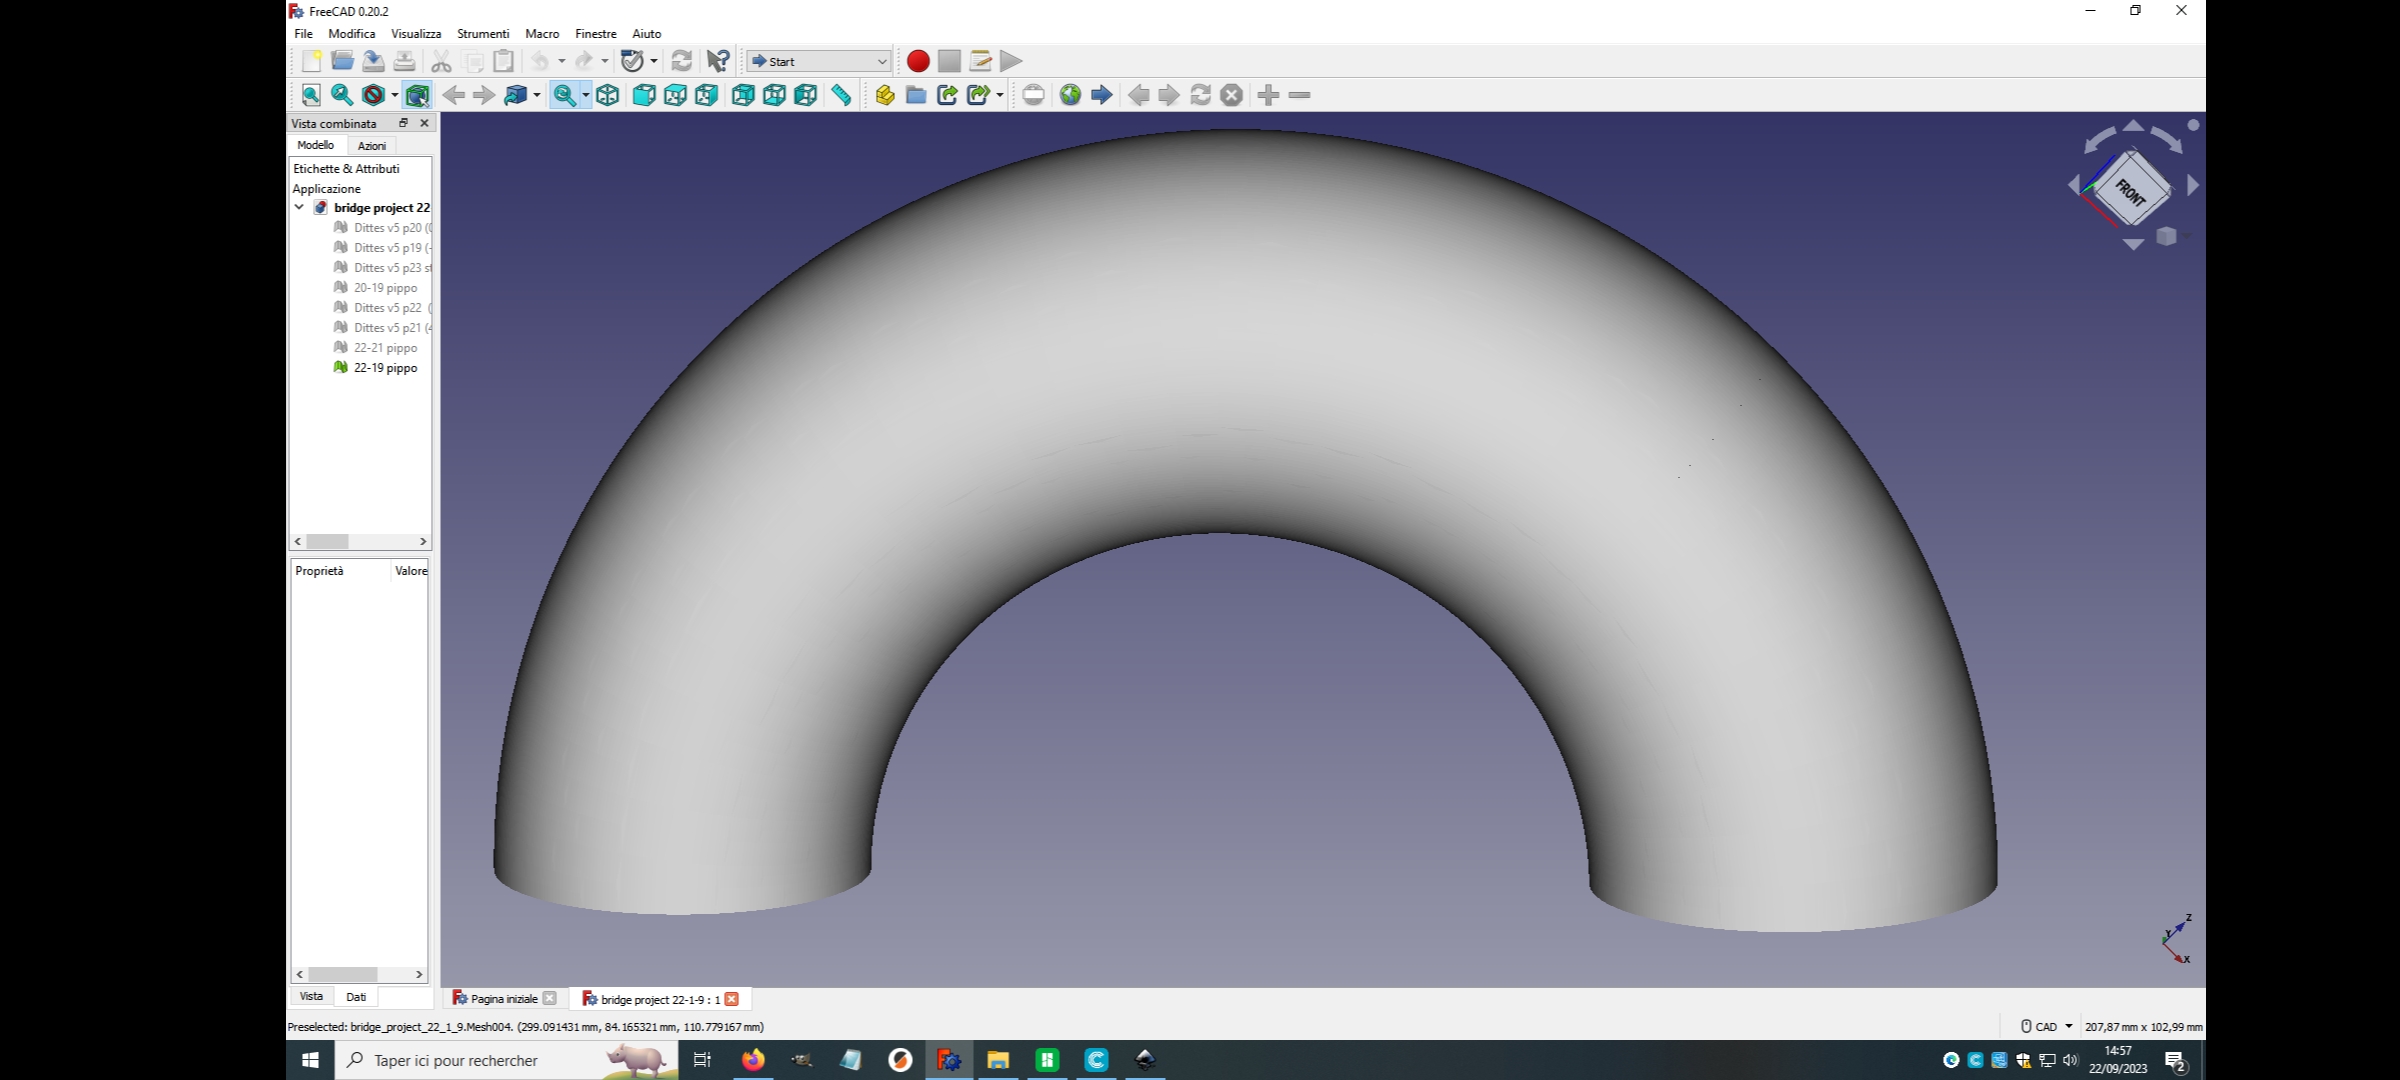
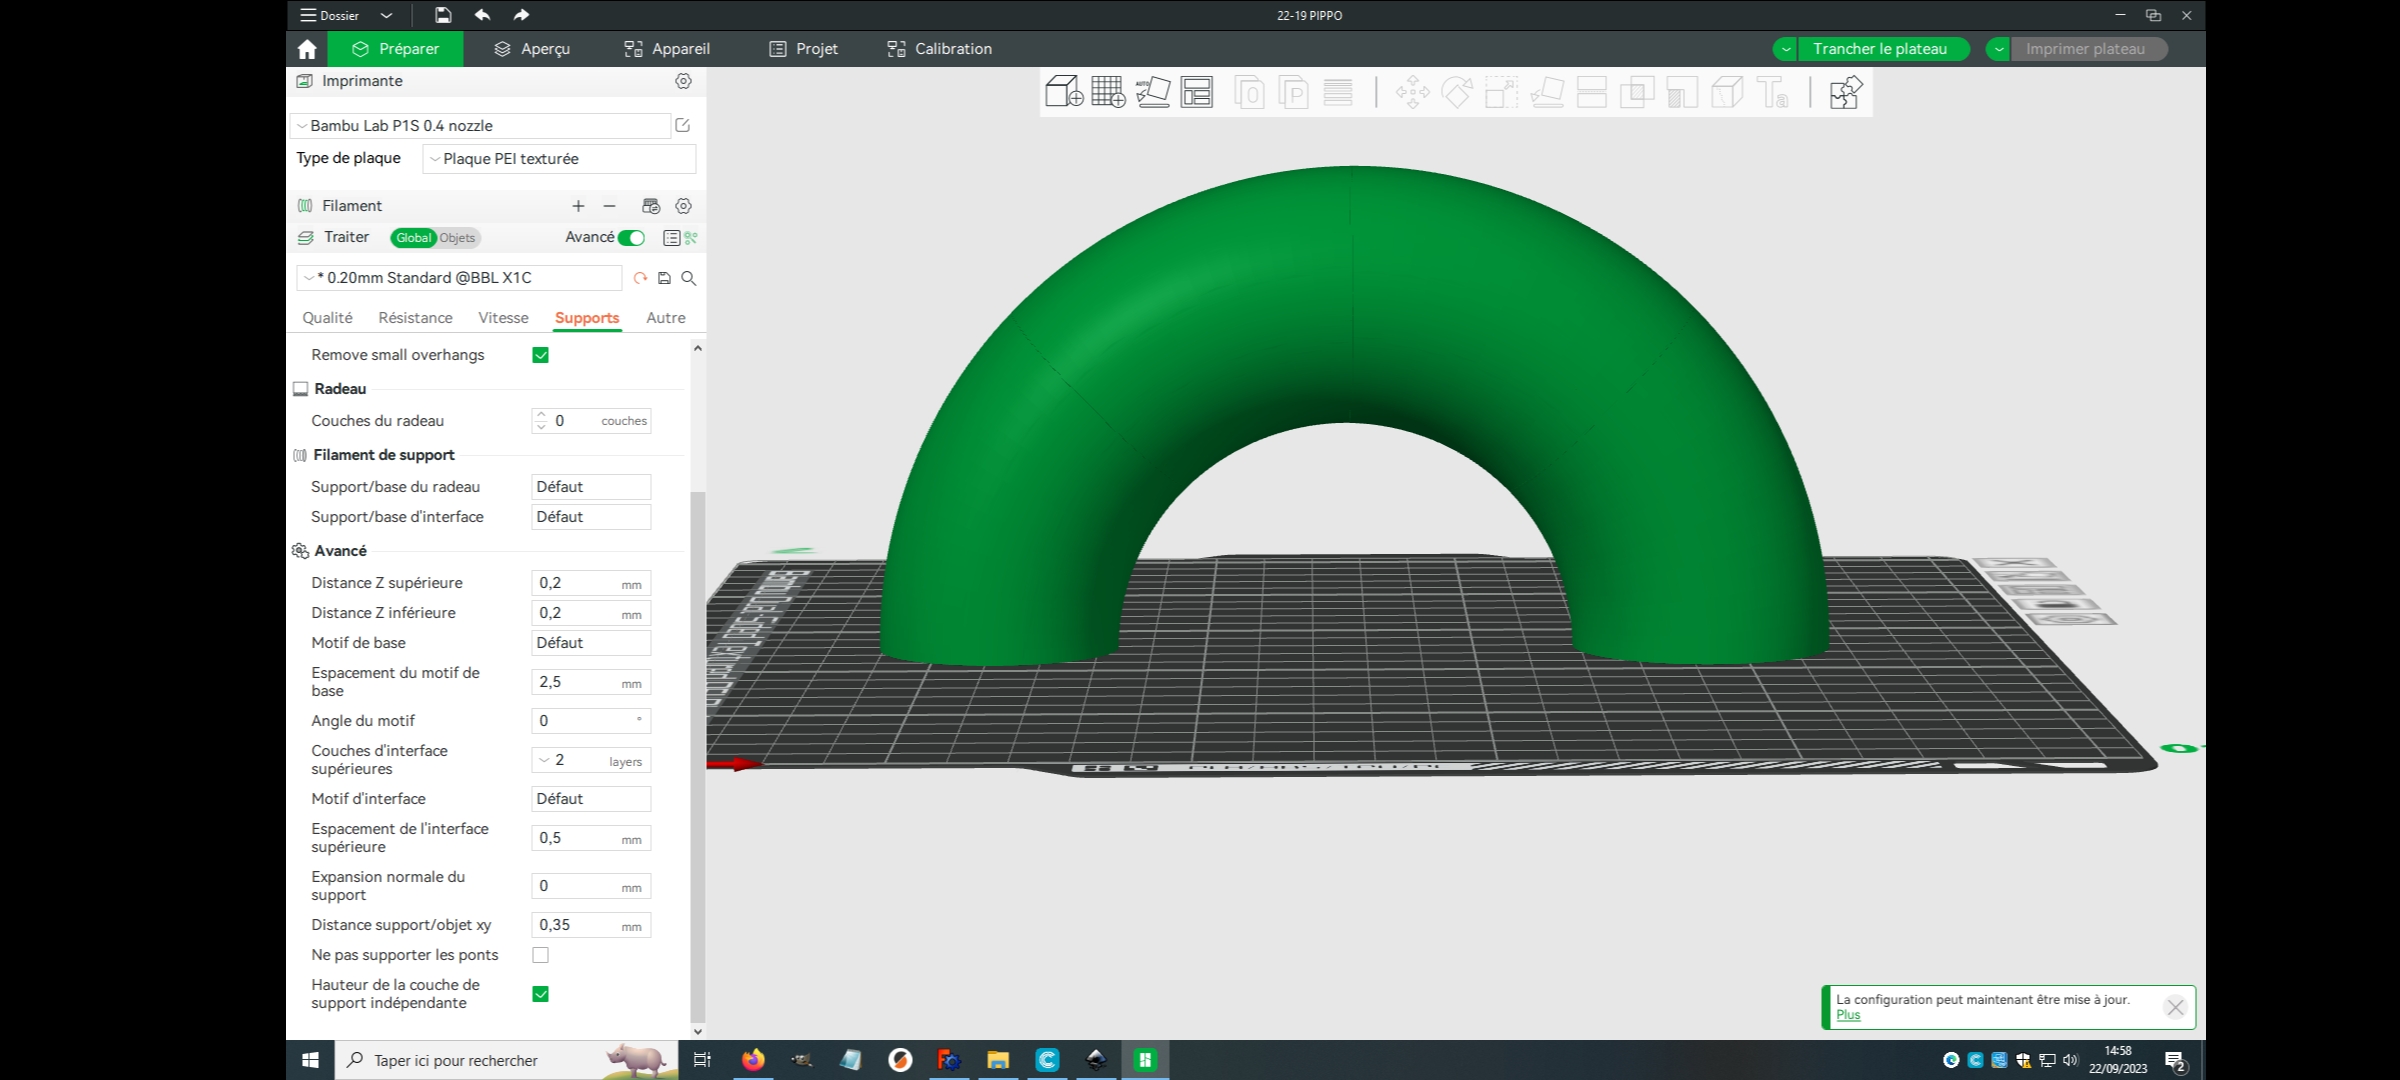
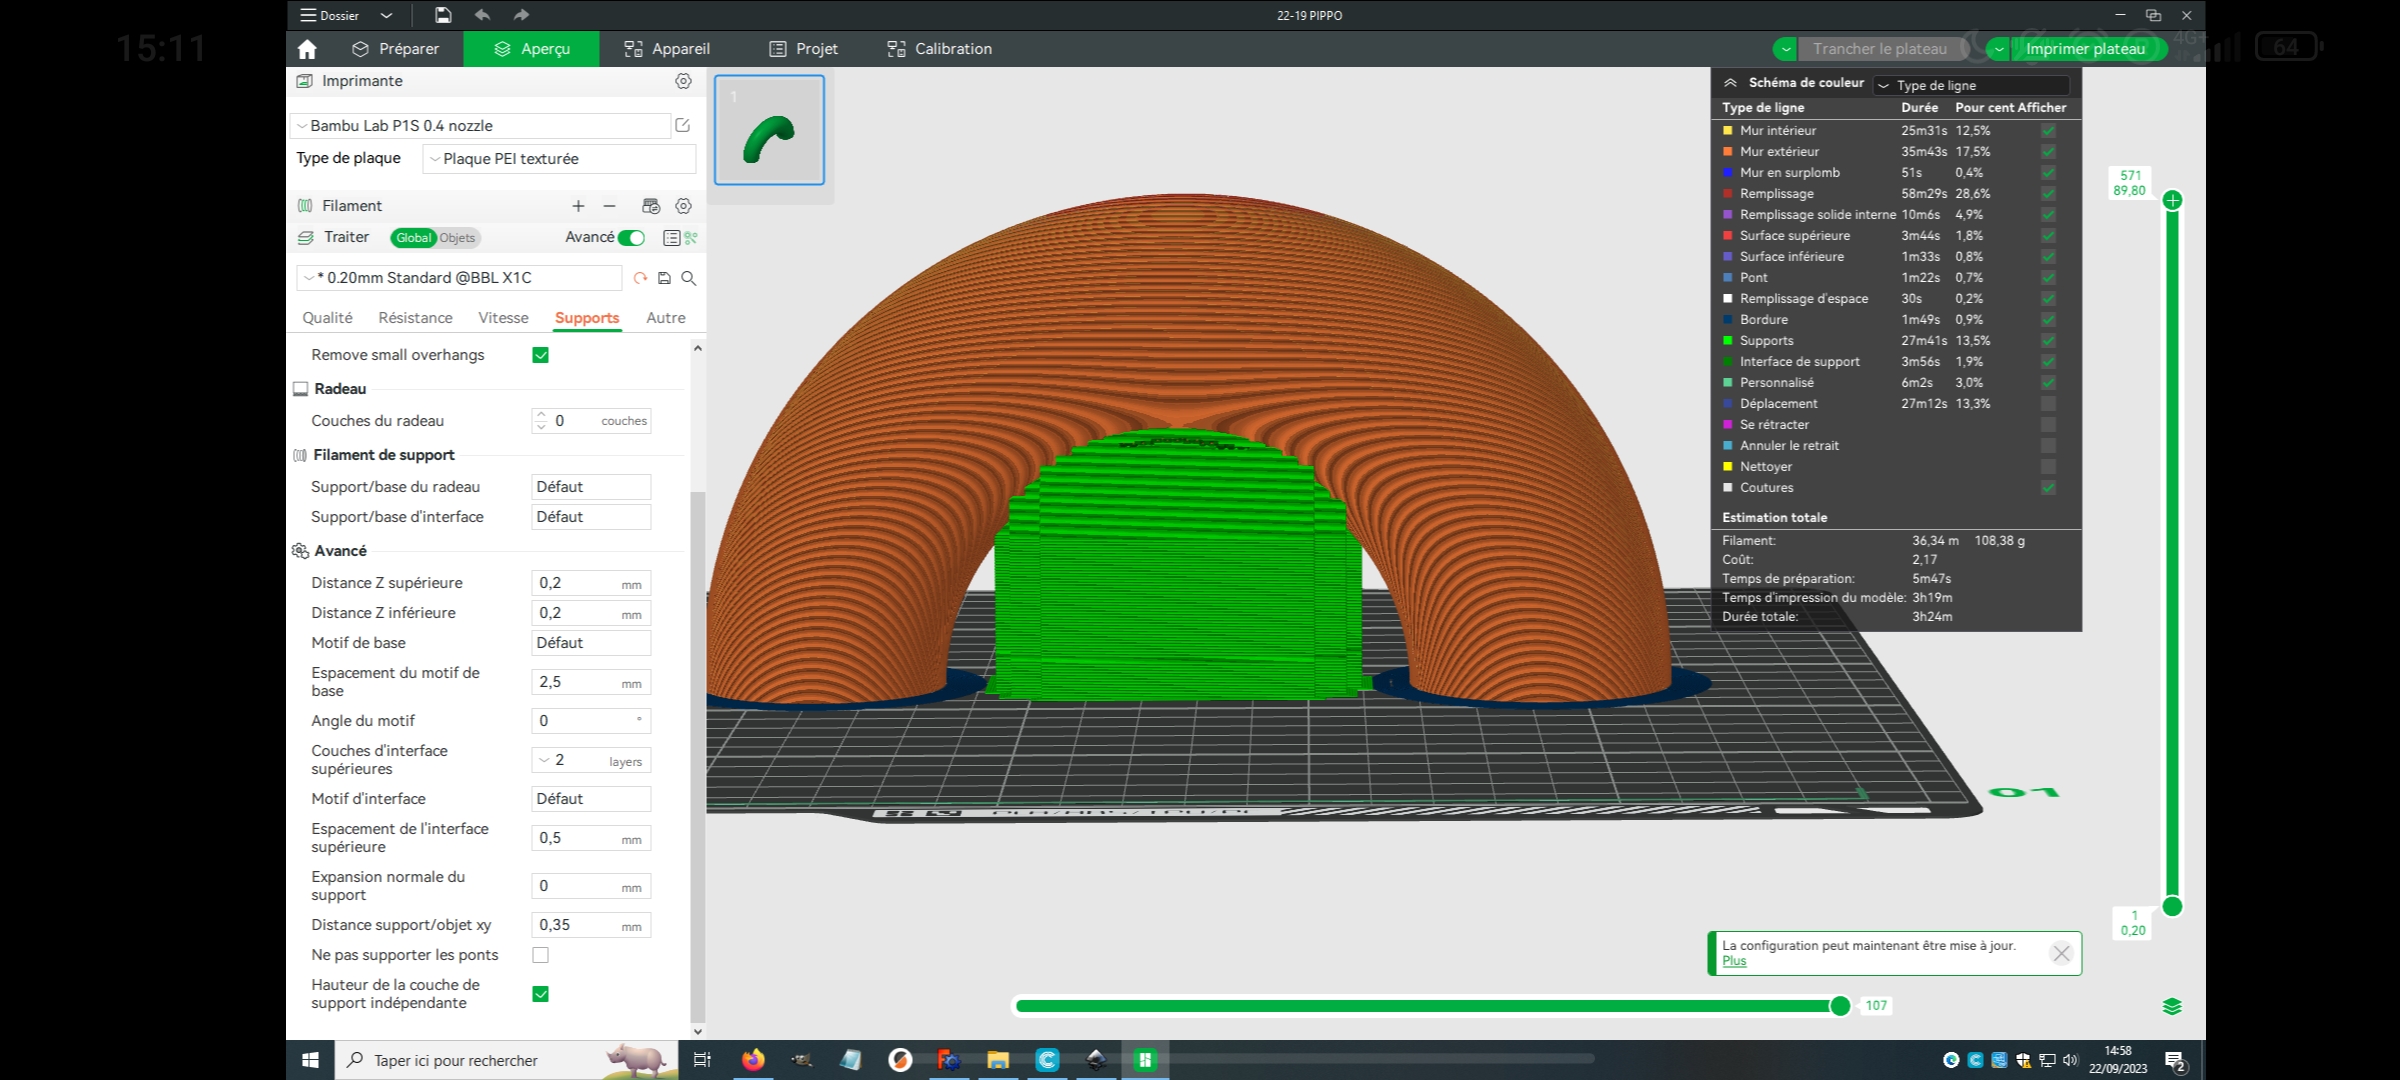
The first is in FreeCad the second and the third on Bambu studio (the software of Bambu Lab).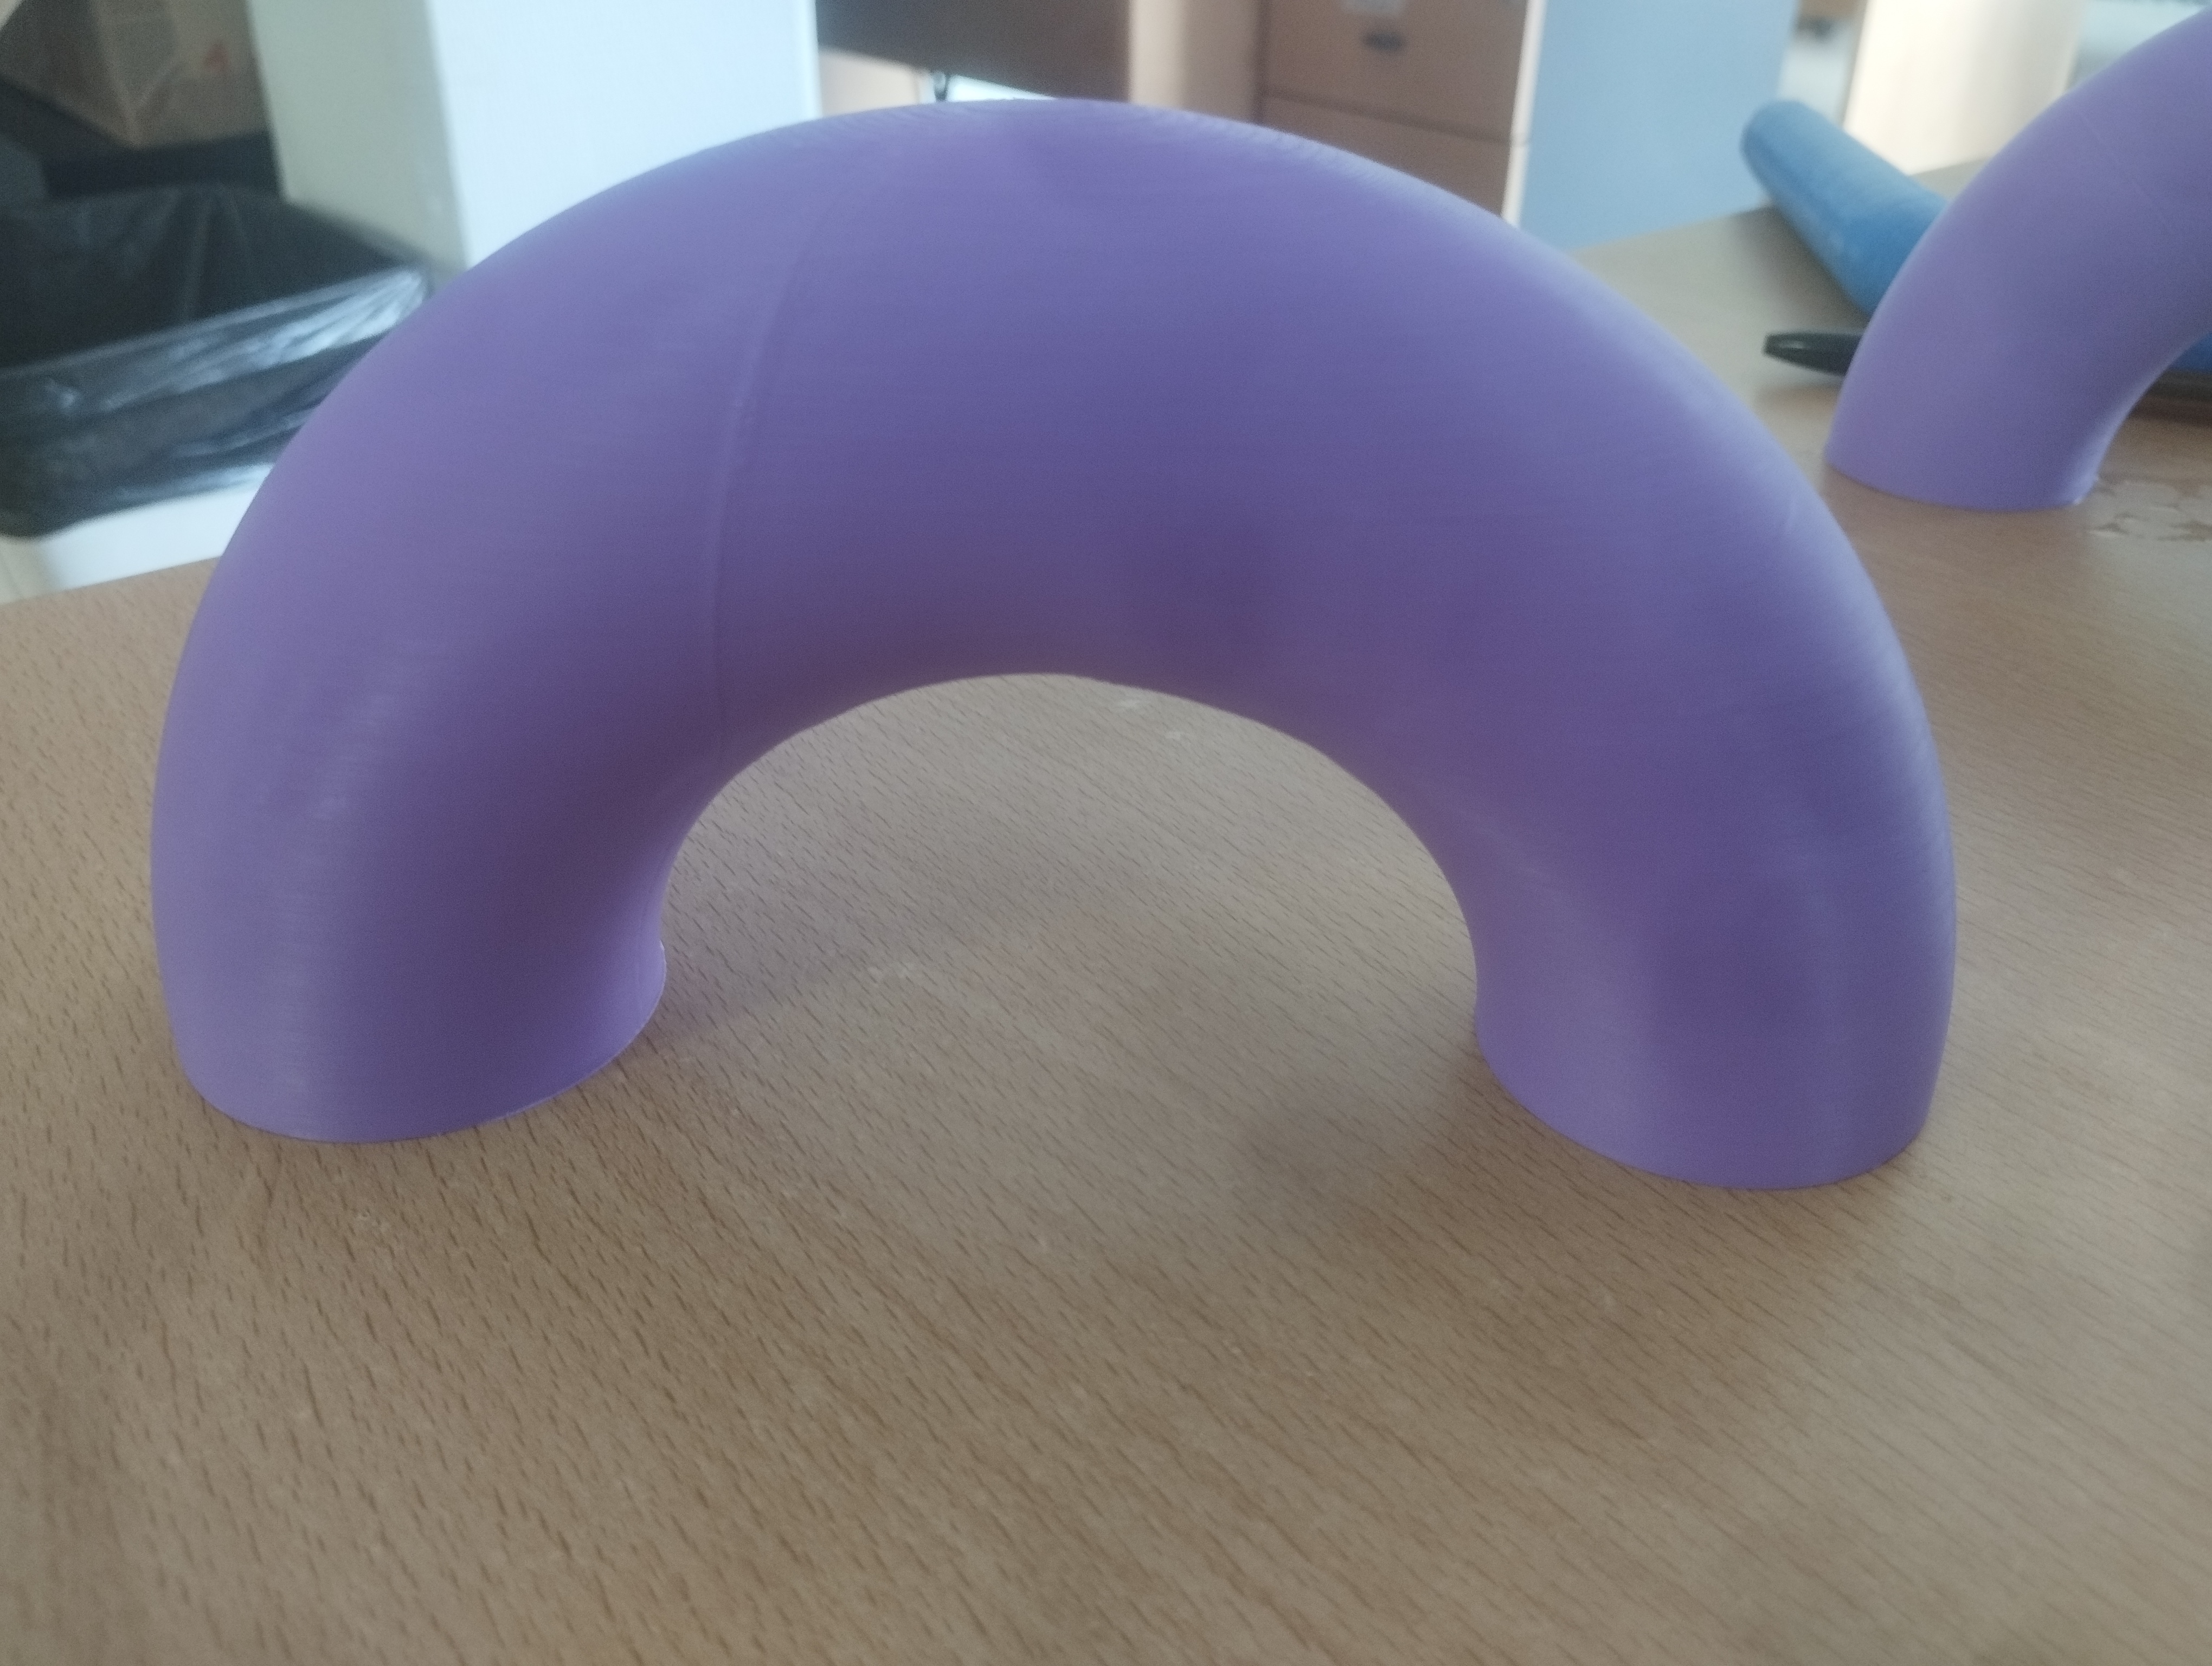
That line is not a problem: is where the printer change the sense of the printing. In the background we can also see the old piece which is no more useful :(
25/09/23
Also today i have dedicated part of the day to the "bridge project". I thinked that i can include other pieces in the "bridges".
If this technique works, the total amount of pieces it will be 10, and i didn't studied the lower part yet.
I have also started thinking about the asseblage of the serpent without the glue. In my opinion is important to have an idea about how it will be the final instrument, that's why i reduced the number of the pieces (for now only in my mind). So i read the Flora EVENO's project and now i made some ideas.
I could use a mechanism similar to the bottle cap, or maybe a screwing mechanism or maybe using some cork. For now these are only idea in my mind, this is a difficult task infact i the serpent it has always been a whole piece, i think am the one of firsts person that try to split it.
Junctions day 26/09/23
Today i decided to focalize myself in the realization of the junction to have an instrument that is not a whole piece. I used the same tecnique of Flora EVENO, which is also the same of the clarinet.
Printing that little protusions and the normal pieces togheter it's to complicated so i decided to print them alone and to gluing them in a second time. I made a lot of tries and i don't find already the perfect solution.
in this pictures it's easier to understand my idea.
Using this tecnique i will have to study every junction, because they depends from the size of the pieces that they have to link. For now i'm studying the junction beetween the pieces 23 and 22. I don't know if they will be printed togheter or not in the final form of the instrument, but they are the smallest parts and i choose them for this.
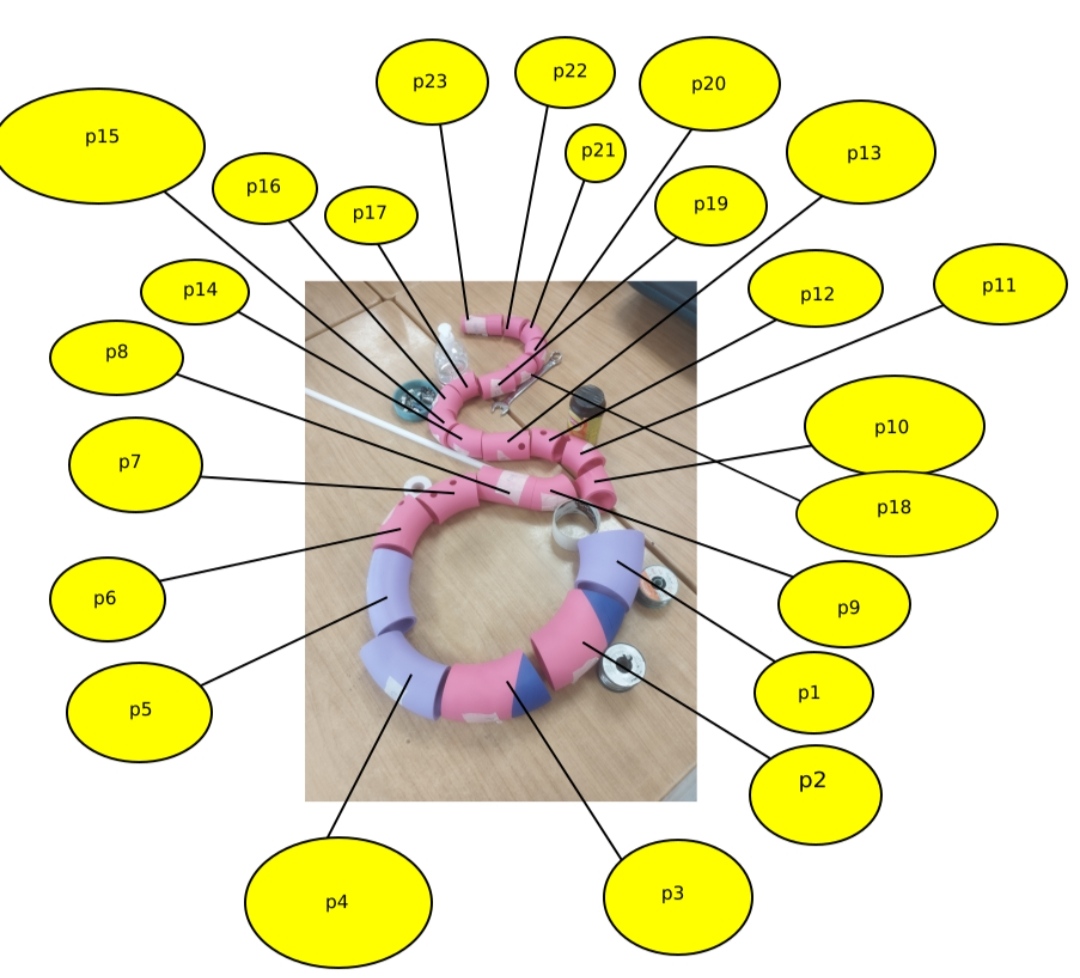
I have also to say that for now i hae organized the serpent in this way (in my mind): 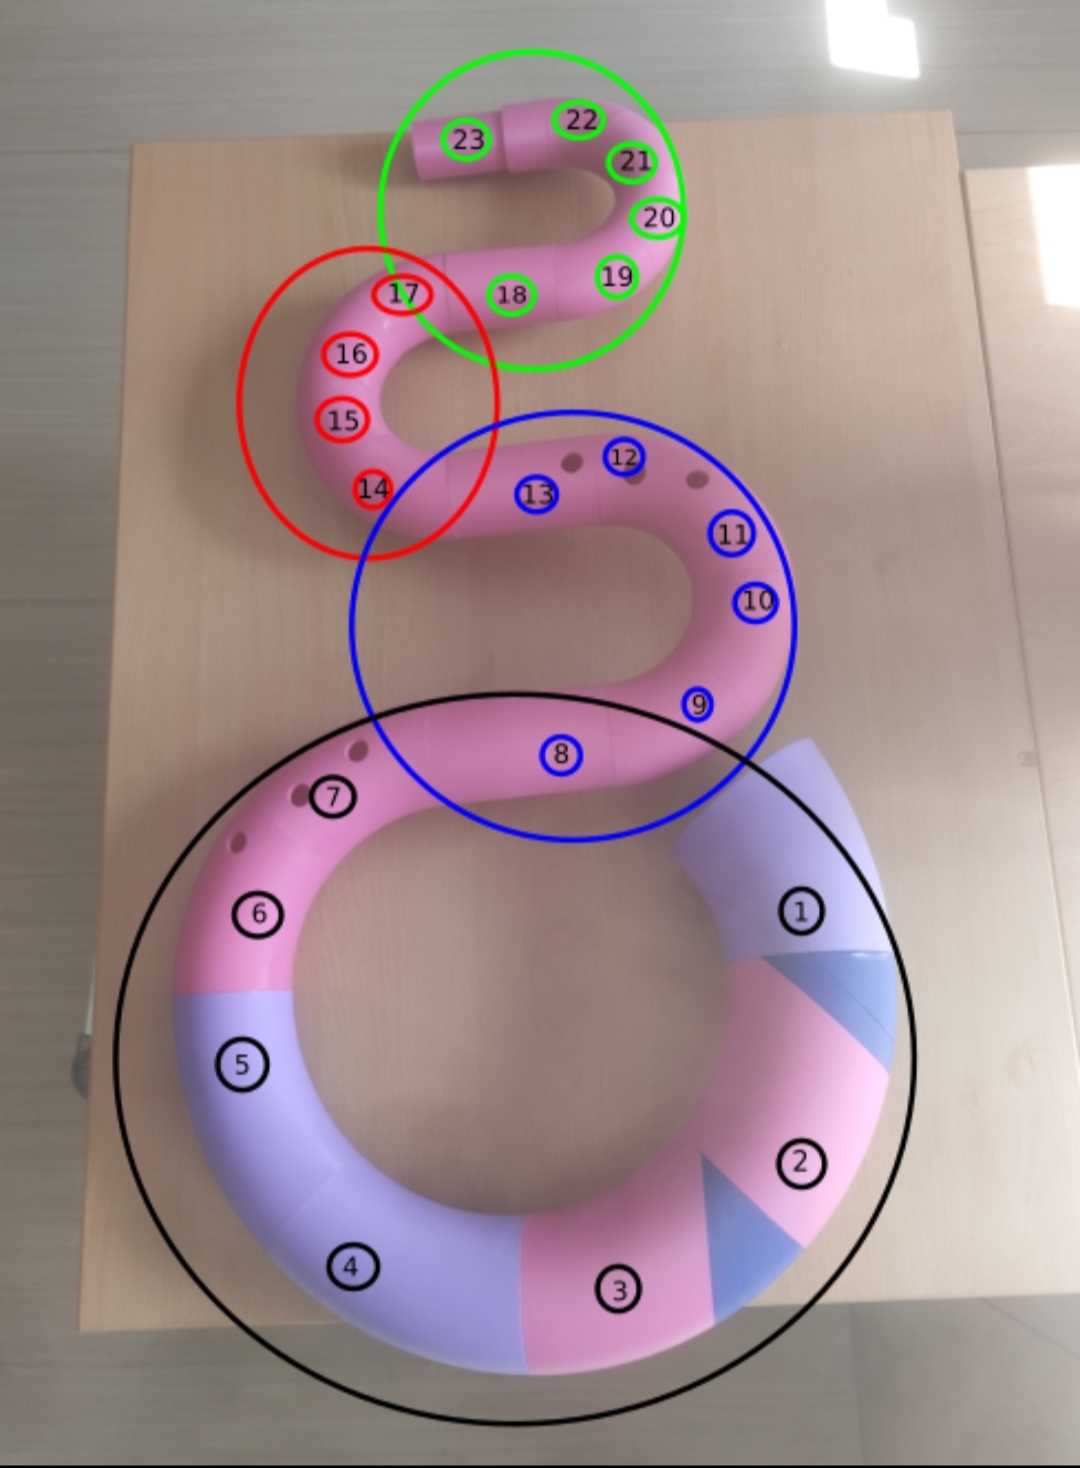
There are 4 section: green, red, blue and black. The first 3 are groups of pieces are group of pieces that can be printed togheter using bridges. For the black section i didn't studied a solution yet; i've tried to unite the pieces 1-2-3-4 and 7-6-5-4 in a bridge, but they are both too tall and they don't fit in the printer. For now my only advice for that it's to print them in pairs, but it will nedd a lot of supports and it's not the best solution.
The liege tecnique it's the best for the first three section, because to link them i would need only 2 junctions.
I suppose that the junction will be more functional if i put the liege's part in a straight component, for example gluing a junction in the piece 22 so i will have the liege in the 23.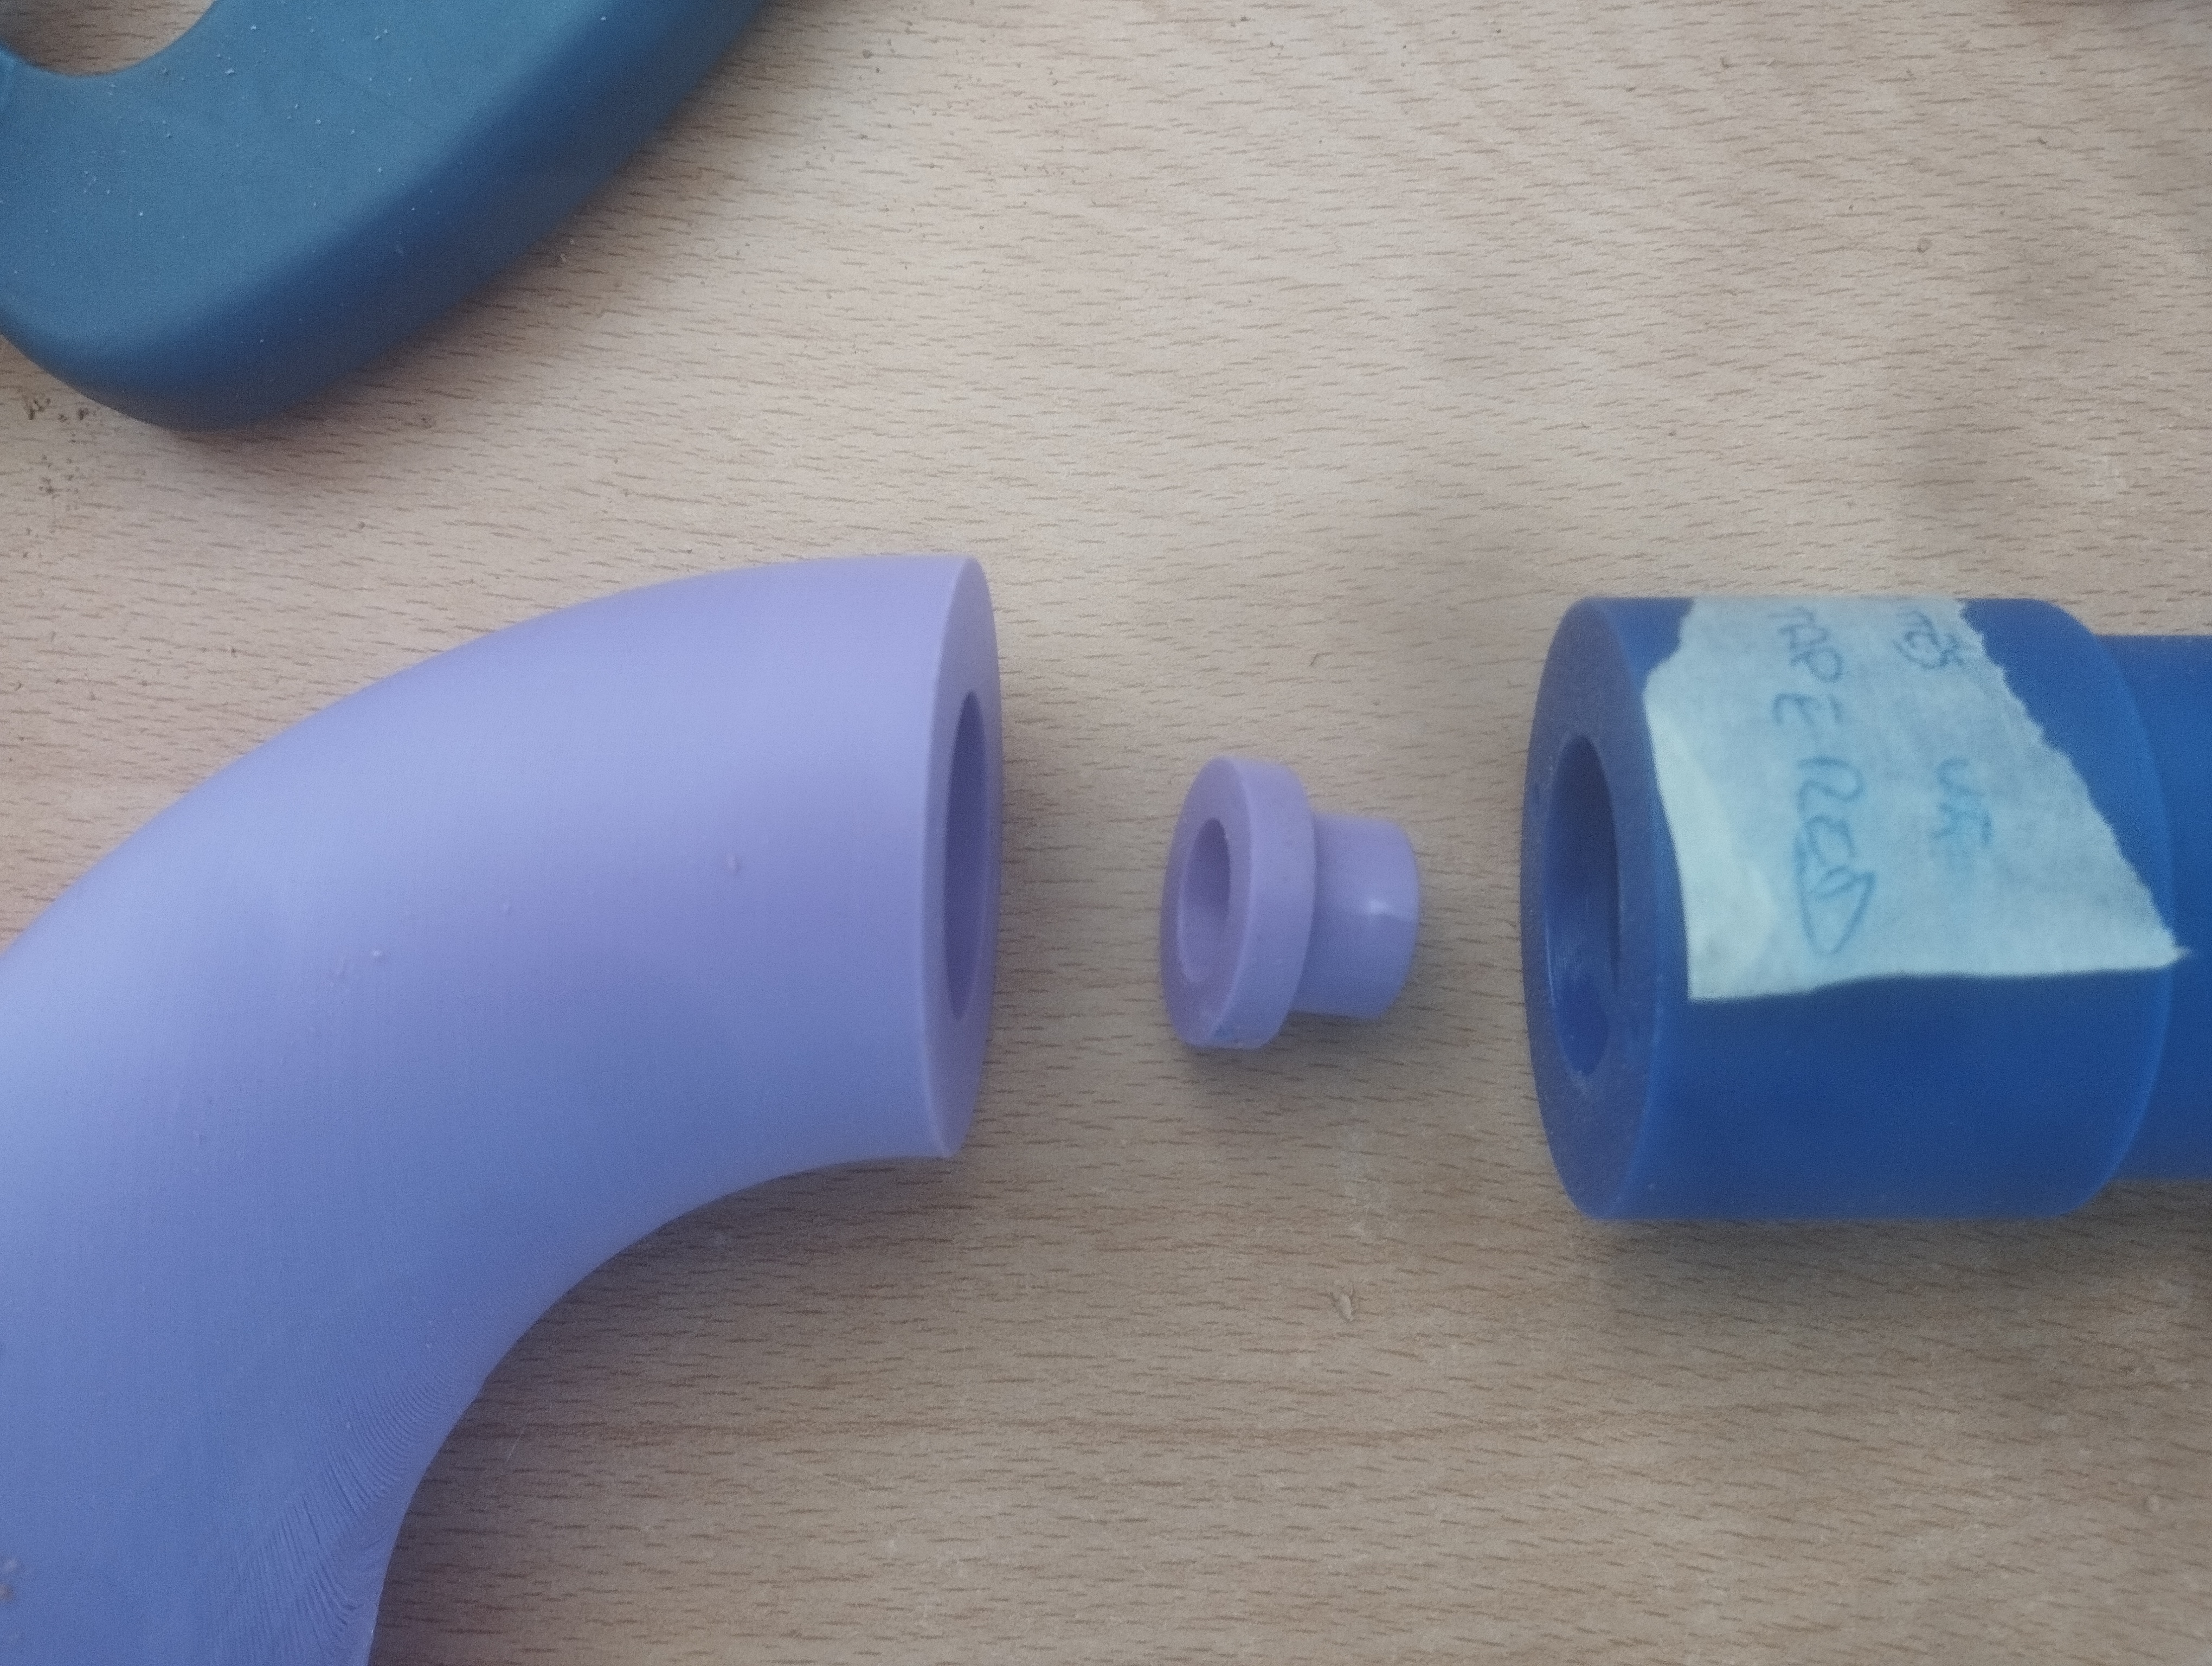
I think it's better because the curved pieces are curved also inside them; so if a junction is straight it wouldn't fit completely in the curved piece. So in that case the junction would need to be curved as the piece; which is a very complicated task beacuse i don't know how curved the pieces are and i don't even know how to measure that angulation.
So i have started my experiments using pieces 22-23 as riferiment.
The junction are made by two part, one bigger and one smaller. The Bigger part has the diameter one millimeter smaller about the diameter of the piece that it have to fit in; that millimeter wil be covered by the superglue, infact it's the part that have to be glued on the instrument, i think that 1 millimeter less than the piece diameter, could be good for all the junctions (for now 1 less millimeter it's the best i found. Maybe you can try with intermediate measures). The smaller part need to be covered with the liege until it reaches a size similar to the bigger part, and has to fit in the other component. His value can variate, because it depend from how thick the liege is. I am using a normal sheet of liege and for now i'm cutting all the strips that i need with a saw. This is not exactly the best because i am not accurate and every strip it's different from the others. Furthermore there can't be a small hole in the junction otherwise the sound would be compromised, so the thickness of the liege must be balanced. So at this point in my case is not even so important to model the junction in the perfect way, because my work with liege it's approximate. The top it's to buy the strips of liege alredy done and to use, so i could also make the right calculation on FreeCad. We have already ordered them but they won't arrive on time because i'm goign to leave on samedi😢.
Junctions 27/09/23
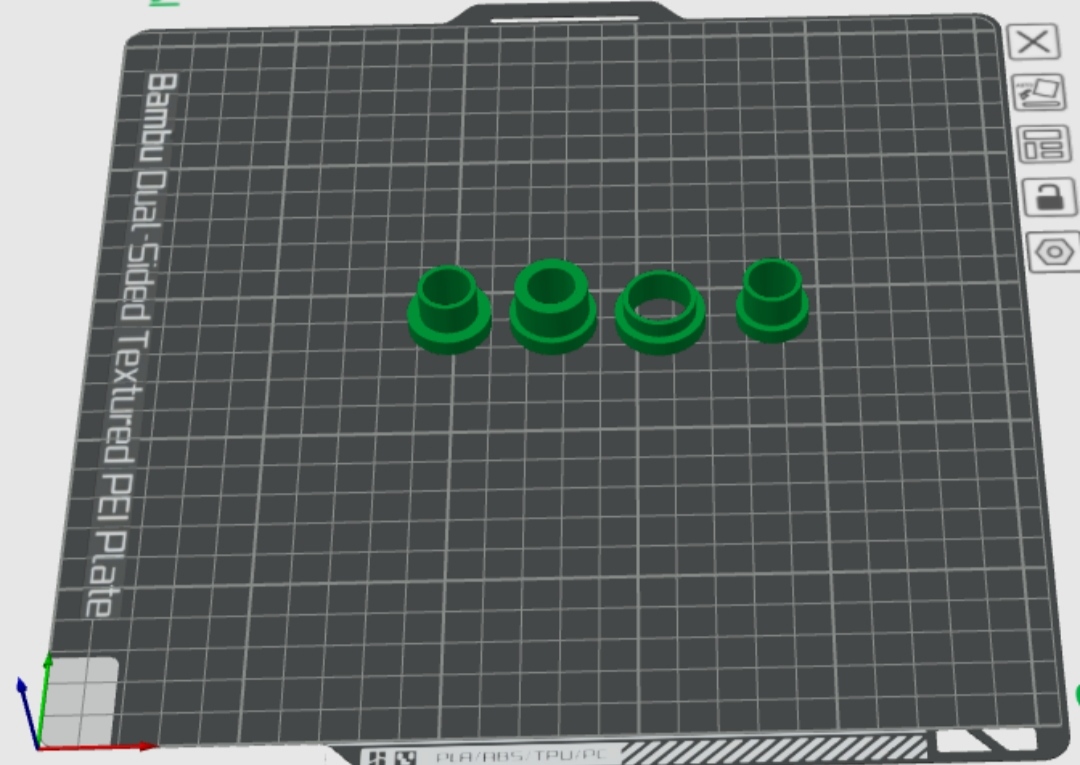
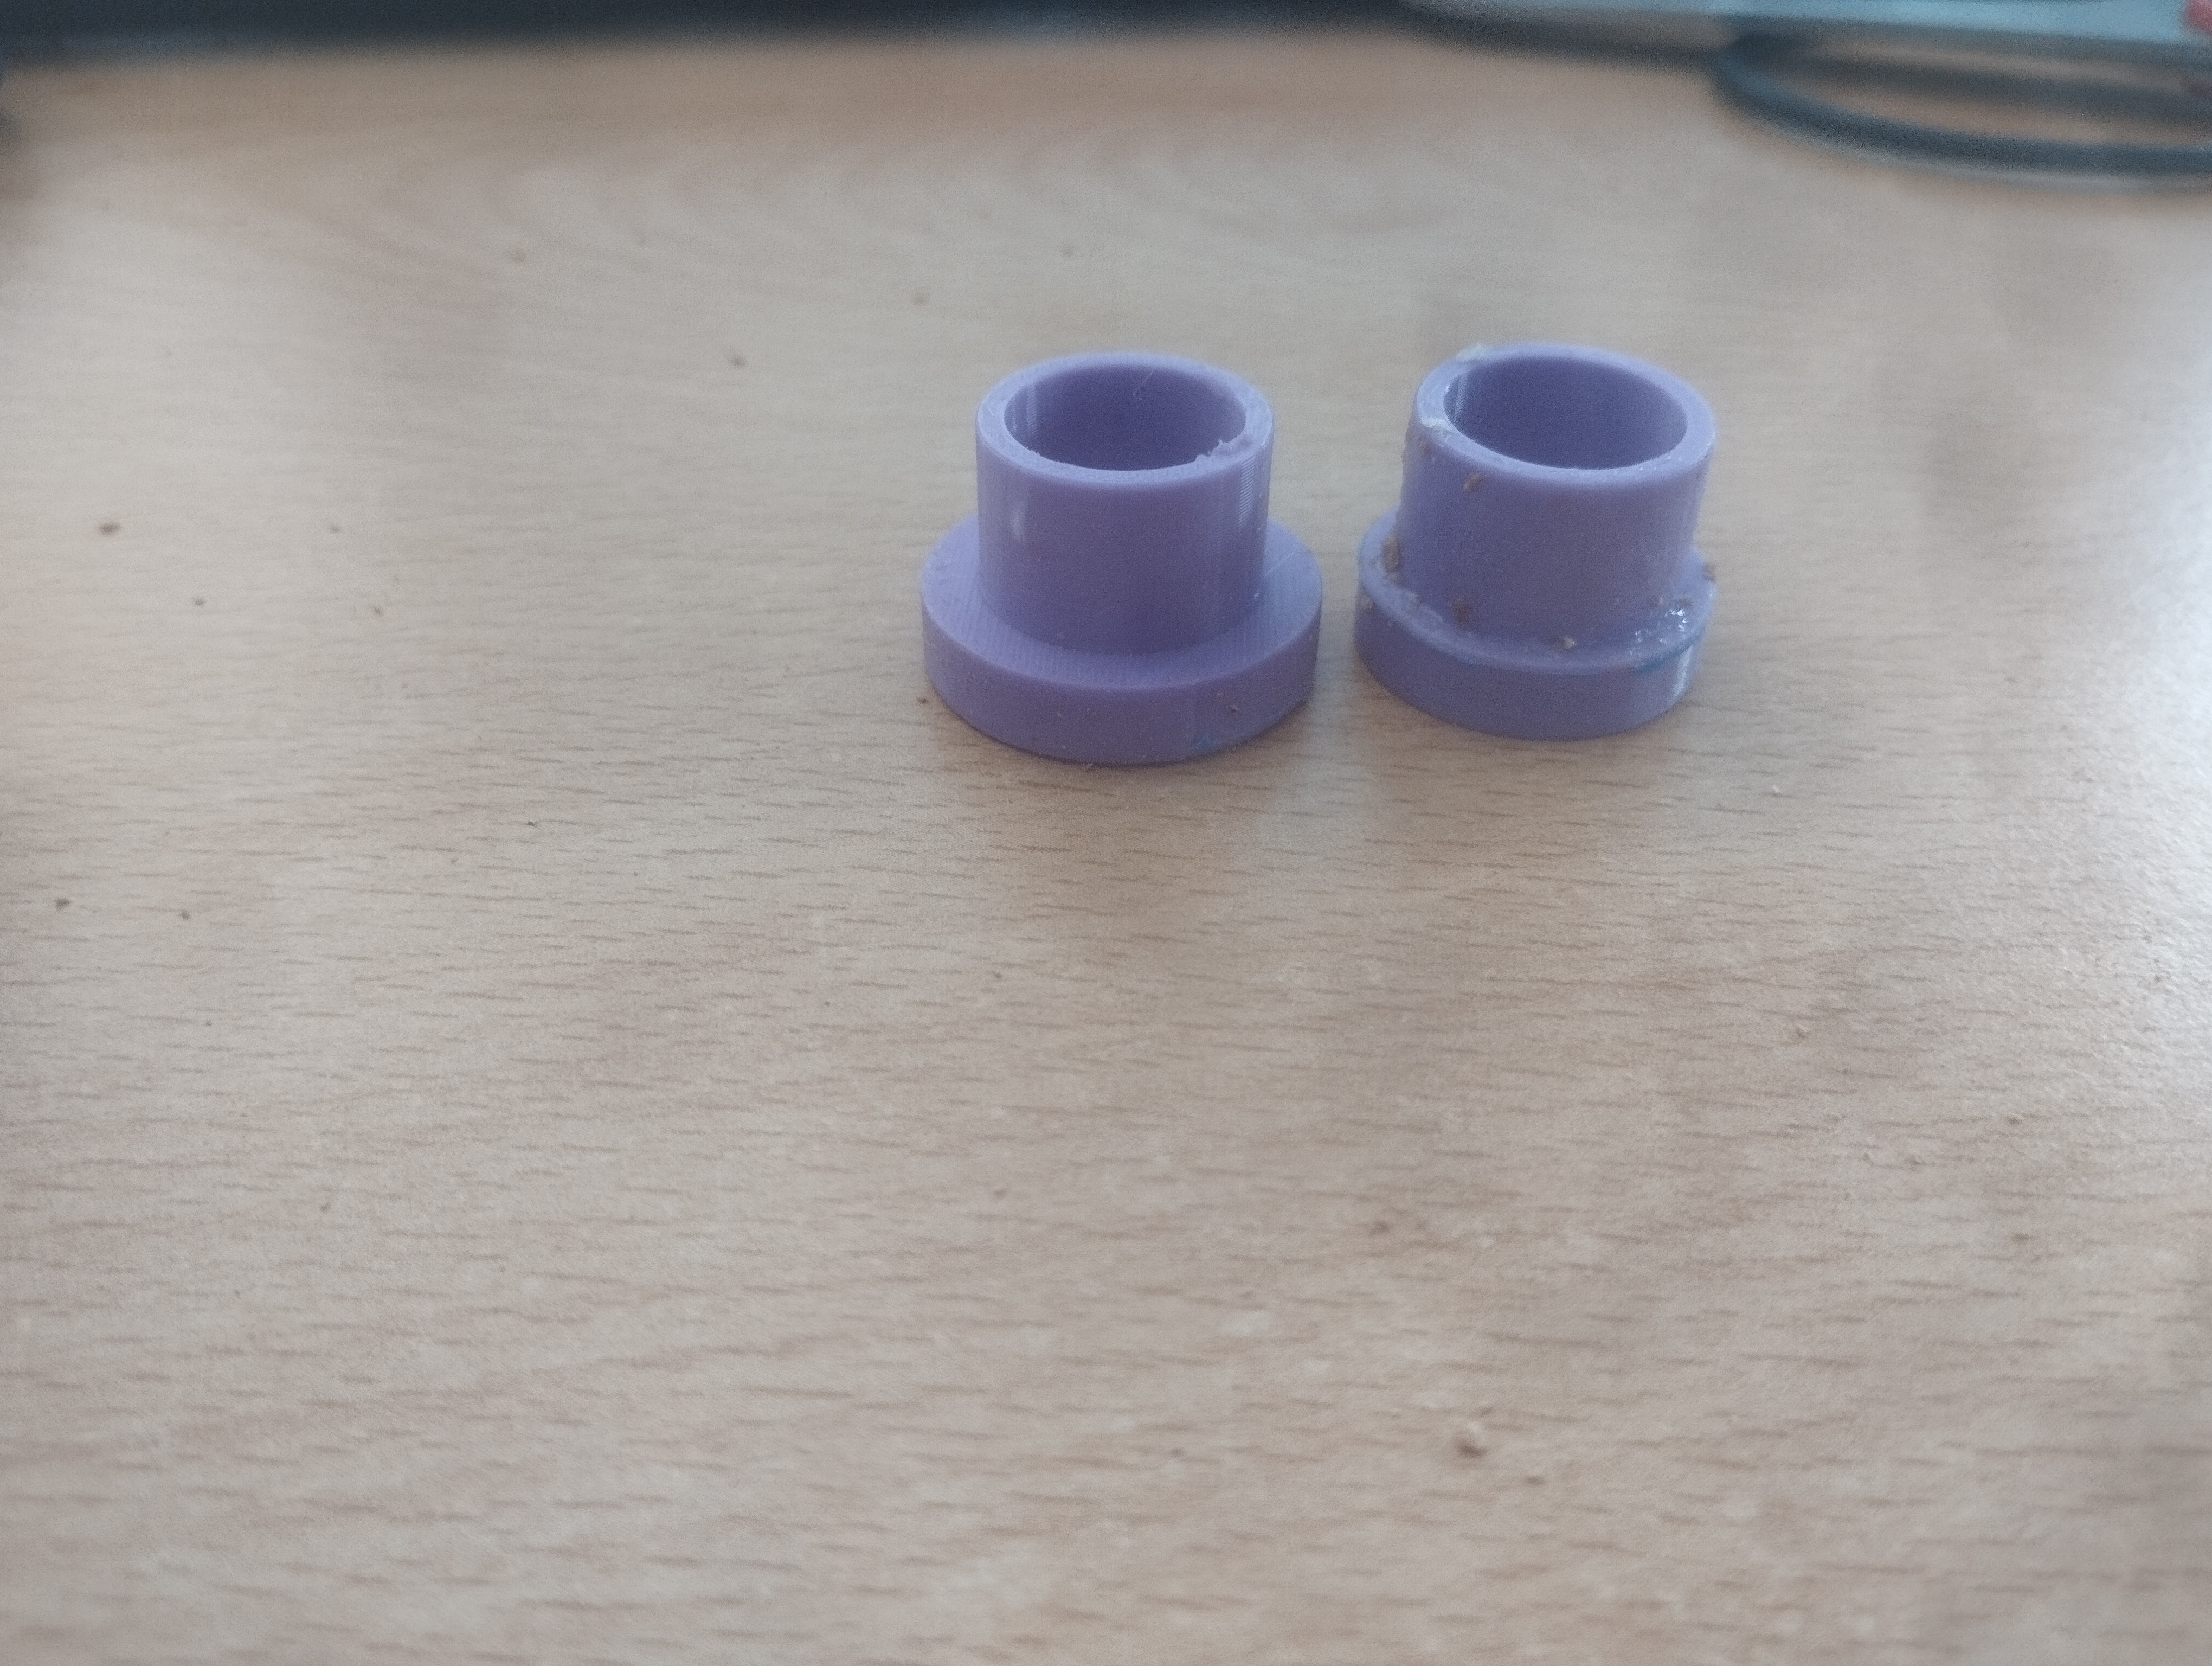
These are the measures of the best prototype for now: prototype number five:
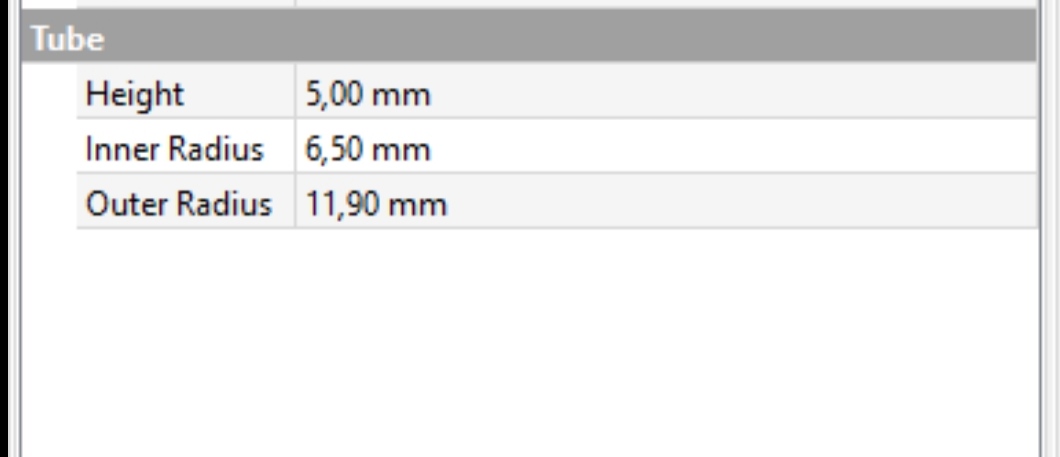
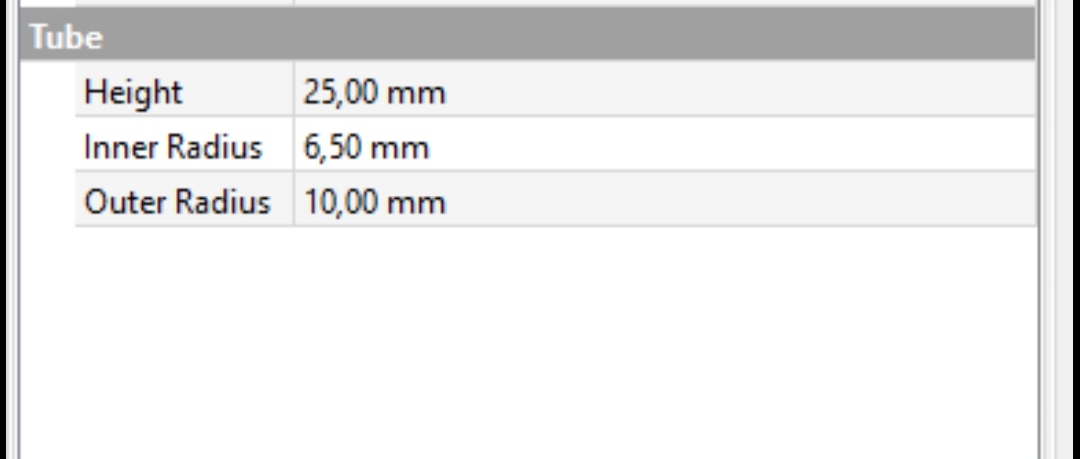
To made the prototype i build two cylinder i overlap them and then i create the hole inside. PRT 5 isn't the first one that works, but it was PRT4; PRT4 it's exactly the same but a little bit shorter, his height was 15mm.
This is how it looks like:
When i used PRT4, the amount of liege was right and the junction entered correctly in P23; but it wasn't really stable because p23 have a step inside his body: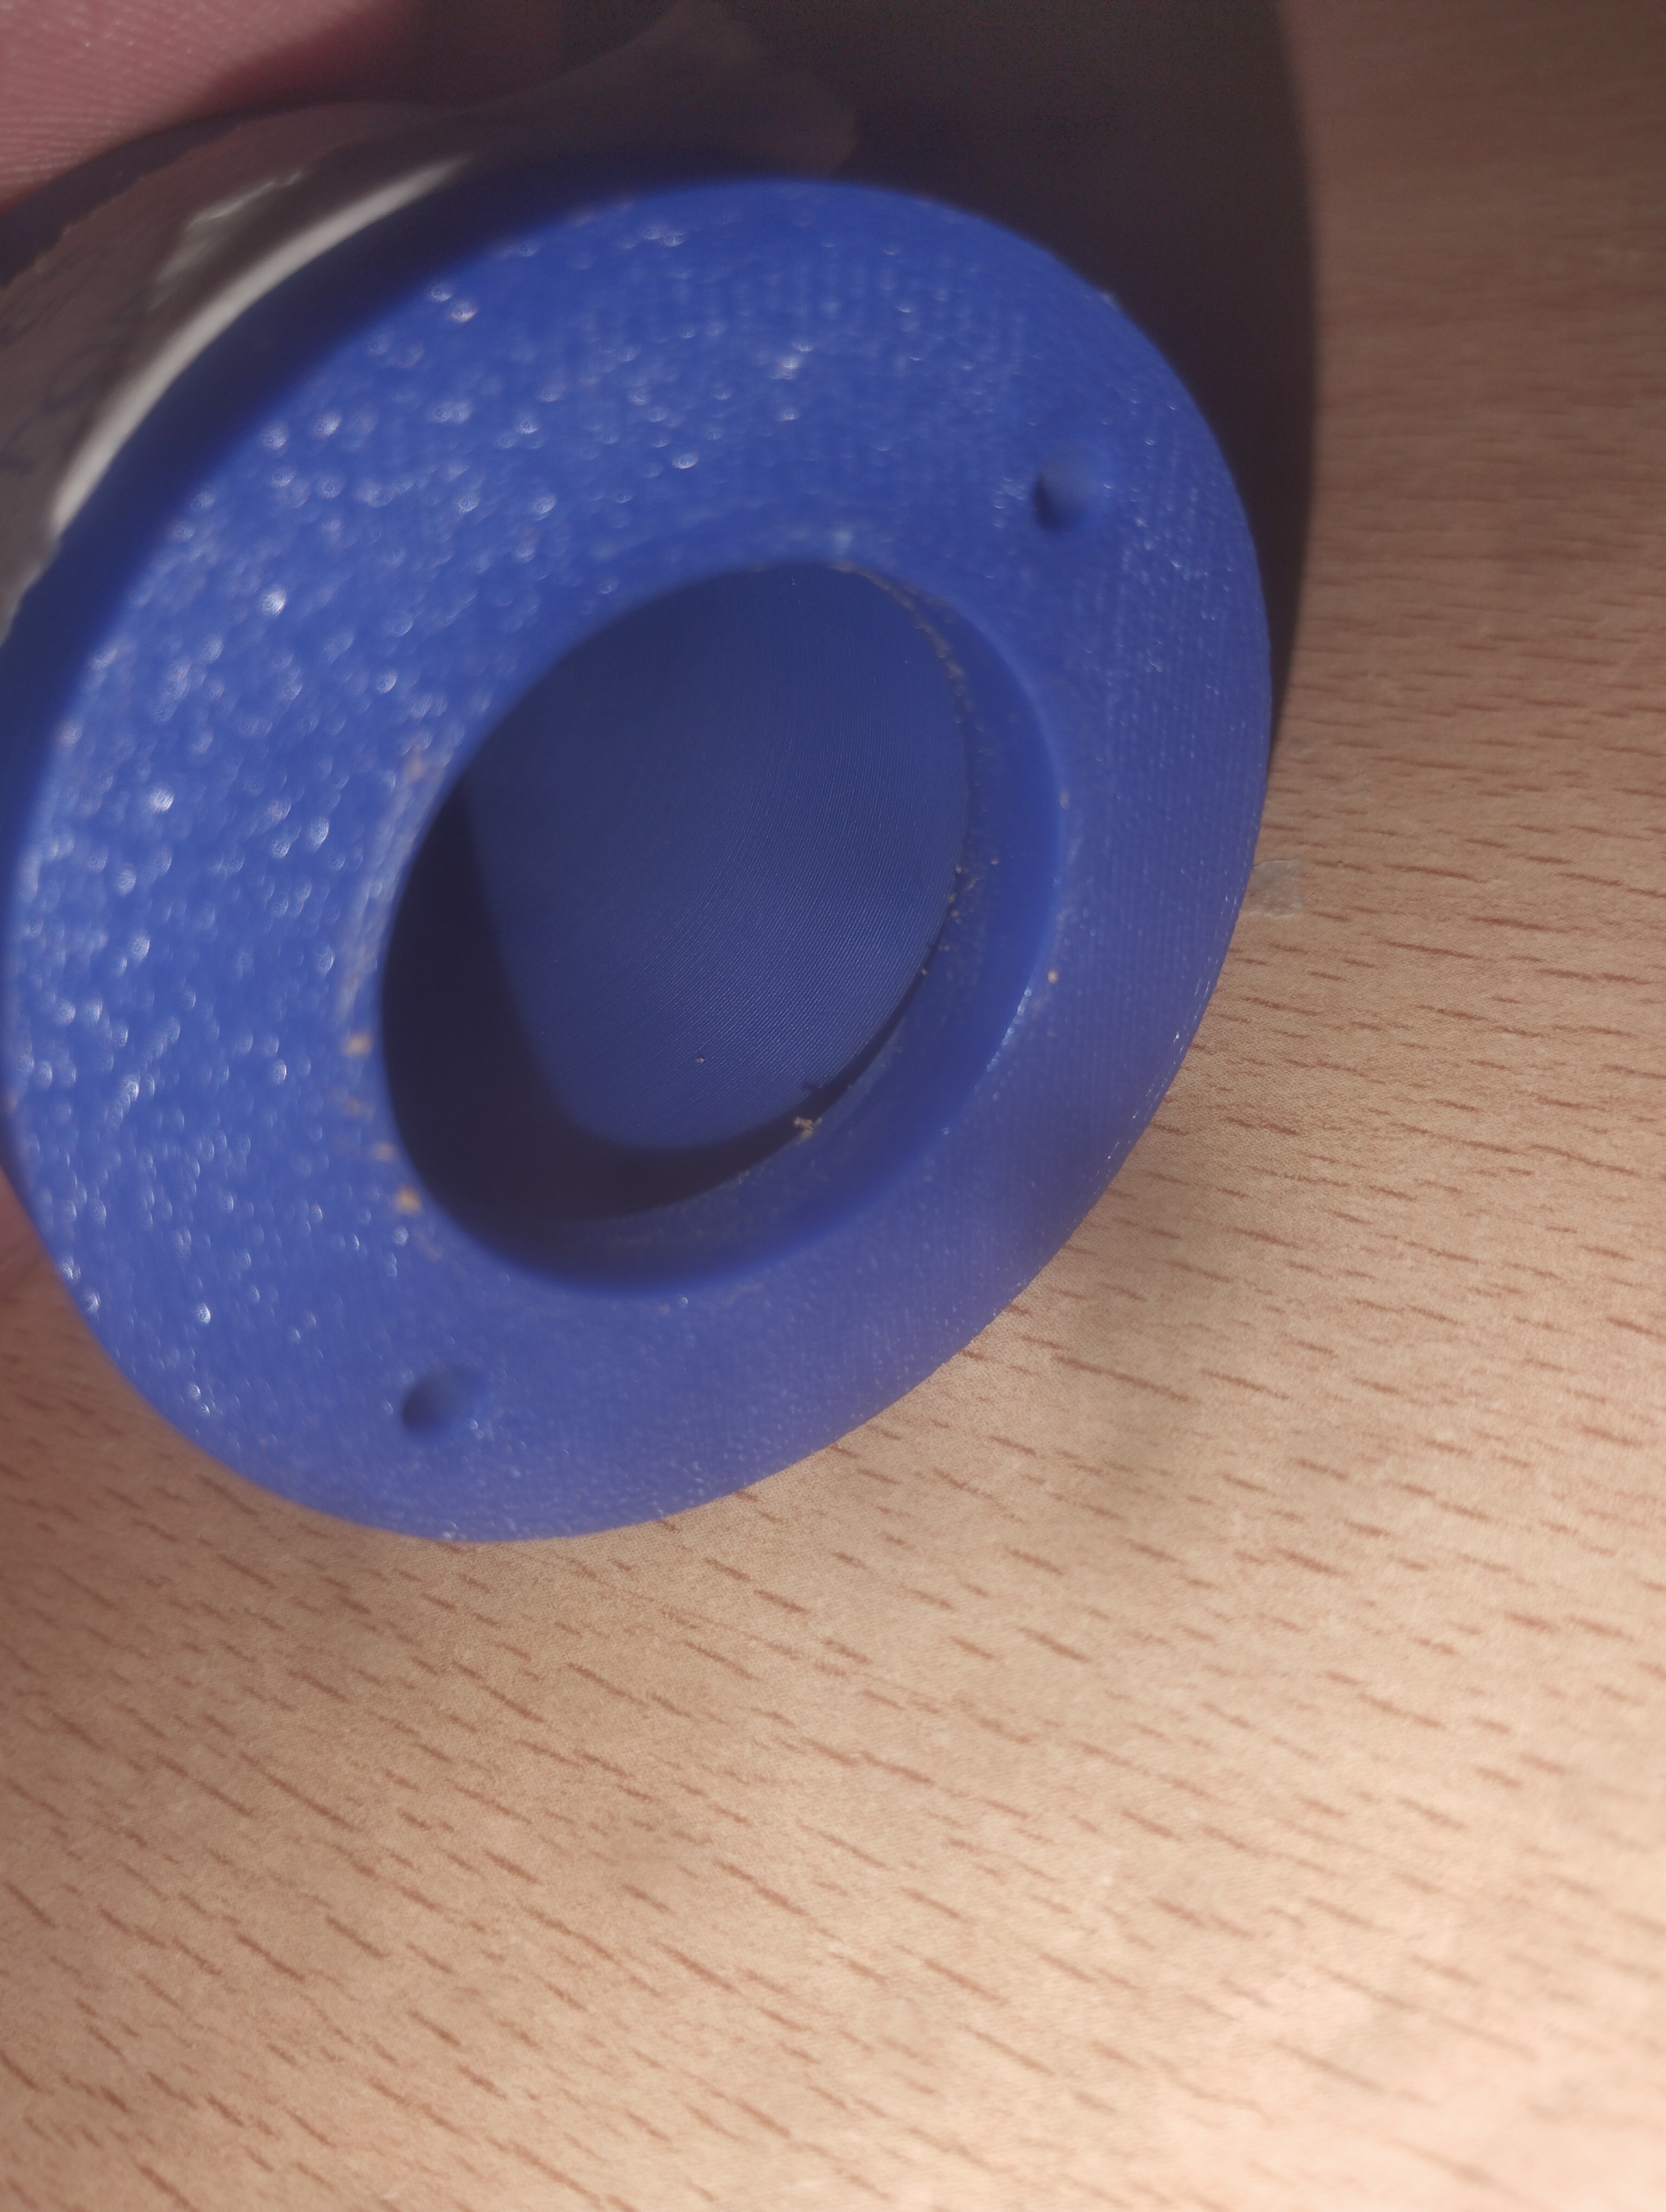
so the liege doesn't make a great contact; that's why i made PRT5. I thought that if the junction was taller and with an additive level of liege it could fit better: the result?
Not very good; cutting liege it's difficult and cutting an higher strip of liege it's more difficult. So i waste lot of liege and time and i didn't find the right strip.
I decided to print another cylinder that have the same size of piece 23 but without the step, only to see if this kind of join can work.
For today i have no more time so tomoroww i will dedicate all the day to this task.
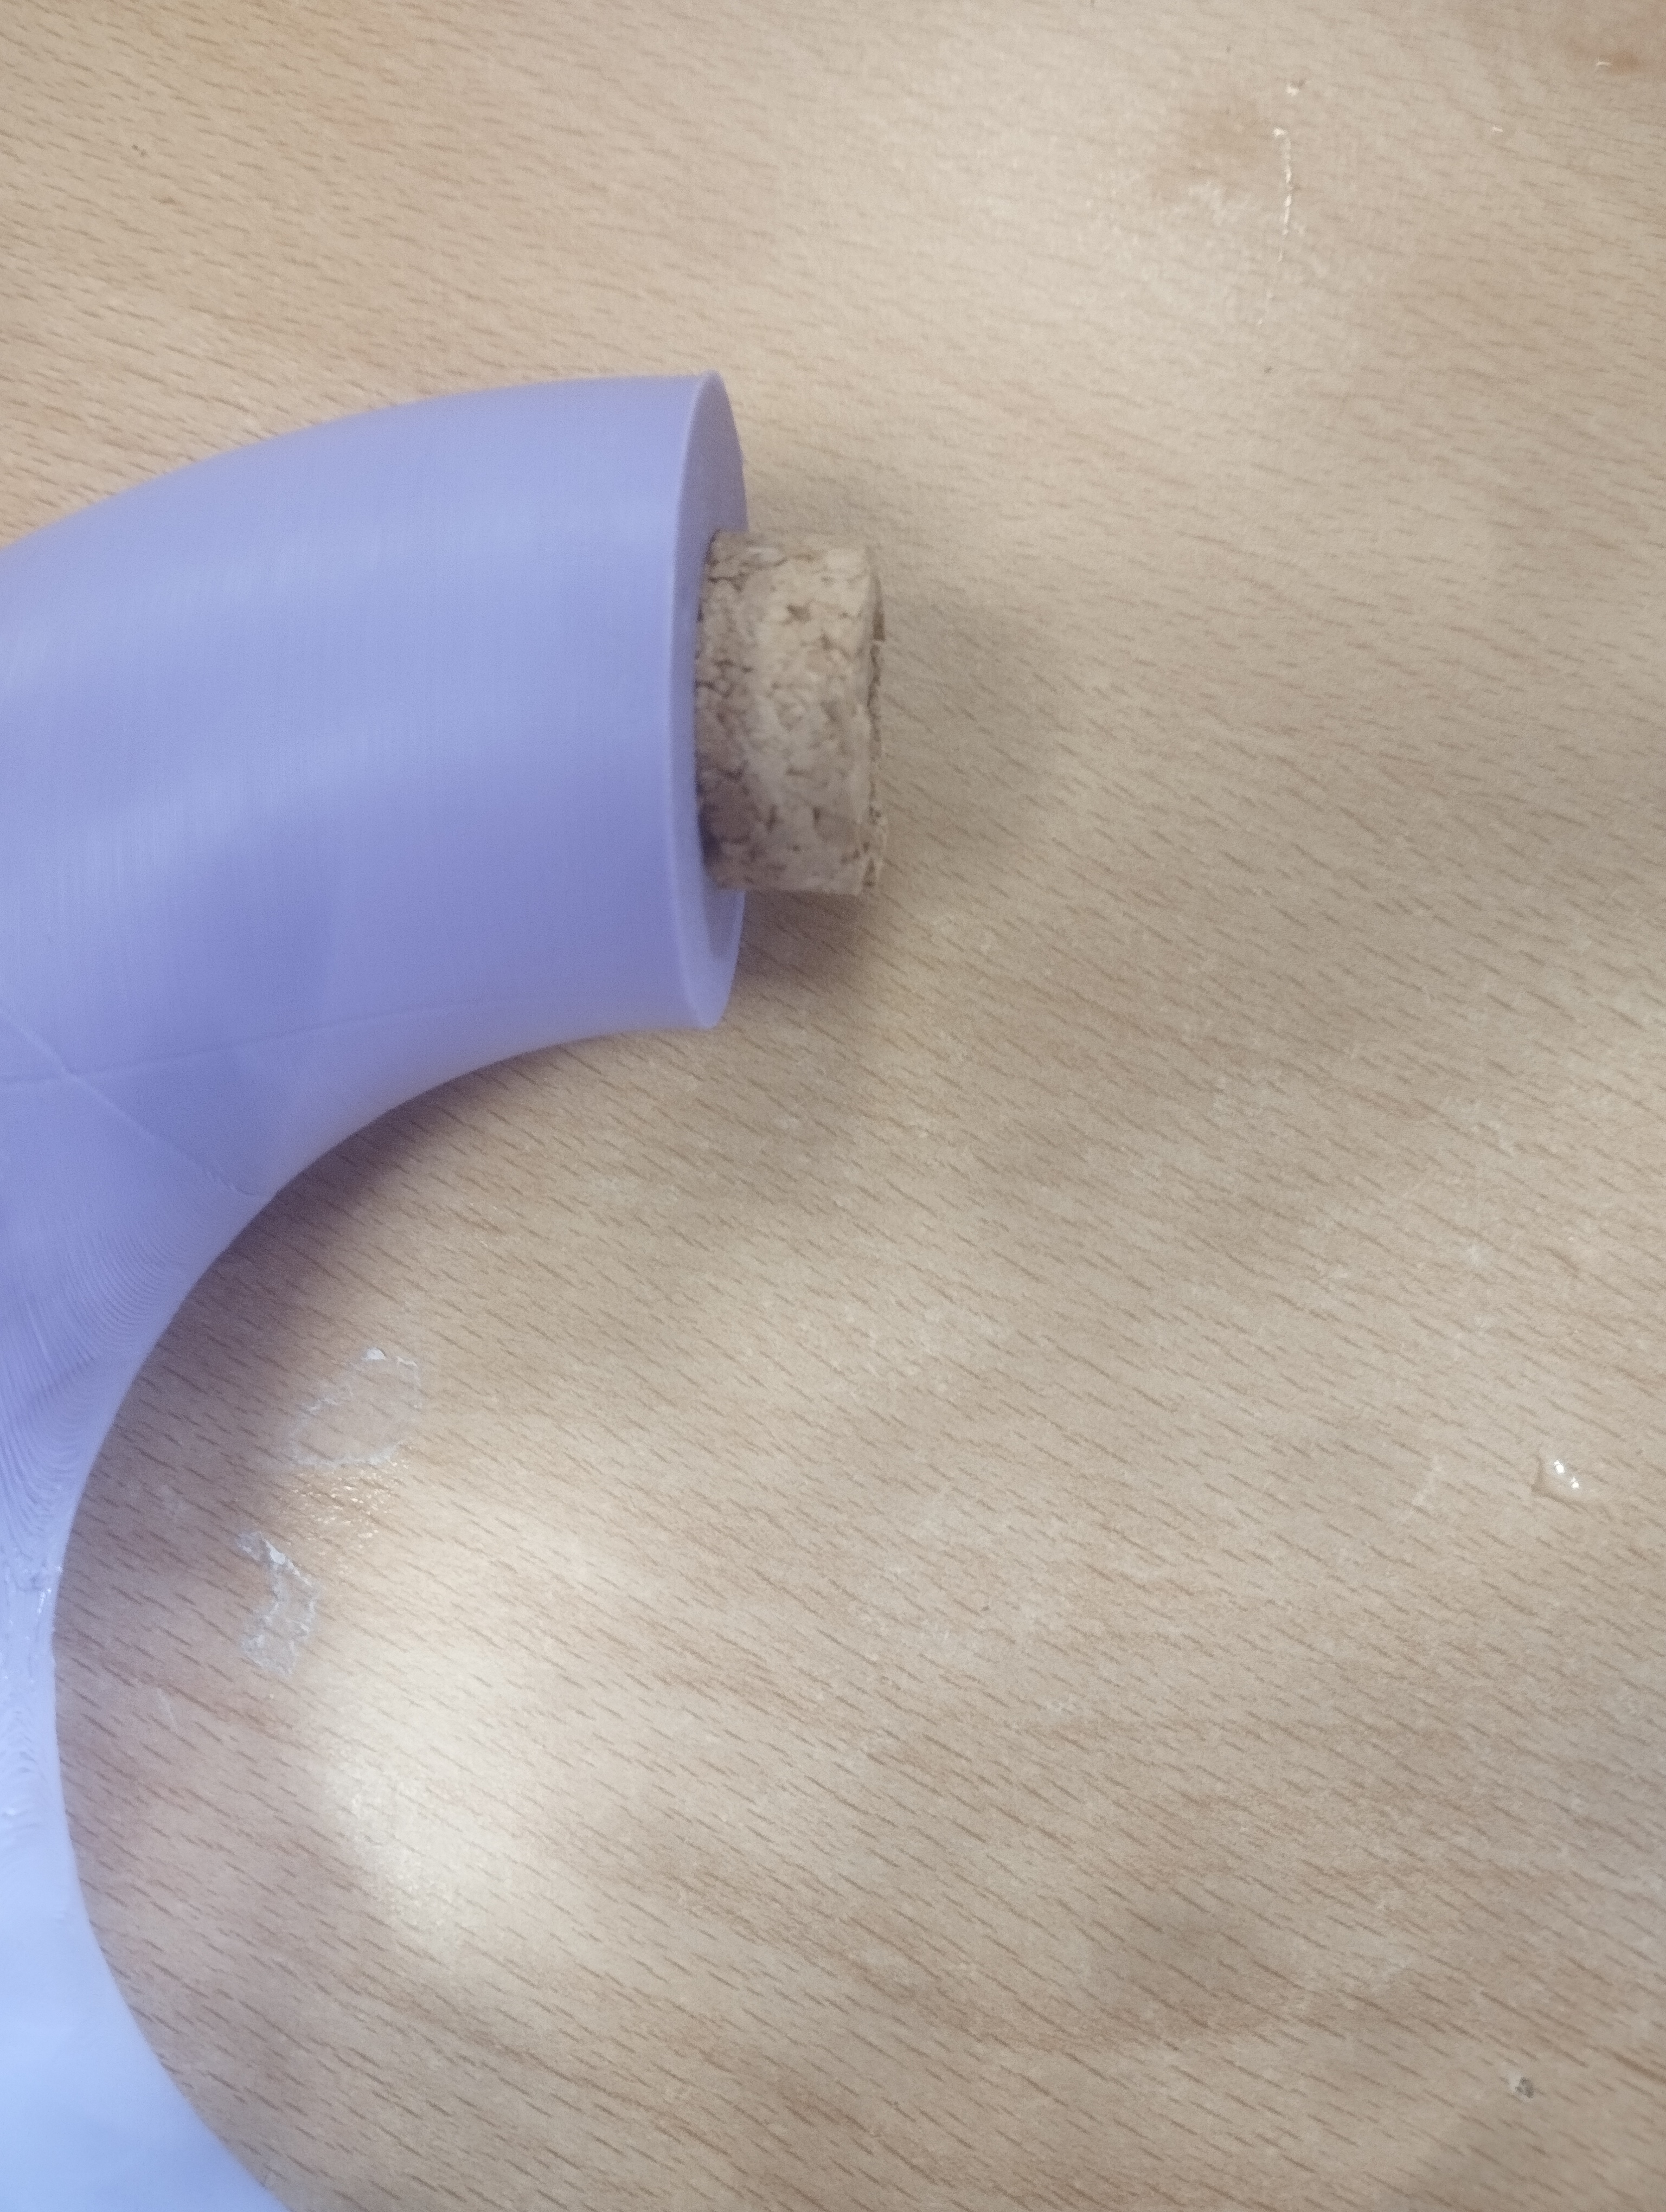
Oh, and this is half PRT4 stucked in piece 23. I tried to remove it but it broke. Superglue is strong.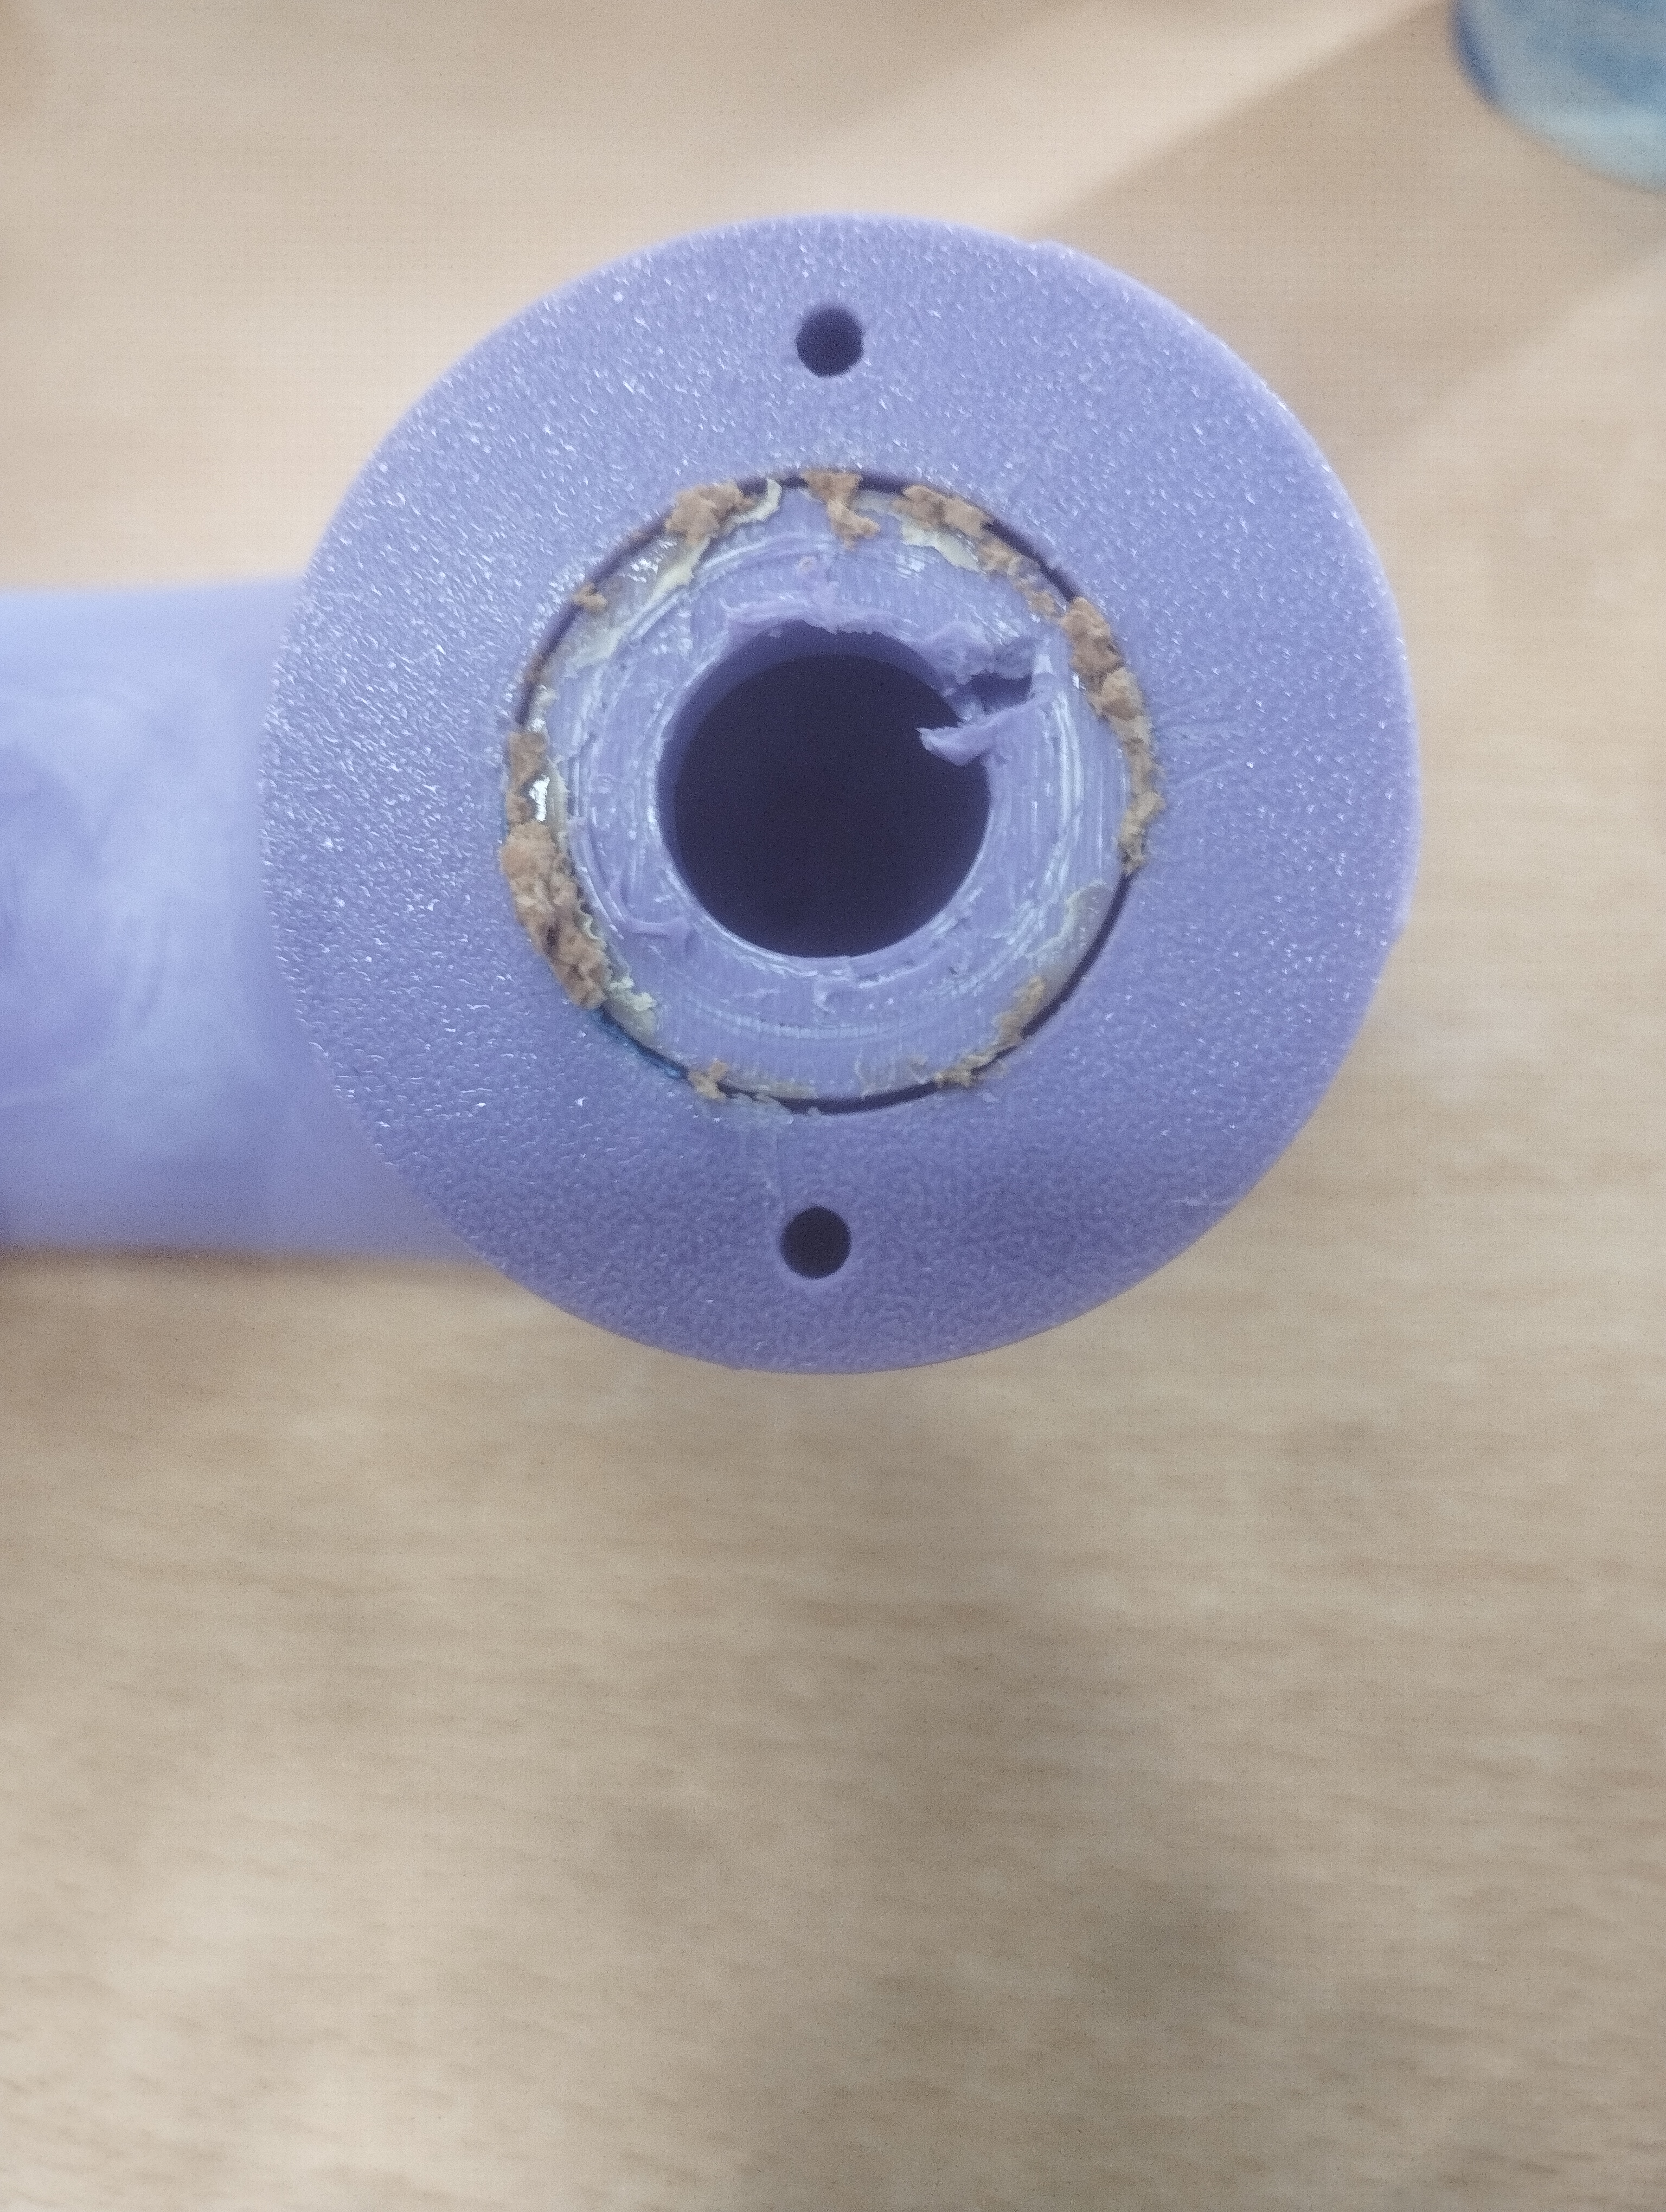
My last day 28/09/23
This morning i fixed my page.
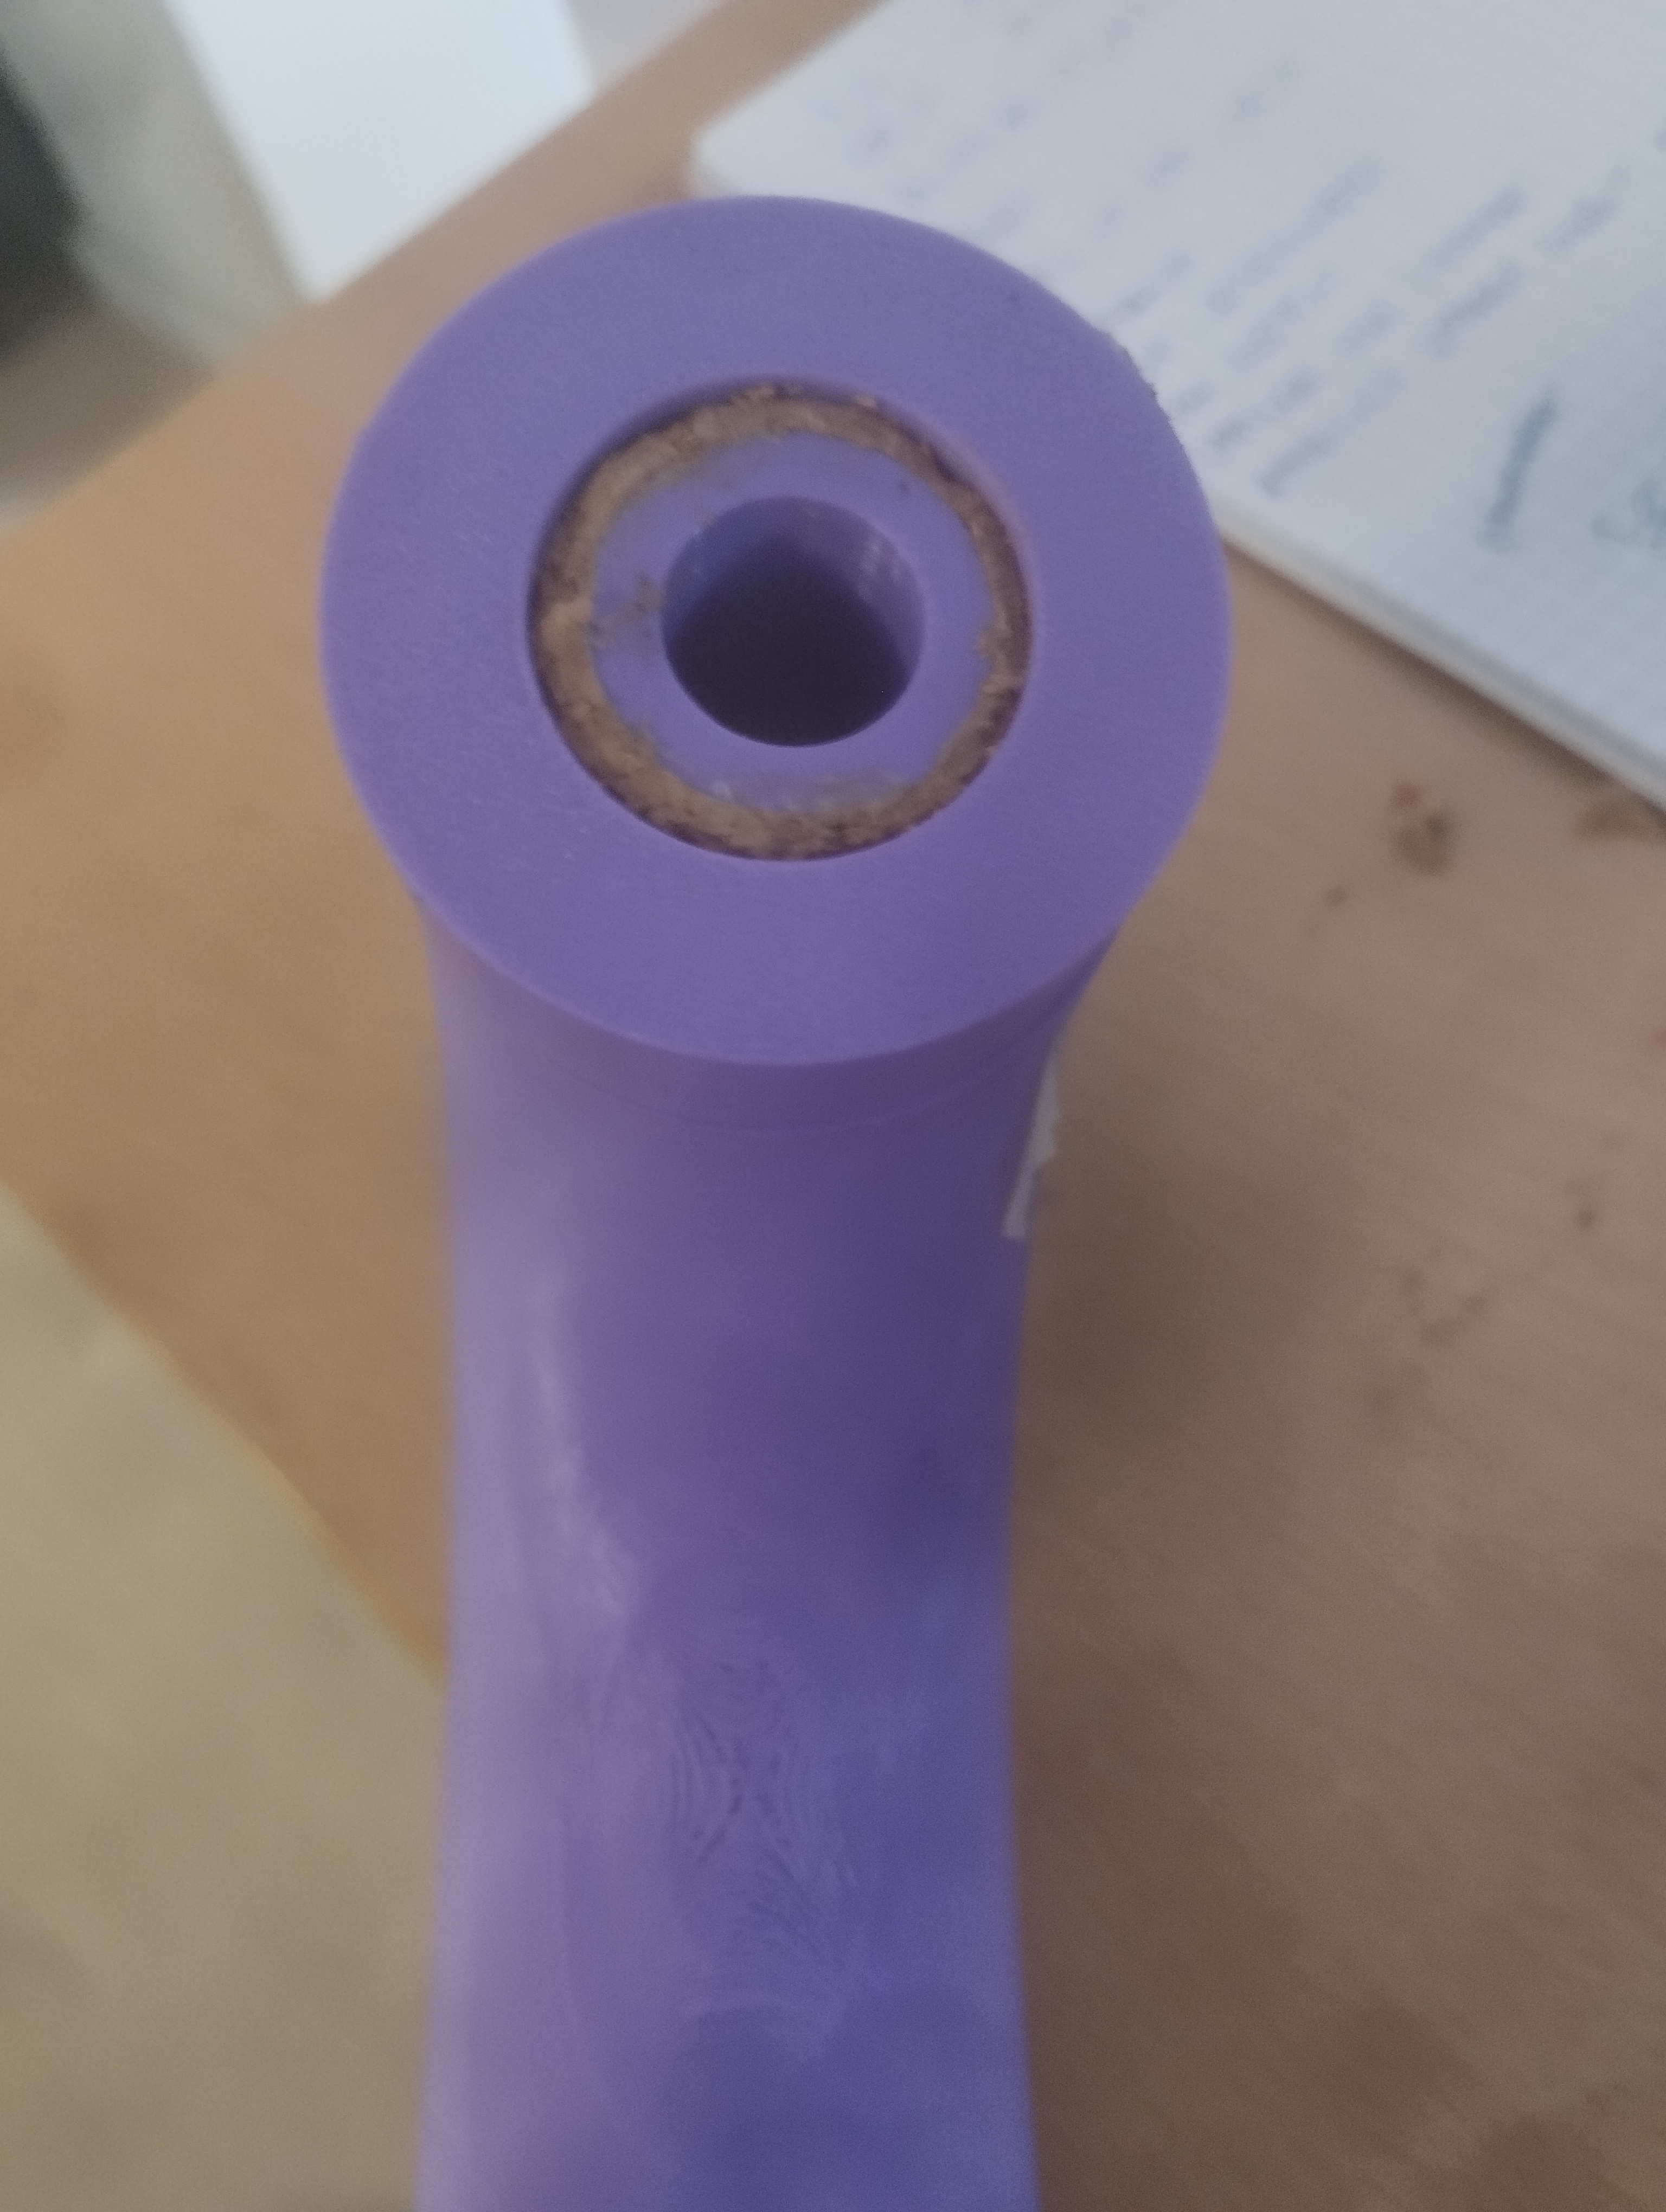
Now i am going to start experiments with liege. This are the picture of cylinder 23. We can also see that it have the same internal diameter of piece 23.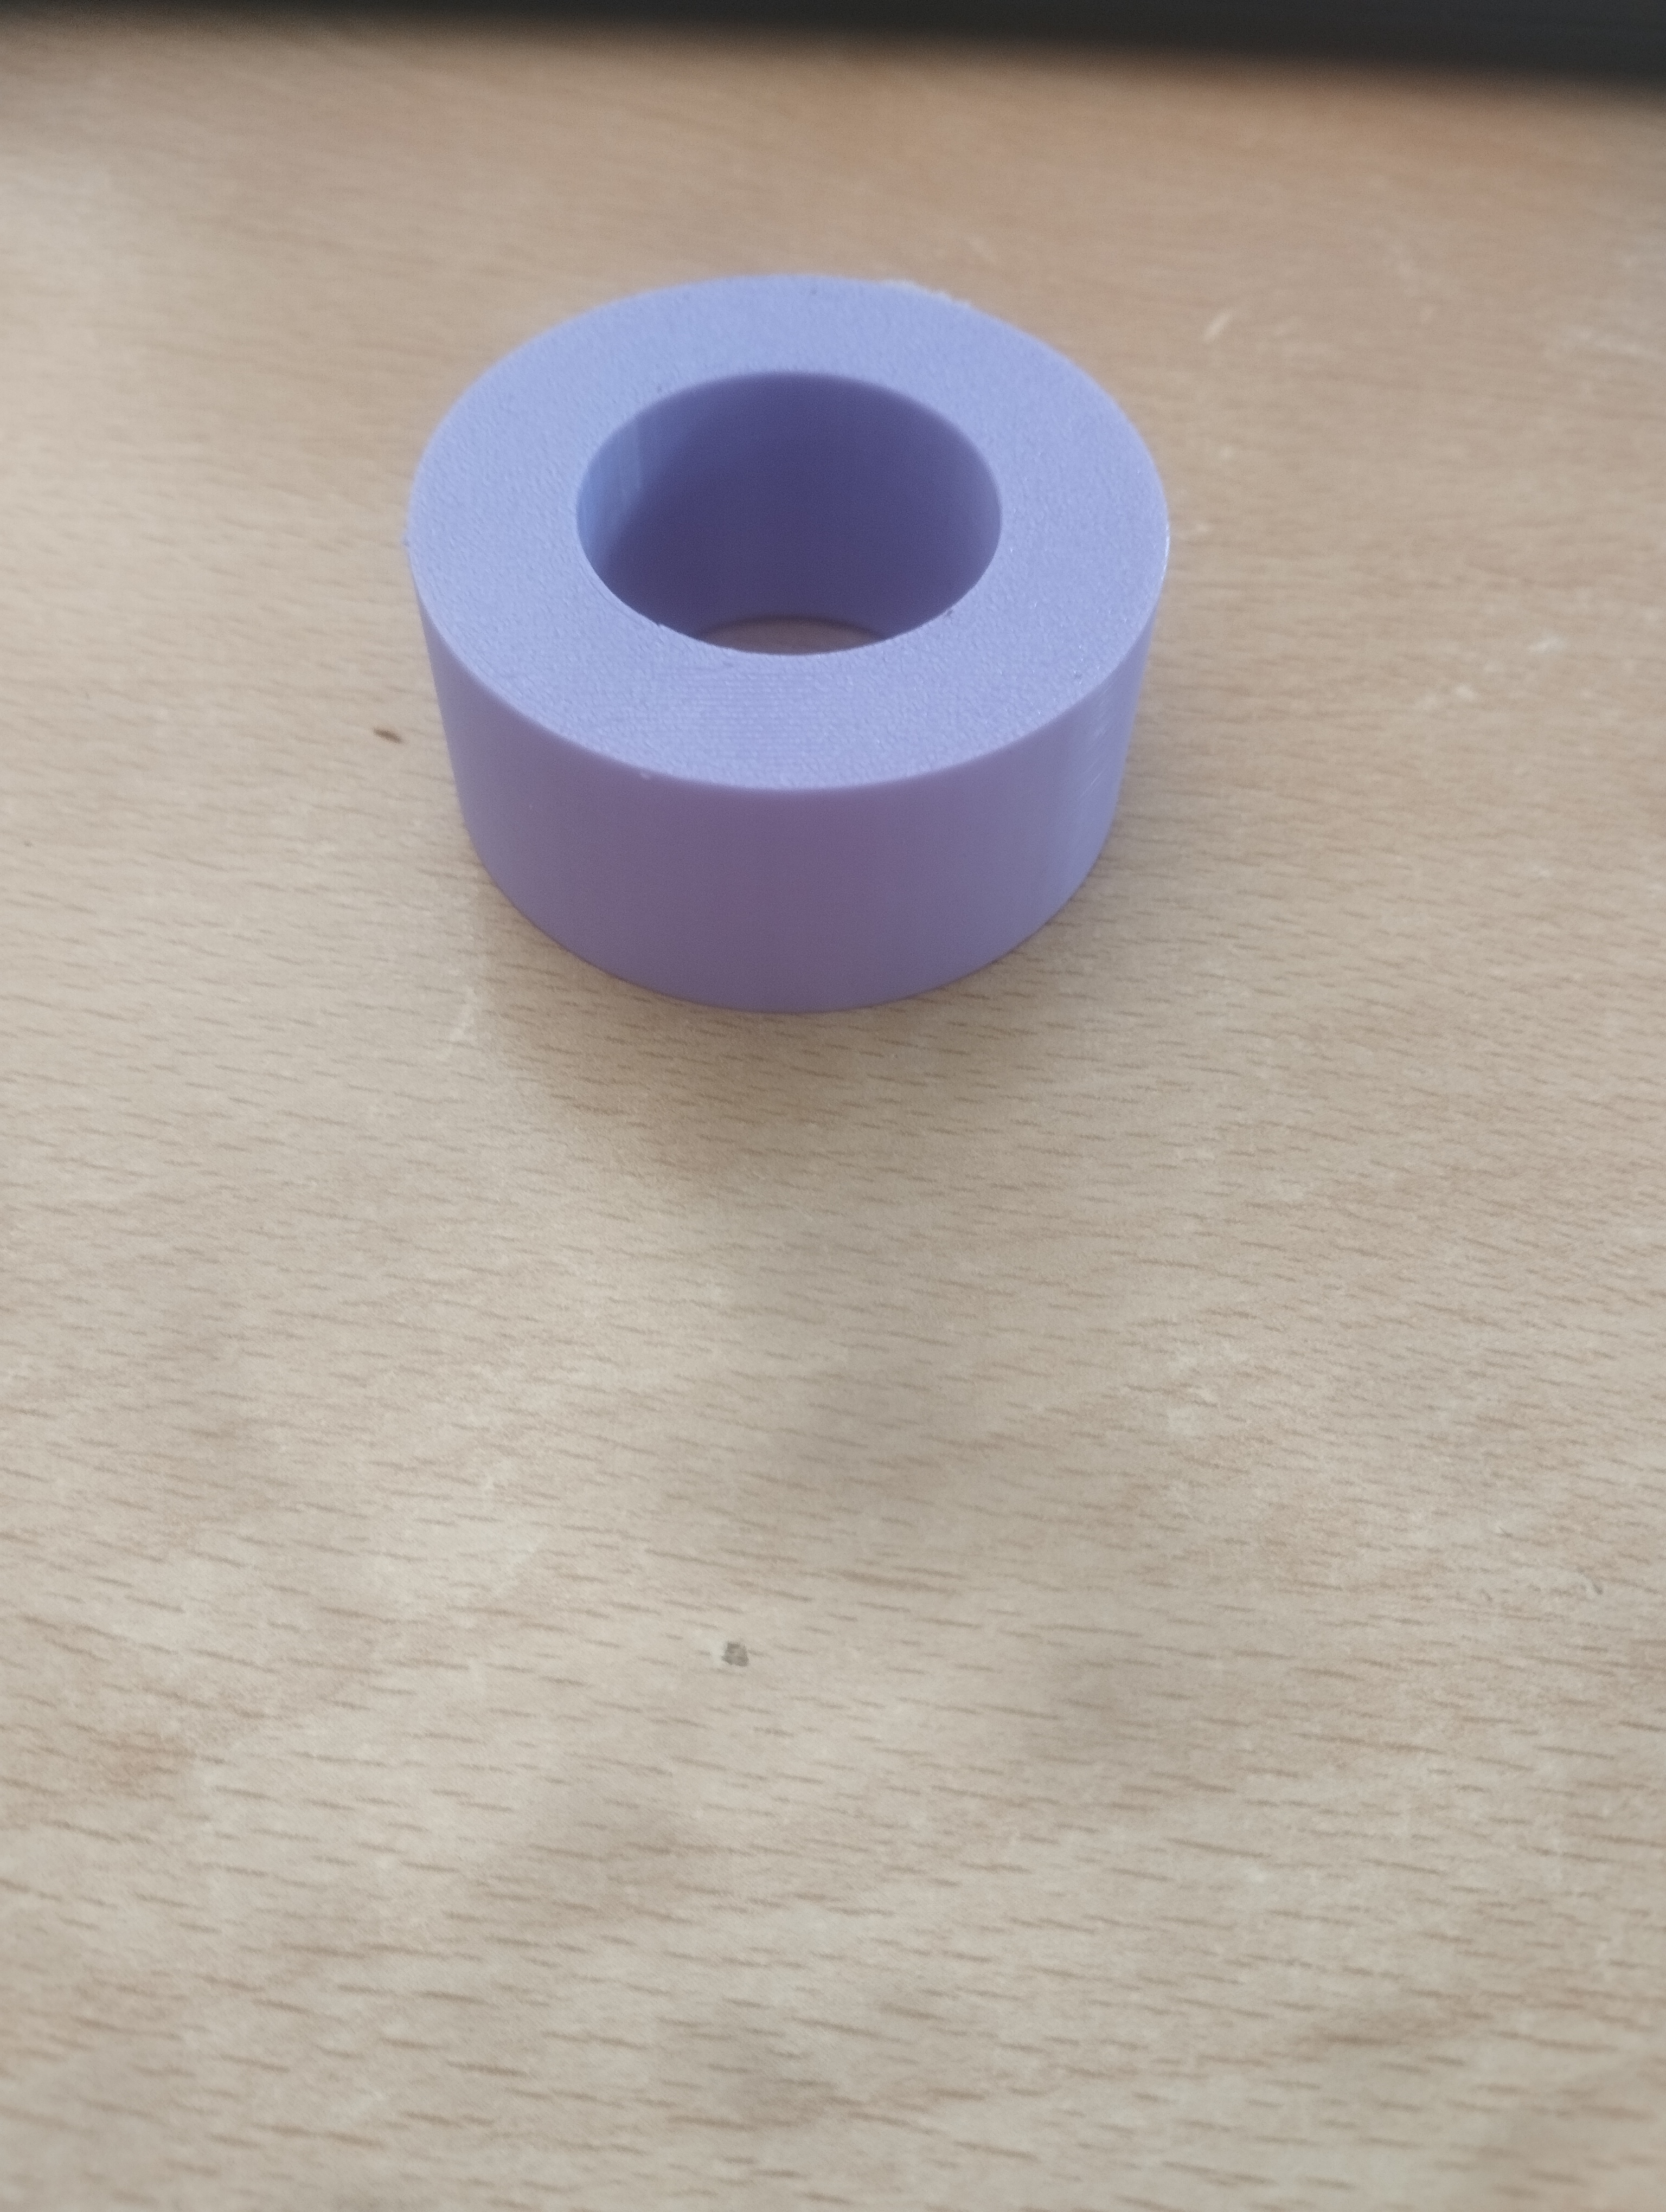
Now i try to produce some good strip of liege and then i will test my work. For now i decide not to glue the junction to piece 22 ( just for information: p22 is part of the bridge) because the wrong bridge is no more useful (half PRT4 inside them), and i don't want ruin also the good one.
I took another sheet of liege and i noted that this one was softer than the other one, i don't know why. This thing is good becaus yesterday i had a lot of difficulties with the liege because if the strips were too thick when i had to curve them and to apply around the junction, most of the time they broke. With this new sheet shouldn't be this problems.
I also have to find a way to remove the old glue from the pieces, i have tried only taking off it manually, but it's very slow, and now i have put a junction in a glass of hot water to see if something happen(nothing happened).
I have to say that i have prineted two PRT5 and now i am printing another one.
I cleaned one PRT5 and i have prinetd another one so i have two chance. I cutted two stripes from the sheet and i have applied to the two pieces. One was a litlle bit bigger than the other. When the glue was dry i tried to put them in cylinder 23 to see how strong it is. It wasn't bad but i could do better.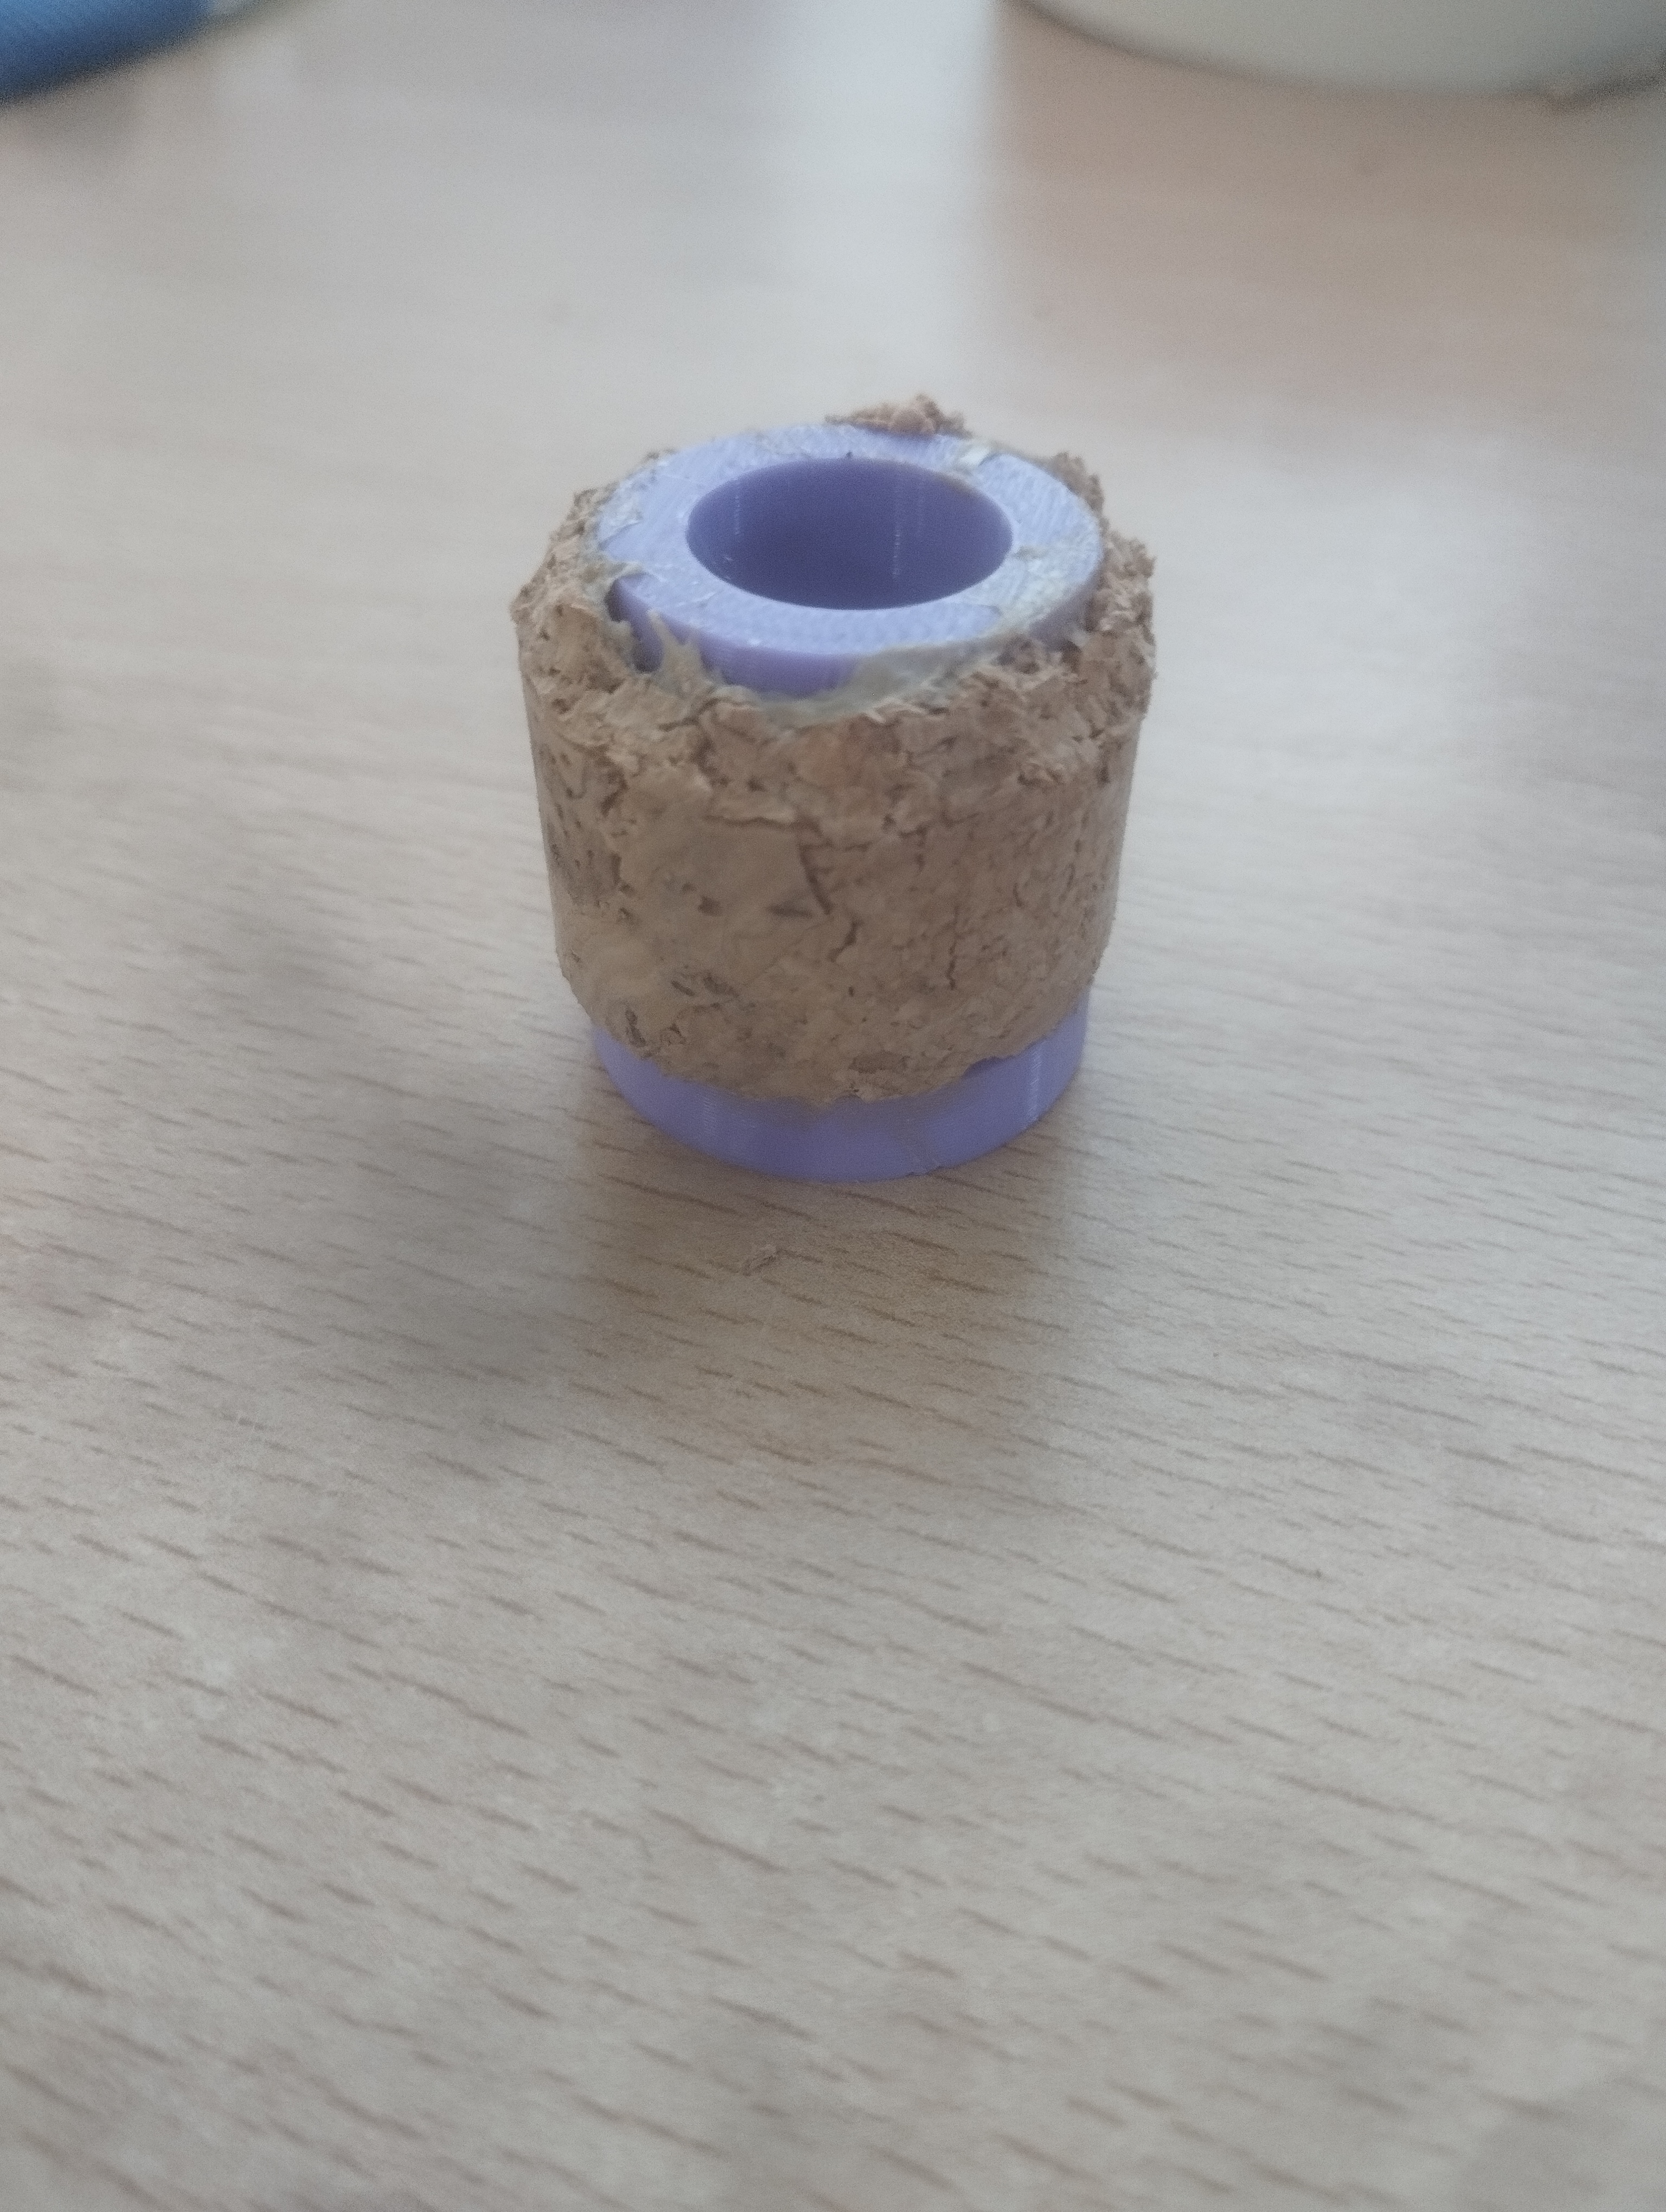
I cutted the top of the liege to make his shape like an arrow, but this is not useful.
So i took the bigger junction and i tried to put in the cylinder; but this time it was too big to fit, so i took the papier-verre lv.40 and i sandpapered a little bit. Then i tried another time and the result was so good that i decided to glue the junction at the bridge. This is the best junction that i made.Now i am waiting the glue and i can make some observation. If i can model the liege with papier-verre it means that over time the liege could be ruined. To solve this you could find a way not to glue the liege or, if this is not possible, you could design junctions that have two part of liege and, when the liege it's ruined you simply change the junction. This is a cool idea and i would have liked to try it but i had no time. To preserve liege you can also tape it but i don't know if this can work.
Now the glue it's dry and i can test the junction.
Pros
- The junction it's strong enough
- There is no big differences beetween the P23 abd the cylinder
Cons
- There is still a little gap beetween the two pieces: the cause for this can be: i applied bad the liege, i glued bad the junction to the P22. I don't konw if the millimeter beetween the junction and the P22 it's too big and for this there are some leaks.
- After not a lot of times that i insert and put again the P23 it's easy to see that the liege it's ruined, probabily there is too much of it; but you have to be careful to put enough liege to guarantee a solid grip. With prefabricated stripes liege it is easy to find the best compromise because you can note down your work, your stats and make calculation. My work it's a little bit random.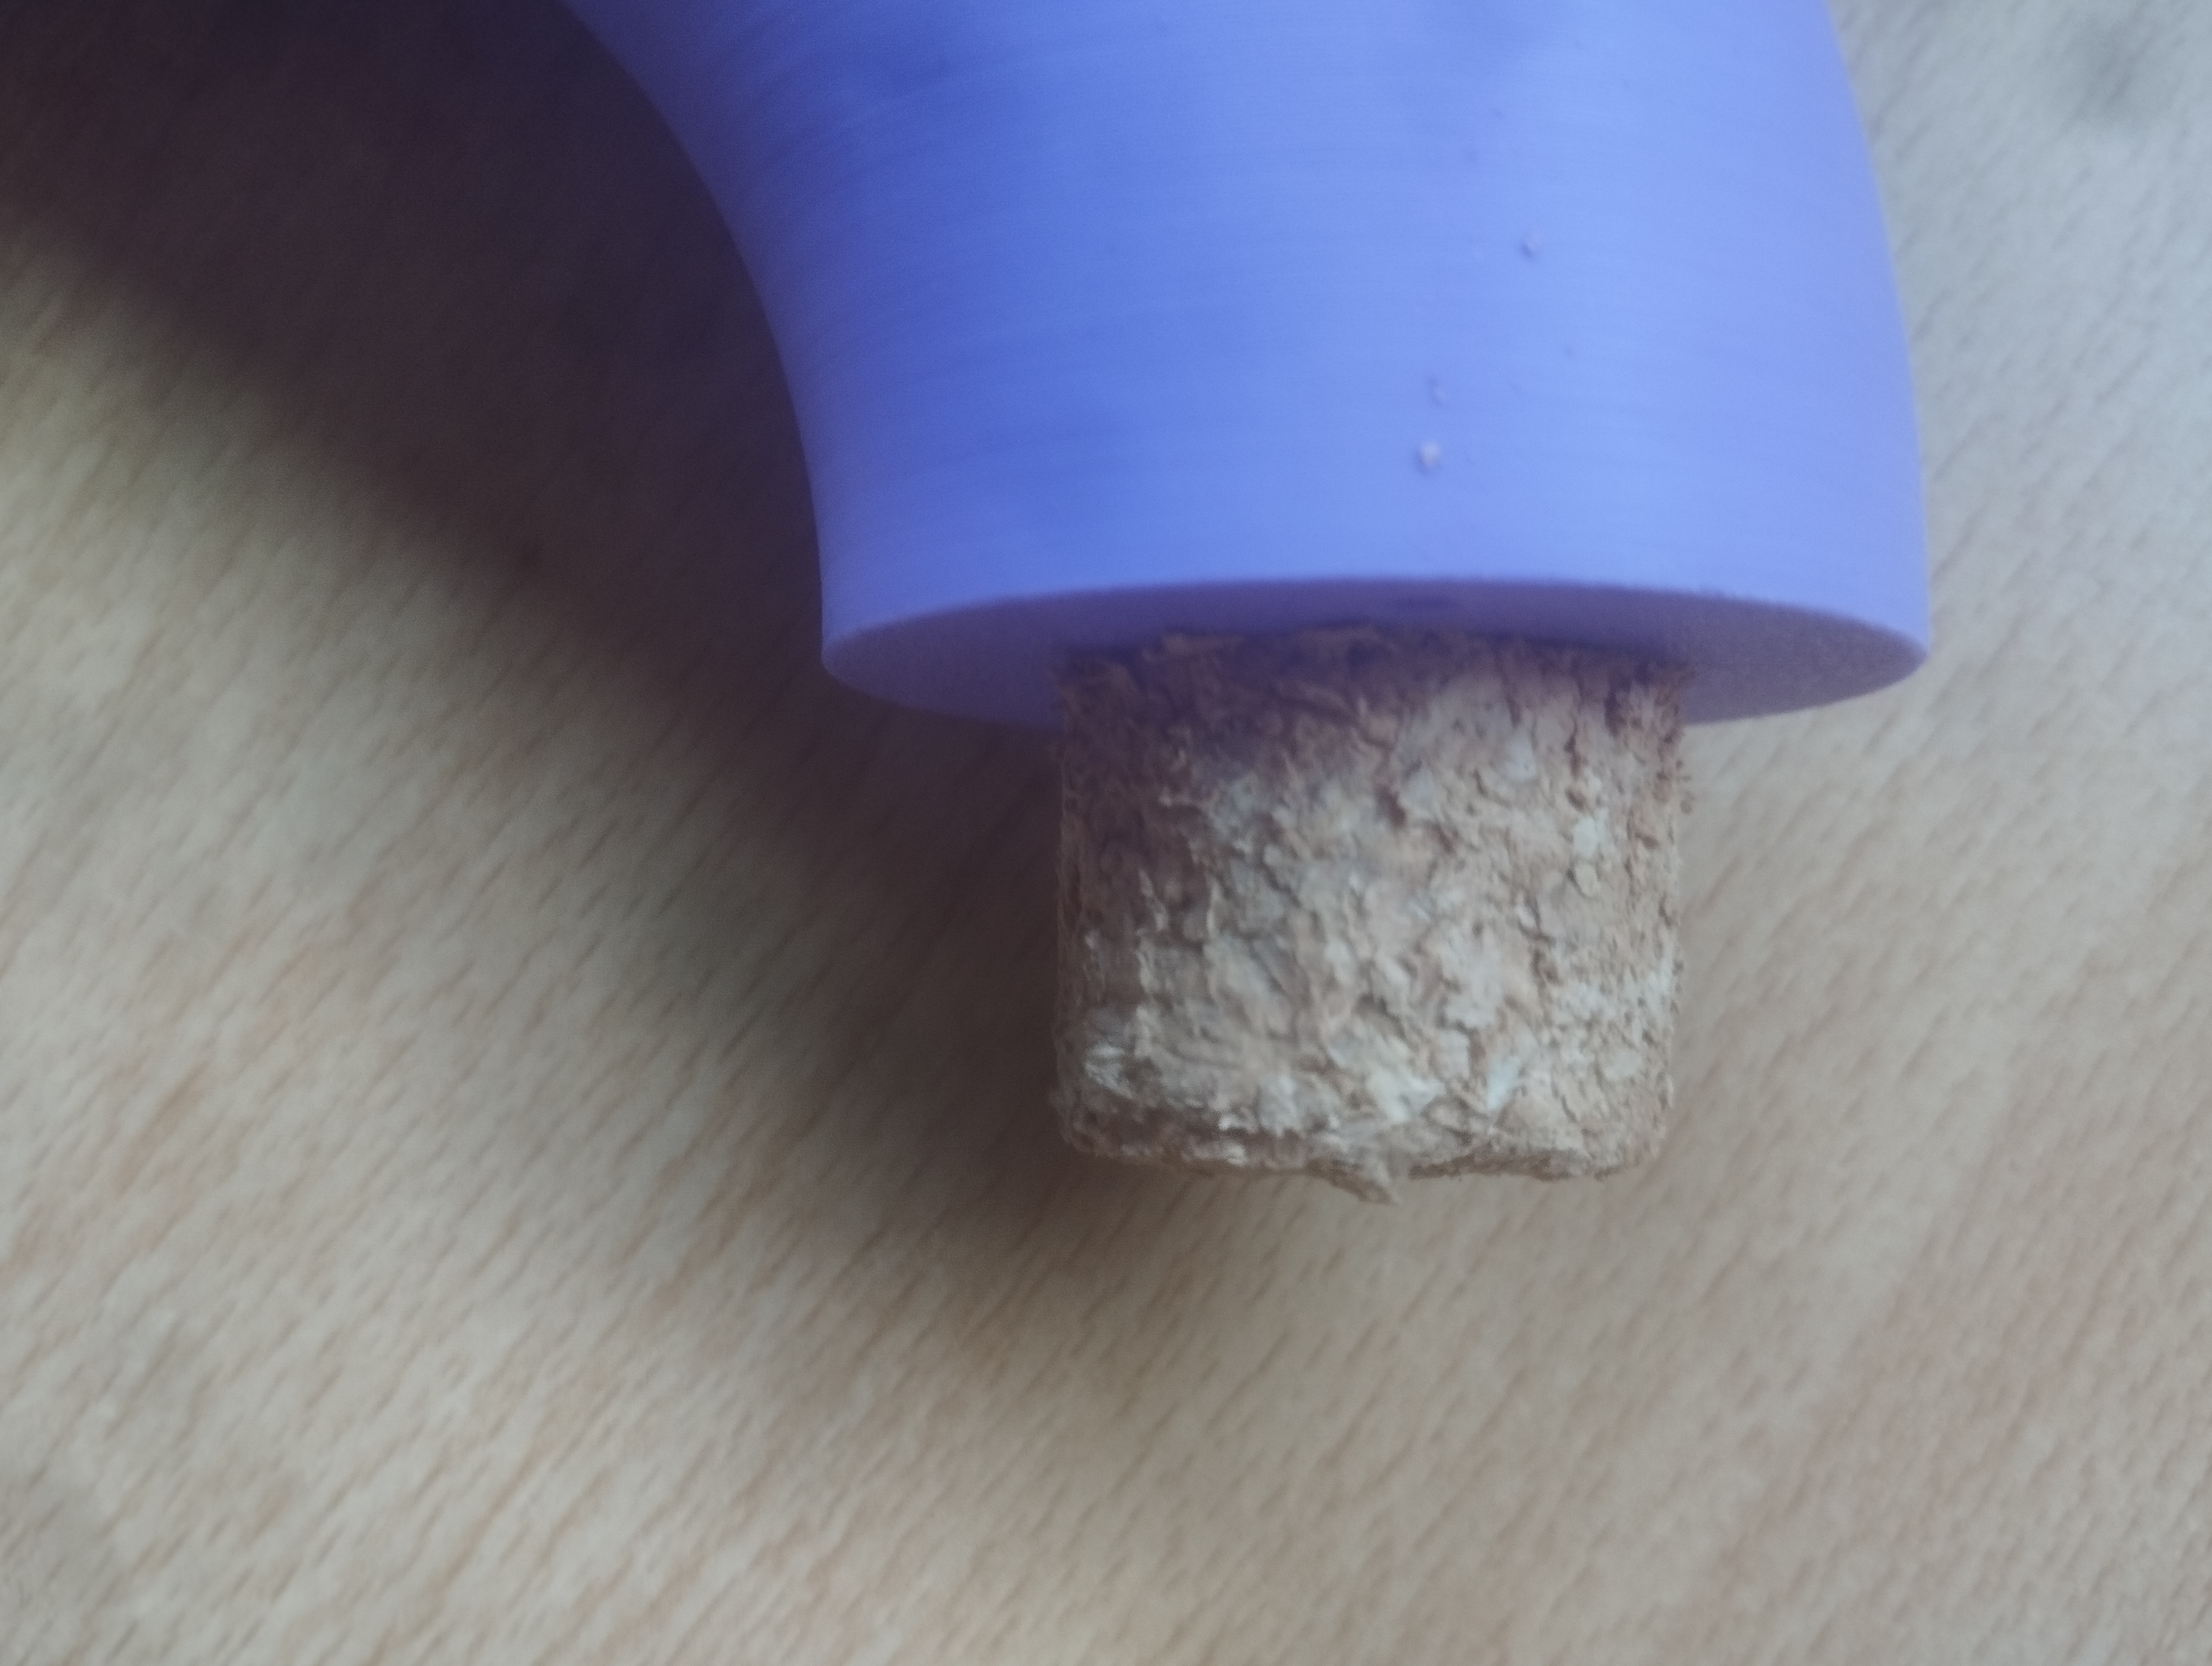
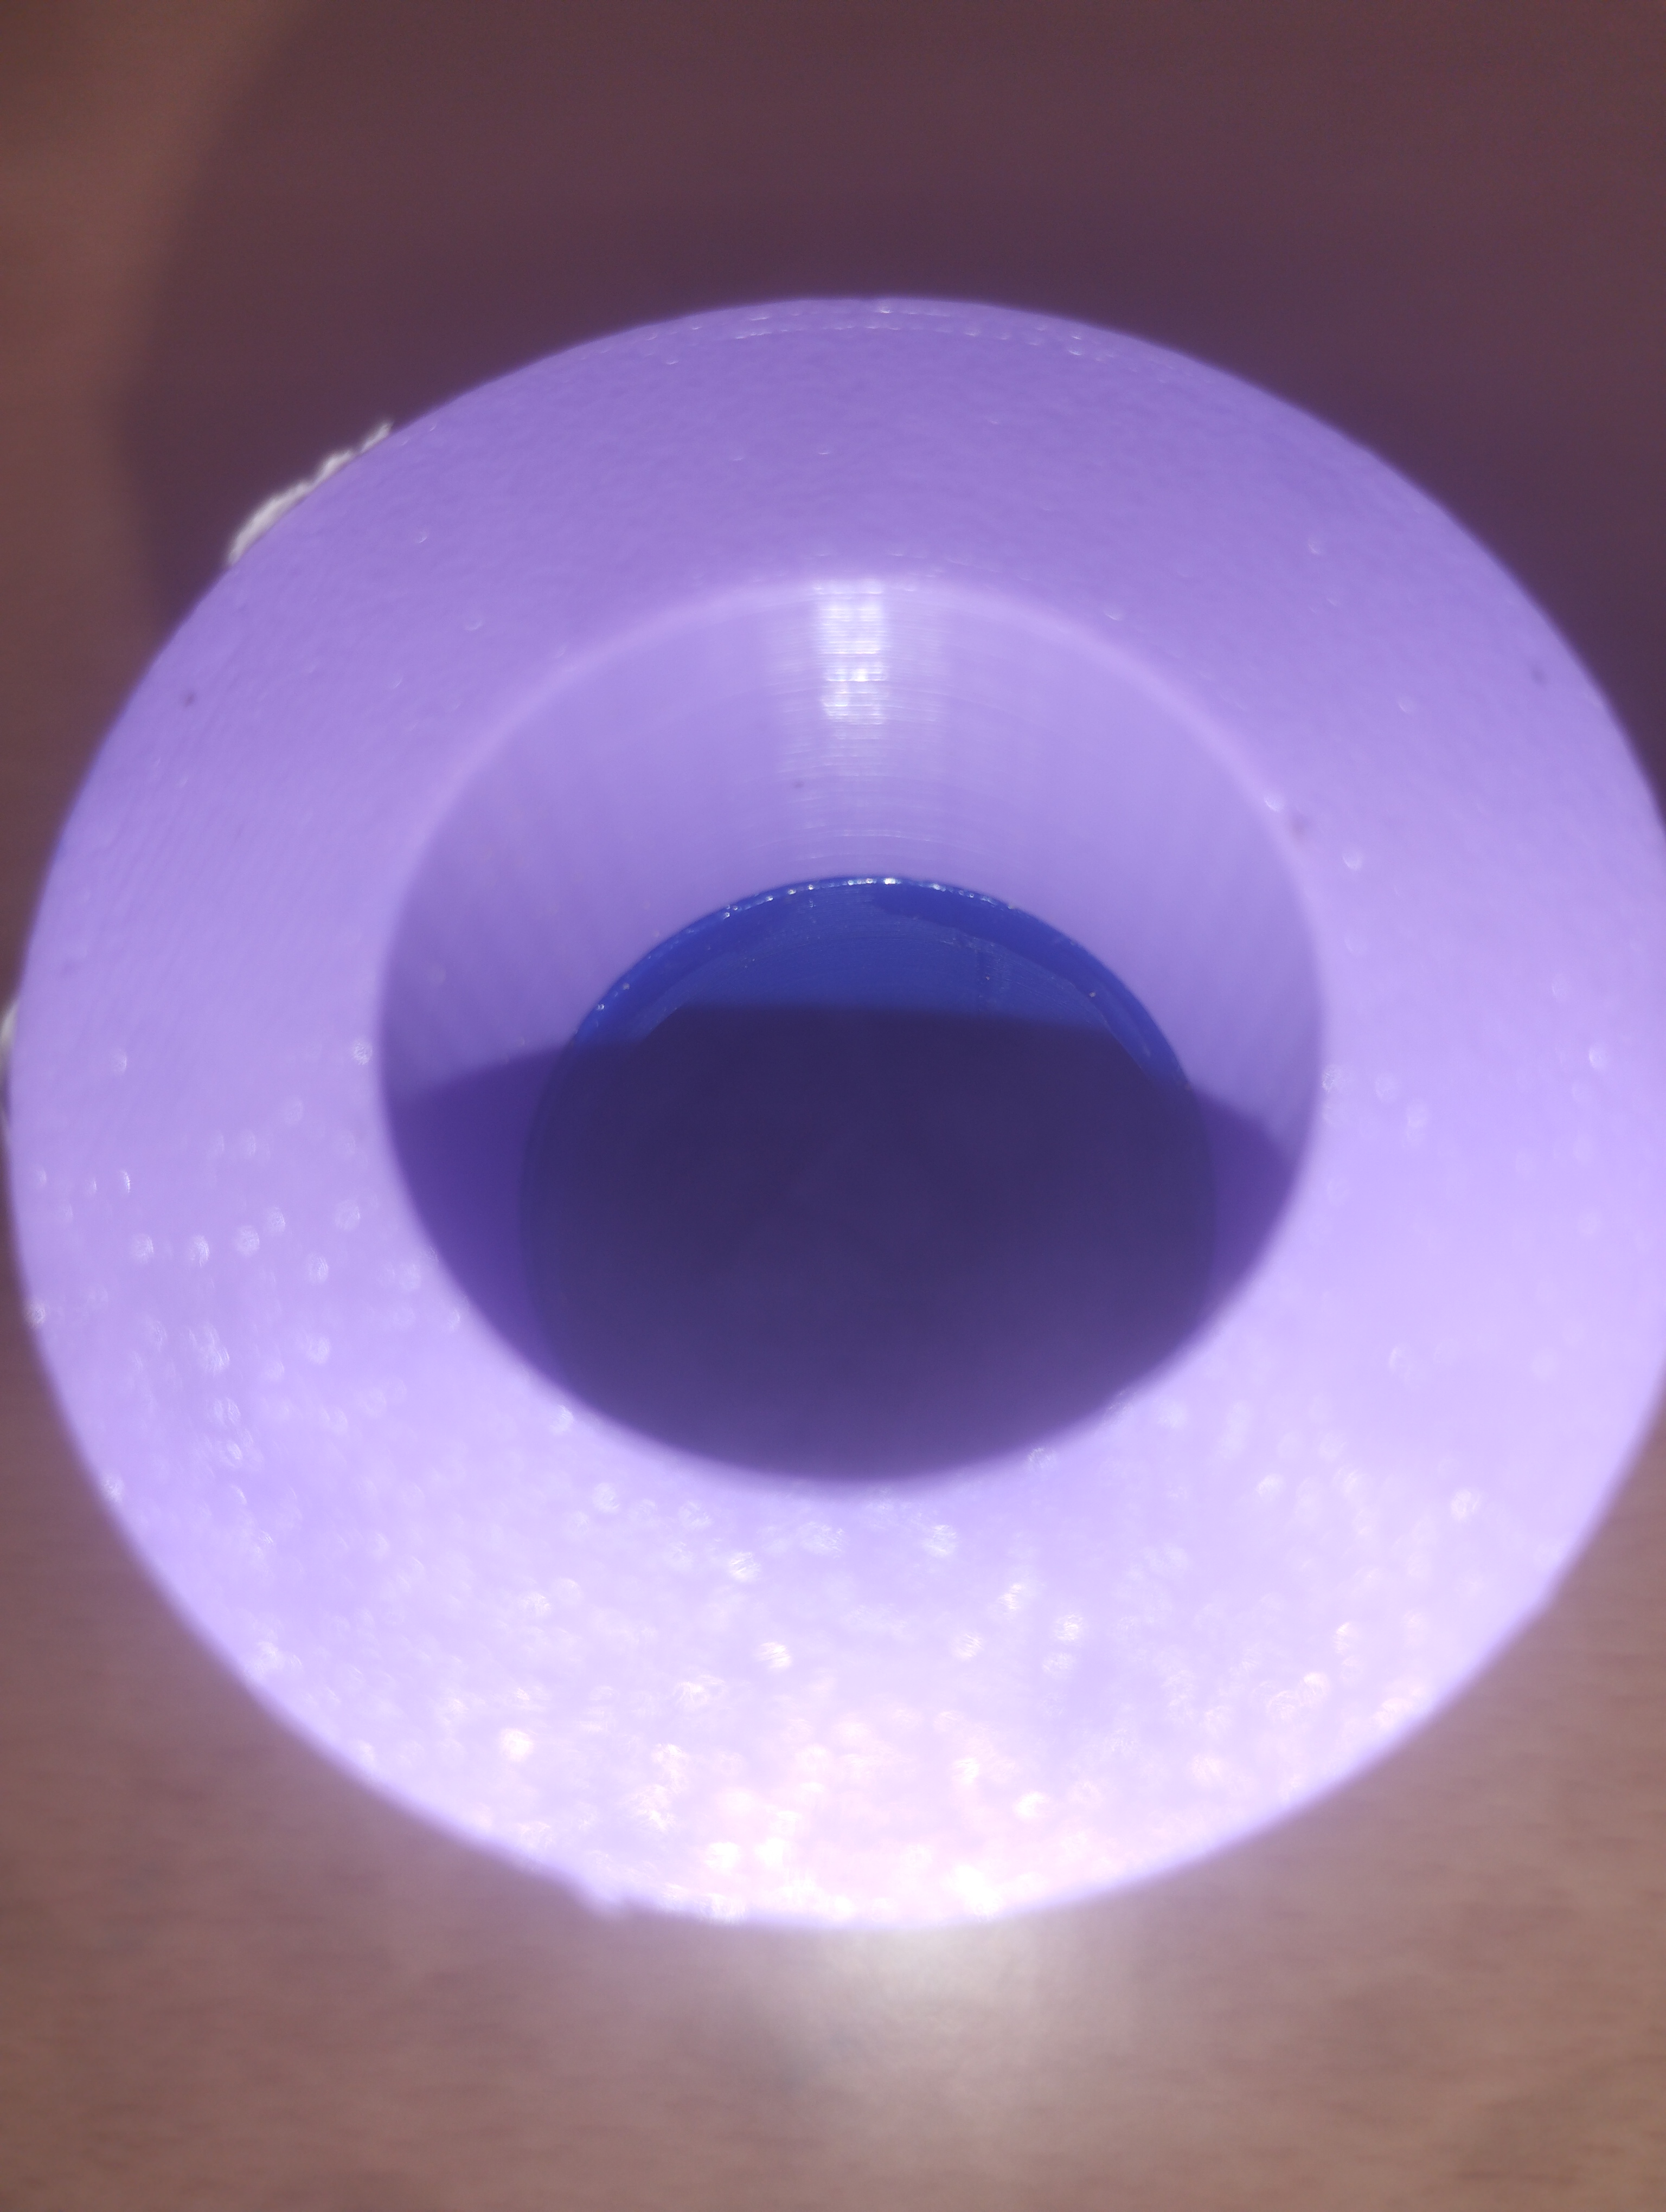
This is the final result
M tips, ideas, advice, to do list (call as you want) for the future of the serpent
- Print the tenor bocal part
- I didn't tapered the full instrument because i think that this is the first version and it's important to see all the pieces, maybe it will be beautiful to compare first version with the last version. But taping it it will sound better.
- Increase the infill for two reasons: have a better sound (maybe) and, we noticed that the ruined piece (the one printed in the supports) have some leaks (water tests: i have also noticed that a lot of water was stuck in the walls after the test. I think that with an higher level of infill it will be possible to have less leaks of water and also of air).
- Find, or try to find other kinds of junction. I didn't had the time to perfect the liege project so, you have to finish this and maybe try something else. Other kind of junction can be: screw mechanism, the closing of the bottles, using magnet, interlocking, maybe using two belts, one on each piece adjacent to the junction with something that can guarantee a better grip....
- If the fixed bocal part is not good i have already prepared the files for reprint it in a little bit differnt way, should be more useful ( you will find only this file on my pc because i deleted the old one ( i'm still stupid));
- Reprint the serpent with less pieces: i have already showed the best organization for printing the serpent in the higher part, you have to find the best way to print the black section. Have less pieces it's important because you will have less junction or anyway gluing points, and so less leaks.
- All the files about the serpent are in a dossier one my PC called Dittes V5 (sept21).
- Remember that using pattex glue you have to aplly it in both the surfaces.
- I have no idea about if the liege can be deteriorate over time, in that case you should think to a way for not gluing the liege. I saw that for the clarinet it's used something like a pin; you could try that.
- Junction with double liege
- Use other printers for the bigger pieces. Maybe some combination of pieces can fit in bigger 3D printer
I think i wrote everything i could write. If i remember something i will write it, i remain available for everything.
I've made my job, now it's your turn: good luck!!!